All posts by Anaswara

A civil engineer turned writer, the girl of 22 set off the journey to freelance content creating since 2019. The impact she could make in people's lives acted as the fuel and the journey still continues in high spirits. This young thrashing blood offers 100% conversion guaranteed contents to your business. Throw brickbats or bouquets and of course, your writing requirements to anaswara.r.s.cet@gmail.com

Remote Sensing- 4 Amazing Applications in civil engineering

Remote Sensing has been leveraged for various applications in various fields. We will see the definition, components & applications in civil engineering in this blog.

First let’s find out the definition of remote sensing.

What is remote sensing?

Remote sensing (RS) is the technology of acquiring information about the Earth’s surface without actually being in contact with it.

This is done by sensing and recording reflected or emitted energy and processing, analyzing, and applying that information.

I showed you the remote sensing definition.

We will find out the different components of RS now.

Remote sensing components

Components of remote sensing
Components of RS

7 components involved in RS are,

  • Energy Source or illumination
  •  Radiation and the atmosphere
  •  Interaction with the target
  •  Recording of energy by the sensor
  •  Transmission, reception and processing
  •  Interpretation and analysis
  •  Applications
  1. Energy Source or Illumination (A)– The first requirement for remote sensing is to have an energy source which illuminates or provides electromagnetic energy to the target of interest.

2. Radiation and the Atmosphere (B)– As the energy travels from its source to the target, it will come in contact with and interact with the atmosphere it passes through. This interaction may take place a second time as the energy travels from the target to the sensor.

4. Recording of Energy by the Sensor (C) – After the energy has been scattered by, or emitted from the target, we require a sensor (remote – not in contact with the target) to collect and record the electromagnetic radiation.

5. Transmission, Reception, and Processing (D)- The energy recorded by the sensor has to be transmitted, often in electronic form, to a receiving and processing station where the data are processed into an image (hardcopy and/or digital).

6. Interpretation and Analysis (E)- The processed image is interpreted, visually and/or digitally or electronically, to extract information about the target which was illuminated.

7. Application (F)- The final element of the remote sensing process is achieved when we apply the information we have been able to extract from the imagery about the target in order to better understand it, reveal some new information, or assist in solving a particular problem

We will move to the principles of remote sensing next.

Remote sensing principles

Symbolizing remote sensing working
Symbolizing RS working

Here we go with the principles.

  • Electromagnetic energy reaching the earth’s surface from the Sun is reflected, transmitted or absorbed.
  • Specific targets have an individual and characteristic manner of interacting with incident radiation that is described by the spectral response of that target.
  • Electromagnetic_radiation (EMR) like radio waves, infrared (heat) waves make characteristic patterns as they travel through space
  •  Soils of differed types water with varying degrees of impurities, or vegetation of various species

The next section deals with the different types of remote sensors.

RS sensors types

There are mainly 2 types of sensors used in RS.

  1. Passive sensors- Passive system record energy reflected or emitted by a target illuminated by the sun. e.g. normal photography, most optical satellite sensors

2. Active sensors- Active system illuminates the target with energy and measure reflection. e.g. Radar sensors, Laser altimeters RADAR(Radio Detection and Ranging), LIDAR(Light Detection and Ranging)

I will walk you through the platforms for remote sensing next.

Remote sensing platforms

Platforms of remote sensing

Platforms are used to house the sensors which obtain data for remote sensing purposes. 

The distance between the target being imaged and the platform plays a large role in determining the detail of information obtained and the total area imaged by the sensor.

Platforms are-

  • Ground-based
  • Airborne eg. Aircraft, Drone
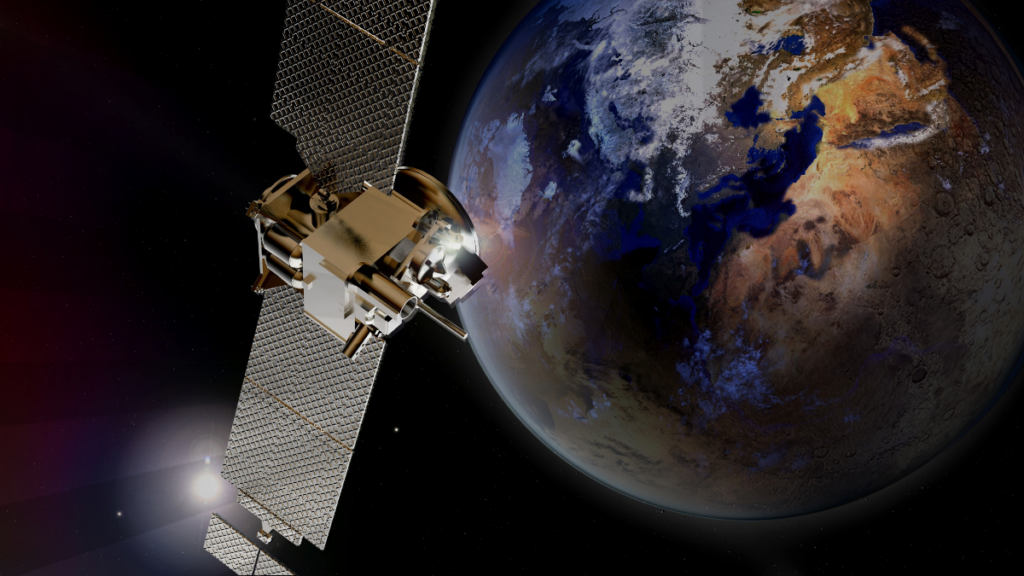
  • Spaceborne eg. Satellite

Time to get into the last, but the most important section.

RS applications in civil engineering

  1. Site investigation
  • Site investigations in general require topographic and geologic considerations.
  • Remote sensing data permits such an assessment. In the case of dam site investigation, information on topography is essential.
  • Geological consideration involves the different soil and rock types and physical properties.
  • In selecting river-crossing sites for bridges and pipelines, an important consideration is the stability of slopes leading down to and up from the water crossing.
  • Such slopes include riverbanks, terrace faces and valley wall.
  • High spatial resolution satellite data can facilitate depth perception in the above-said investigations

2. Planning and design of highways

  • Highways are part of the infrastructure that makes up the spinal cord of modern society.
  • RS & GIS provides a valuable tool in the process of planning and design of highways.
  • To obtain an optimum highway route alignment which is economical, suitable and compatible with the environment, various types of data have to consider simultaneously.

3. Groundwater location

  • Knowledge of groundwater location is important for both water supply and pollution control analysis.
  • Remote sensing plays a vital role in delineating potential areas of groundwater occurrence for detailed exploration.
  • Thus, it reduces the cost and time involved in groundwater exploration. Potential groundwater areas cannot be seen as on satellite images directly

4. Landslide assessment

  • Landslide is the result of a wide variety of processes which include geological, geomorphological and meteorological factors.
  • The important terrain factors are lithology, structure, drainage, slope, land use, geomorphology and road network.
  • A complete landslide hazard assessment requires an analysis of all these factors leading to instability in the region.
  • The feature extraction of some of these factors can be done from the interpretation of RS using satellite images

That’s it about remote sensing. Let me your doubts in comments.

Happy learning!

Floating House- 2 Types of Floating Houses & Amazing Examples

Floating house is always an attraction to those who care for the aesthetics and beauty of their residence. More than anything, they have the advantage to sustain the flood. Floating houses are the ones that are built with a load that is equal to or less than the uplift force of the water that aids in floating the house on the water. Traditional houses, such as houses on boats, have mobility, whereas floating houses are those houses used as living spaces on water that are minimally mobile other than moving vertically with the tide. A float house, unlike a houseboat, is not self-propelled, though some smaller float houses can be propelled by attaching an outboard motor to them.

Today, we are going to find out all the interesting aspects of this civil engineering wonder.

  1. What are floating houses?
  2. Types of floating houses
    1. 1. House that permanently float
    2. 2. House that floats during flood
  3. Examples of a floating house
  4. Principle of a floating house
  5. Principle of a vertically moving floating house
  6. Services available with a floating house
  7. Life in floating houses
  8. Need for floating houses
  9. Moving houses
  10. What good would it do to hire an outside firm to do the cutting of our lumber?
  11. Conclusion

What are floating houses?

“Floating”  term in the foundation  engineering is used when the soil beneath the footing does not experience any extra load , as the load of the structure is equal  or less than the soil displaced.

Floating houses are similar in concept and normally defined those houses which are constructed on water in a way that the load of the structure is equal or less than the uplift force of the water which helps in floating the house on water.

Now, let me show you the different types of floating houses.

Types of floating houses

There are two types.

  1. House which permanently float
  2. House that floats during flood

We will learn each of them in depth next.

1. House that permanently float

These type of floating houses are constructed by the mechanism that allows it to float permanently.

Green roofed Schwimm Haus Boat by German architects.
Floating houses - Green Roofed Schwimm

2. House that floats during flood

These are houses that float only during flood water, else get placed on the ground ,particularly during dry season if there is no water.

The figure below shows floating houses during flood. They are an easiest homemade solution with foam blocks under your home. The 4 guide posts keep the house in place as it rises, just like a floating docks

Houses that float during flood
Floating houses that float during floods

There is a home in Kerala which was widely appreciated for the innovation.

The whole building is made of steel (GI pipe). The walls are made of multi wood sheet on both sides.

The home is built by P Gopalakrishnan Achari from Ernakulam district in Kerala. To avoid the floating house from being swept away by the floodwaters, he placed four steel pistons at 25 feet into the earth in four corners through the walls.

Floating house in kerala

The house is supported on the inner rods of these pistons.

During floods, the house will move up along with the air tank with the piston.

When the water recedes, it will automatically come back to the normal level. The house will not move an inch on to the sides.

Also read: Self healing concrete|Bacterial concrete-Preparations& Advantages

Now, let’s look into some exciting examples of floating houses.

Examples of a floating house

  1. The figure below depicts a house that was built on a steel platform structure with steel pontoons.
House built on steel platform
Floating house built on steel platform

2. The house shown below is designed by Morphosis Architects and students from UCL. They collect its own water, generates its own electricity, and is capable of floating as high as 12 feet on rising flood waters.

Flotation is made possibly by a single unit of expanded polystyrene foam coated in glass fiber reinforced concrete.

Floating house in which floating by expanded polystyrene foam coated in glass FRC

3. The building in the figure below is amphibious home that rests on land but are built to rise when waters rise. When the river swells the house will float as much as 18 feet. It floats back down as the water subsides.

It is designed by Factor Architecten.

Also read: Infrared Thermography in Civil Engineering: Applications & Pros and Cons Simplified

In the next section, let’s discuss some technical jargon. After all, the beauty emerged from it, right?

Principle of a floating house

  • Floating house do not require foundation and are based on the  principle  of buoyancy. Thus known as  buoyant   homes.
  • Base of the structure  should be such that it help in floating as well as able to take dead load, live load and other load to encountered by the  house.
  • The houses may be constructed on boat, hollow pipe, light weight pads and similar materials which help in floating as well  as take up load.

That was the principle behind it. Next, let us particularly look into the technology behind vertically moving floating houses.

Principle of a vertically moving floating house

  • A steel frame that hold the floatation blocks is attached to the underside of the house.
  • There are four ‘vertical guidance’ poles not far from the corners of the house.
  • The tops of poles attached  to steel frame.
  •  The poles  telescopes out of the ground, allowing the house to move up and down.

What about the services that would be available in a floating houses?

Services available with a floating house

  • All the ducts and wires for water, gas, electricity and sewage disposal in such amphibious homes are flexible , designed to remain functional even when the house rises several metres from its usual  position
  • Solar panels are provided for energy requirements
  • In-cino-let toilets which burn waste are provided
  • Drinking water is collected from rainstorms and filtered into glass partition wall  inside
  • The  inner  temperature  is regulated in case of geothermal pond loop

Here comes, the most interesting aspect. How about the life in the miracle?

Life in floating houses

  • Relaxing
  • Romantic
  • Comfortable
  • Low storage space
  • Less accommodation
  • Cost
  • Heating/cooling
  • Maintenance
  • Safe during flood

Okay. So, now it feels so good. In an environmental friendly approach, is it relevant?

Need for floating houses

  • The sea level  is said to have risen by 20cm in last centuary.
  • It is expected to rise  by three amount in the 21st centuary.
  • So floating house will not be a fashionable style but necessary.
  • Safe  in  flood prone  areas  during floods.

Finally, let’s give quick trip through the moving houses which is a cousin of floating houses.

Moving houses

  • Envelope of houses can be fabricated , shown to customer and towed to the site.
  • The whole structure will require to be anchored to the  foundation.
  • If house owner wants to shift, it can be dismantled and reinstalled at other place.
  • Interiors  can  be placed as per the requirements  through  modular  parts  like  kitchen ,bath  etc.

Time to wrap up.

What good would it do to hire an outside firm to do the cutting of our lumber?

The building industry is very competitive and requires pinpoint accuracy when it comes to building floating houses. Preparing a timber layout and constructing estimates before being hired requires a significant lot of knowledge and time. Your time is money, and it might be used to increase profits and extend your floating houses business’s reach.

Contact Nedes estimating first if you need a precise wood quote for an upcoming floating house or company plan. For many of the world’s greatest and smallest construction projects, we laid the first wooden beams. Our team of professional estimators has decades of experience in the construction sector and floating houses are no different. In addition, we are aware that a thorough wood plan is required when producing estimates for construction projects. To ensure an error-free design and correct sizing of all components, we use state-of-the-art estimating technology. Our Lumber Takeoff Services are what you need, so contact us now.

Conclusion

  • India has islands, coastal areas and areas highly prone to  flood.
  • So there need to construct  floating house and have expertise  in this type of construction.
  • There is need to develop  technology for  moving  houses which can be  transported and constructed  early  particularly  during  disaster or when required to be shifted  due to other consideration.

So, how was the journey through floating houses? I found it really awesome. Let me know your thoughts in the comments.

Photo credits: (https://insteading.com/)

Infrared Thermography in Civil Engineering: Applications & Pros and Cons Simplified

Heard about infrared thermography? We are going to deal with the topic in today’s blog.

I will walk you through the principle behind the technology, the classification based on its working, applications and the advantages and disadvantages.

What is Infrared thermography?

Infrared thermography uses thermographic cameras to detect radiation in the long-infrared range of the electromagnetic spectrum and generate images of that radiation, called thermograms.

The figure below shows the procedure of IRT.

Schematic Representation of IRT
Source: Vollmer et al. (2010)

The principle behind infrared thermography is that the heat flow through the body is  affected by the  presence of internal anomalies. The main heat transfer mechanisms are conduction and radiation.

Now, let’s peep into the classification of infrared thermography.

Classification of infrared thermography

There are two types of classification based on different parameters.

1. Based source Of heating

  • Passive Thermography- Passive thermography explicitly tests the surface temperature for measurement, as the interest area would have irregular hot-spot as compared with the surroundings
  • Active Thermography- In active thermography, to detect inhomogeneities and cavities, heat is directed into a test piece. When a test object is heated or cooled, surface temperature variations are caused by local differences in the thermal conductivity and heat power of the test sample.

2. Based on method of heating

  •  Pulse Thermography-  Infrared pulse thermography is a non-contact, non-intrusive NDE process commonly used for aircraft structure inspection. To unleash a thermal wave into the material for the detection of defects within the material, the technique employs a burst of high-intensity thermal excitation.
  • Lock-in Thermography- Lock-in thermography is a method that uses a laboratory power supply and reed relays to automatically and repeatedly power a device at regular intervals while the device’s temperature response is integrated and measured over time.

In the next section, I will show you the advantages and disadvantages of infrared thermography.

Advantages of infrared thermography

Digital and Infrared image of a building
[Source: Vollmer et al. (2010)]

The main advantages of IRT are as follows.

  • Early detection of defects
  •  No hazard 
  •  Quick
  •  No time constraints

Disadvantages

The disadvantages of IRT are,

  • High Equipment Cost
  • Dependency on the environment conditions
  • Dependency on the surface conditions
  • Difficult to measure the depth of a flow

That’s it about the pros and cons. Let’s move on to the last section that talks about the interesting applications of infrared thermography in civil engineering.

Applications of infrared thermography

1. Bridge deck assessment

Bridge deck deterioration is an issue to be addressed with seriousness. Delamination and disintegration of concrete lead to this. Inadequacy of Traditional methods like sounding, chloride, corrosion potential gives way to IRT to be considered as the better alternative.

2. Testing for fibre reinforced plastic wrapped columns

  • Subsurface debonds form between the fabric and the underlying member
  • This affects the strength and ductility of the member
  • IRT in rehabilitation work and periodic monitoring
  • External Heat source is used
  • Detection of  subsurface debonds
  • Repair using resin or replacement

3. Thermal Measurement And Control Of HMA Pavement Construction

The figure below shows the continuous thermal measurement system.

Continuous Thermal Measurement System
Continuous Thermal Measurement System:
(a) Sensing Bar mounted to Paver (b) Display Screen
[Source: LeClair et al. (2015)]
  • IRT can be used for real-time measurements of the surface temperature of the installed asphalt mat
  • Map thermal contour on the surface of a material
  • Identify temperature anomalies in cold areas

4. Energy Efficiency Assessment in Buildings

  • It is used to identify and minimize the source of unnecessary heat flows.
  • It makes use of the actual and expected 3D spatio-thermal models using EPAR
  • The technique optimizes R-values using retrofit
  • It helps to achieve optimal thermal comfort for occupants
  • It also improves energy efficiency in buildings

5. Building Moisture Inspection

  • In this application, IRT is utilized as a diagnostic tool to evaluate moisture
  • It uses Moisture detector as a supporting device
  • IRT identifies critical areas that were not detected visually
  • Structural plans of the building should be checked

With that, we come to the end of this piece of information. Let’s wrap with the conclusion.

Conclusion

  • Infrared thermography is a fast, clean and safe technology
  • IRT is dependent on the sensor and the surrounding environment
  • The defect can only be detected if it possesses enough thermal resistance
  • IRT has wide applications in the realm of NDA as well as Civil engineering

So, how was the trip through infrared thermography for civil engineering? Was your time worth investing here with me?

If so, let me know your thoughts in the comment section.

Enjoy learning!

Self Healing Concrete ||Bacterial Concrete -Preparation and Advantages

Self healing concrete is a mind-blowing innovation in civil engineering. It can potentially contribute to ensure a longer lifespan of a structure. In this article, we will find out the details about bacterial concrete. A bacterial concrete is most effective in this category.

Let’s start from scratch.

What is self healing concrete?

The type of concrete that uses the process of self-filling up of cracks by the help of bacterial reaction in the concrete, after hardening is known as Self-healing concrete.

Why self healing concrete is important?

  • Unrepaired cracks lead to a reduction in the service life of the structure. Therefore, it is worth giving attention to.
  • Epoxy resins and other synthetic mixtures are alternatives. (But they are not good for human health)
  • Self healing concrete does not require human intervention

Let’s dive in deep now.

Bacterial Concrete

Concrete which is made by adding bacteria that precipitate calcite is called bacterial concrete.

  • It is microbiologically induced calcite precipitation.
  • Bacterial concrete heals cracks around 0.5 mm thickness.
  • It has improved Compressive & flexure strength than ordinary concrete.
  • Bacterial concrete is well suited for Small & Medium-Sized building
  • It is used on a limited scale & not commercially wide-spread.

We learnt the general details. Let’s be a bit technical now?

Bacteria Used in the self healing concrete

Bacteria used in bacterial concrete
Source : alchetron.com
  • “Bacillus pasteurii ”  is a common soil bacterium which is used in bacterial concrete.
  • Precipitates impermeable calcite layer over the surface of concrete.
  • Acid producing bacteria
  • Remains dormant & be viable for over 200 years under dry conditions

In the next section, let me quickly walk you through the mechanism of the self healing concrete.

Mechanism of Bacterial Concrete

  • Bacillus pasteurii is used along with Calcium Lactate. 
  • Both are added in the wet concrete when the mixing is done.
  • Water seeps in the cracks (or exposure to moisture)
  • Spores of the bacteria germinate & feeds on calcium lactate ,consuming oxygen.
  • The soluble calcium lactate is converted to insoluble limestone.
  • limestone starts to harden, filling the crack automatically
  • The advantage is that oxygen consumed helps in the prevention of corrosion of steel.

That’s it. Now, we will move on to the chemical process in bacterial concrete.

Chemical process of this self healing concrete

The steps in the process are as follows.

  • Water comes in contact with the unhydrated calcium.
  • Calcium hydroxide is produced by the help of bacteria, it acts as a catalyst.
  • This calcium hydroxide reacts with CO2 to form limestone and water.
  • This extra water molecule keeps the reaction going.
  • The limestone then hardens and seals the cracks.

Figure below shows the self healing concrete.

Source: sciencedirect.com

What about us study about the preparation of bacterial concrete now?

Preparation of Bacterial Concrete

There are mainly two methods.

  • By Direct application
  • By Encapsulation

Without delay, let’s meet each of them.

Direct Application

  • Bacterial spores and calcium lactate is added directly when mixing of concrete is done.
  • This doesn’t change the most properties of concrete.
  • When water comes in contact with this bacteria
  • They germinate & feeds on calcium lactate and produces limestone.

Encapsulation Method

  • The bacteria and its food (calcium lactate), are placed inside treated clay pellets.
  • Concrete is prepared.
  • Clay pellets break when crack occurs.
  • Bacteria germinate and eat down the calcium lactate & produce limestone.

Time to chill. Sit back and enjoy the advantages and disadvantages of what we have made through the process.

Advantages of bacterial concrete

  • Increase in compressive and flexural strength compared to normal concrete.
  • Self-repairing
  • Reduction in permeability of concrete
  • Resistance towards freeze-thaw attacks.
  • Low maintenance
  • Improves the durability of steel reinforcements.
  • Bacillus bacteria are harmless to human life.

Disadvantages of bacterial concrete

  • High Cost
  • Growth of bacteria is not suitable in some environment.
  • The clay pellets comprise 20% of the volume of the concrete. This may become a shear zone.
  • Design of mix concrete with bacteria  is not available in any IS code

We have reached the shore. Let’s wind this up with the conclusion.

Conclusion

  • Self healing concrete appears to be much more efficient
  • It has more advantages than disadvantages.
  • So far, Bacterial Concrete is the best approach in the field of self healing concrete

Hope the article served its purpose to quench your thirst to know about self healing concrete. Share your thoughts on this in comments.

3 d Printing buildings |Concrete Printing & Contour Crafting Methods Full Guide

3 d Printing buildings are one of the greatest advancements of technology. The rapidity and accuracy with which the work can be completed is the attraction. We will find out all the details about the important methods of 3 d printing which are concrete printing and contour crafting.

What is 3 D Printing?

The 3D printing process builds a three-dimensional object from a computer-aided design (CAD) model, by successively adding material layer by layer.

Unlike conventional machining, casting and forging processes, where material is removed from a stock item or poured into a mold and shaped by means of dies, presses and hammers.

Time to ask the question. Why is it a big deal?

Why 3 D Printing for construction?

  • To avoid construction formwork which accounts for 40% of the total budget for concrete
  • It allows for flexibility and freedom of architectural design
  • To reduce construction and facilities management costs
  • To build a future of sustainable construction

Now, let’s move on to the next section which introduces the 2 printing methods.

3 d printing buildings methods

There are mainly 2 methods for 3 d printing buildings.

  1. Contour crafting
  2. Concrete printing

Let’s dive in deep into each of them.

Contour crafting for 3 d printing buildings

Contour crafting- Schematic of CC extrusion and filling process
  • Contour crafting is based on an extrusion and filling process
  • The extrusion process forms the smooth object surface by constraining the extruded flow in the vertical and horizontal directions by the use of trowels.
  • The orientation of the side-trowel is dynamically changed for better surface fit for each decomposed layer.
  • The side-trowel allows thicker material deposition while maintaining the high surface finish.
  • Thicker material deposition cuts down manufacturing time, which is essential for building large-scale parts using the material additive process.
  • Maximum deposition layer thickness is limited by the trowel height.
  • As the extrusion nozzle moves according to the predefined material deposition path of each layer, the rims (smooth outer and the top surface of outside edges) are first created.
  • The towelled outer surface of each layer determines the surface finish quality of the object.
  • The smooth top surface of each layer is also important for building a strong bond with the next layer above.
  • Once the boundaries of each layer are created, the filling process begins and material is poured or injected to fill the internal volume.

Now, let’s find out the details of concrete printing.

Concrete printing for 3 d printing buildings

Concrete printing
Concrete printing
  • Concrete printing is similar to contour crafting in the ejection phase of concrete
  • It is able to achieve better 3D printing, because of its resolution of deposition
  •  Concrete printing provides larger freedom printing internally and externally.
  • The method not only enables the production of both high compressive compressive_strength and_tensile_strength concrete mixture, 110 MPa and 10 MPa respectively but improves the overall workability, extrusion and onsite construction methods.

Next, let me show you the advantages of 3 d printing in construction industry.

Advantages of 3 d printing in the construction sector

  • Cost Efficiency
  • Labour efficiency
  • Time and costs savings
  • Environmental/ economic aspects
  • Any complex design can be built

Now, let me quickly show you some examples of 3 d printing buildings.

Implementation examples of 3d printing for construction

  1. Dubai Future Foundation (DFF)
DFF Building Dubai
Dubai Future Foundation (DFF) Building in Dubai

     2. Reinforced concrete printed bridge at Gemert

     3. Yin gChuang, the Chinese company

Conclusion

  • Using this technology is cost, time and quality efficient, through analyzing many theoretical and practical examples of 3D printed structures.
  • According to the literature survey that was conducted, using 3D printing can save up to 80% of manufacturing costs and 40% in materials costs.
  • For future work and application, the detailed economic analysis must be conducted to show the reduction potential of 3D printing, and its impact on the full-scale economy of the country, by applying any of the methods previously mentioned companies use in their work.

Real experiments must be conducted to prove the material, labor and energy reduction. And, you will amaze at the beauty of 3d printing building.

Photo credits: https://www.spentys.com/

Don’t forget to share your views on the innovation in comments.

Happy learning!

Cracks in a Building |3 Types of Cracks in Building Walls Full Guide

Cracks in a building affect the building’s artistic look and it destroys the wall integrity, affects the safety of the structure and even reduces the durability of the structure.

In this blog, I will show you the important types of cracks in building and example of these cracks to understand them better.

Cracks occur when stress in the components increases beyond its strength.

Stress in the building components could be caused by externally applied forces like,

  • Dead load
  • Live load
  • Wind load
  • Seismic loads
  • Foundation settlement

It could be induced by internally due to temperature variations, moisture changes and chemical actions.

Let’s find out the types of cracks in building now.

Types of cracks in a building

Cracks are classified into three types

  • Structural cracks
  • Non-structural cracks
  • Cracks based on width

Structural cracks

Structural cracks arise due to different reasons such as incorrect design and overloading of the structural components. Structural cracks are a threat to the stability of the building and are difficult to correct.

This type of cracks can’t be corrected. But needs special retrofitting techniques to prevent the structure from collapsing. We will discuss more that in another blog.

For now, see the cracks in different structural members below.

BEAMSCOLUMNSSLABS
Flexural CracksHorizontal CracksFlexure Cracks
Shear CracksDiagonal CracksShrinkage Cracks
Torsional cracksCorrosion cracksCorrosion cracks
Corrosion cracks
Combination of above cracks
Cracks in a building at different structural members

Next let’s know about the structural cracks on beams and columns. An example is always good to understand a concept better.

Cracks on beams and columns

Cracks on beams and columns
  • Cracks in beams and columns occur when a material is strained under stress.
  • When two materials of varying elastic properties is joined together under the effect of force, then different shear stresses in these materials create cracks at the junction.
  • Dead and live loads are the main reasons for elastic deformation in any structural components of a building

Preventive Measures

  • To prevent this, you can build slip joints under the support of concrete slab on walls
  • Slip joints are mounted in the brickwork and concrete junctions to allow low friction movement between different materials due to expansion and contraction. And, thereby, prevent the bricks or mortar from cracking.
  • Provide horizontal movement joints between the top of the brick panel and reinforced cement concrete- beam/slab

Now, we will find out the details on non- structural cracks.

Non-structural cracks in a building (hair cracks)

Non-structural cracks are formed because of internal forces in the structure.

Materials due to moisture variation, temperature changes and suitable remedial measures can be carefully handled to put a curb on the crack. Cracks differ in width largely.

There, she is. The last member. Let’s meet last member in types of cracks in a building.

Cracks based on width

Depending upon the crack width, the cracks can be further divided as,

  • Thin Crack -less than 1 mm in width
  • Medium Crack -1 to 2 mm in width.
  • Wide Crack -more than 2 mm in width.

That’s it about the types of cracks in building.

We have sailed through the important aspects of cracks in building. We missed out the causes of cracks which will be explained in a blog in future.

Stay tuned!