Cement tests are significant because cement is the most important and highly recognized binding material used in construction. Cement is an integral part of all types of construction ranging from huge skyscrapers, bridges, tunnels, etc to small residential buildings. For industrial structures like power plants, refineries, steel plants, cement plants, bridges, roads, etc. cement is the main component. Cement, when mixed with sand and aggregates, forms concrete and with sand makes mortar. The serviceability, strength, and durability of a structure are related to cement used in various works.
This article is about various tests conducted on cement to check its quality.
Cement tests – Categories
Cement is one of the oldest and most used binding materials and an integral ingredient used in the construction sector. The quality, serviceability, and stability of a structure are directly related to the quality of cement used in it. Hence it is required to analyse the quality of cement before using it for works. The tests for determining cement quality are split into two major categories.
- Laboratory test
- Field tests for cement
Cement got physical as well as chemical properties. Normally lab tests are conducted to ascertain the properties of cement. Lab tests require time, special equipment, and professionals for testing and interpreting the results. It may not be possible to check all the properties of cement at the site. To overcome this difficulty cement tests are categorised into field tests and laboratory tests.

Field tests on Cement
The quality of cement is determined using some simple field tests. These tests do not require any sophisticated types of equipment and professional skills and get the results very quickly. By conducting these simple tests and analyzing the results we will get an idea about the cement quality and can immediately decide on accepting or rejecting it.
Following are the common field tests conducted to ensure the quality of cement.
These are first look tests and quality of cement is ensured by its smoothness to touch, the colour of cement, etc.
- Checking manufacturing date
- Visual checking of lumps
- Feel test
- Heat of cement
- colour
- Water float test
- Setting test
These basic tests give an approximate characteristic of cement. These are easy and quick but not accurate, however help in concluding the acceptance of cement for works.
Also read : Field tests for cement
Laboratory tests for Cement
The laboratory tests are conducted to define the physical and chemical properties of cement. It is not possible to check all the cement properties at the site. The main laboratory tests conducted on cement is as follows.
- Fineness Test
- Compressive Strength Test
- Consistency Test on cement
- Setting time
- Soundness Test
- Tensile strength Test
- Heat of hydration
Lab tests require time. But it provides accurate results.
Fineness test
The fineness test determines the size of the cement grains. Smaller the diameter of grains finer the cement is. Finer cement grains enhance the strength and cohesiveness of concrete.
The fineness of cement grains plays an important role in the hydration process and directly impacts the strength of concrete. Cement fineness is determined with the help of the following tests.
- Sieve test
- Blain’s air permeability test
- Wagner turbidimeter method.
Blain’s air permeability test is the more reliable than sieve analysis test. The apparatus for this test is the permeability apparatus.
Finer cement grains above the permissible limits are also not preferred because excess finer grains increase the surface area. An increase in the surface area requires more water and results in the quick setting of cement. The standard guidelines for the Fineness test are IS 4031-PART1-1996, IS 4031(Part2)-1999, ASTM-204-05, ASTMC-115-96a (re-approved 2003).
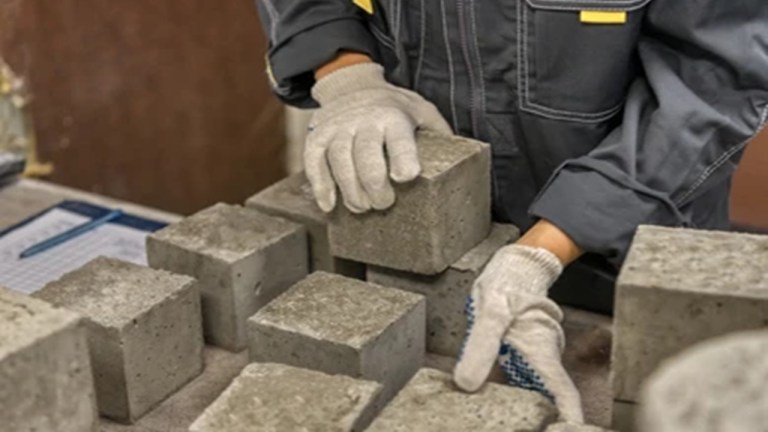
Compressive Strength Test
The compressive strength of cement is the prime data to be determined before selecting the cement at the site. Concrete imparts strength to the structure and cement is the main ingredient in concrete. The apparatus for this test is a Compression testing machine. Gradual load is applied to the cement specimen. The load at which the specimen breaks and the area of the specimen define its strength. Certain factors like improper mixing, curing, proportioning, etc also affect the strength of cement. The cement with low compressive strength is not recommended in construction. The standard guidelines available for this test are IS4031 (Part 6)-1988, ASTM C 109, BS EN 196 – 1:2005.
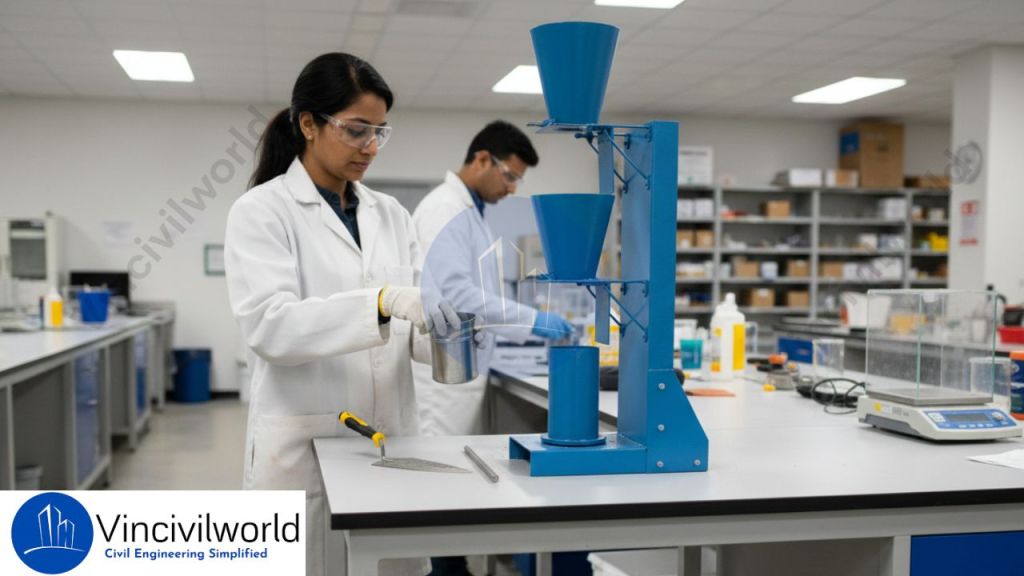
Consistency test on cement
The consistency test is performed to determine the water necessary for attaining standard consistency or normal consistency. Water content is an important factor in making cement mortar. On mixing water with cement the chemical reaction or hydration is initiated. Excess water in cement results in an increase in the water-cement ratio. An increase in the water-cement ratio leads to a loss of strength when cement hardens. Less water content reduces the hydration process leads to loss of strength. Vicat apparatus is used to determine the consistency. The standard consistency of cement is when the Vicat plunger penetrates to a point 5 to 7 mm from the bottom of the Vicat mould. The consistency of cement ranges from 26% to 33%.

An increase in the amount of water content creates problems like bleeding, segregation in concrete. The standard guidelines about cement consistency are available in IS 4031 (Part 4)-1988, ASTM C 187, BS EN 196-3:2005, etc.
Setting time
Setting time is the time at which the cement hardens after gaining strength. It is necessary for the transportation, placing, and compaction of cement. The setting time of cement is measured at two stages – Initial and final. The time at which the setting begins is the initial setting time. At this stage, the cement loses its plasticity. The time at which the setting completes is the final setting time. This helps in the removal of scaffolding. We use the Vicat apparatus for determining setting time. The initial setting time of cement is 30 minutes and the final setting time is 600 minutes. The code which gives the guidelines about this test are IS 4031 (Part 5)-1988, ASTM C 191, BS EN 196-3:2005.
Soundness Test
A soundness test determines the capacity of cement to retain its volume after hardening. It also determines the additional lime present in the cement. Lime is one of the main ingredients of concrete. The deficiency of lime affects the setting time of cement. If the amount of lime is high, the cement will become unsound. Large expansion in the cement may produce cracks in concrete. Thus the disintegration, corrosion, and distortion occur in the concrete. So unsound cement should not be used in construction. This test can be done using the Le Chateler method and Autoclave method. The standard guidelines about this test are available in IS4031 (Part 3)-1988, ASTM C 151-09, BS EN 196-3: 2005.

Tensile strength Test
The tensile strength test is done using the Briquette test method or by the split tensile strength test. The tensile strength of cement is less compared to the compressive strength. Tensile cracking occurs due to dynamic loading and temperature variation. In this test, uni axial loading is done to determine the tensile strength. The standard guidelines for this test are available in ASTM C307 and EN 196-1.
Heat of Hydration
Hydration is an exothermic chemical reaction between cement and water involving the release of Heat. The hydration process increases the strength of cement. The heat of hydration is signified in terms of kilo joules per kilogram.
A calorimeter is an apparatus used for determining the hydration of cement. Important factors that influence the heat of hydration are the proportion of C3S and C3A, water-cement ratio, the curing temperature, fineness of cement, etc. An increase in heat of hydration produces undesirable stresses. The standard guidelines for this test are available in ASTM C 186 and IS4031 (Part 9 ) – 1988.
Conclusion
Tests on cement is the most essential activity to be included before starting any construction activity. The quality of cement determines the strength, serviceability, stability and life of a structure. Any compromise on quality can lead to serious construction defects and failures.