All posts by Vinod Gopinath

Dams – Site selection, Advantages and Disadvantages

Site selection for dams is a critical process that ensures the structure’s stability and efficiency. Choosing the right location is essential for minimizing risks and maximizing the dam’s performance. Geology, river flow, and environmental impact are crucial factors. They play a key role in determining the best site selection of a dam. A well-placed dam offers significant advantages, such as water storage and flood control, while improper sites increase the disadvantages of dams, like ecological damage and costly maintenance. Balancing these factors is vital for success.

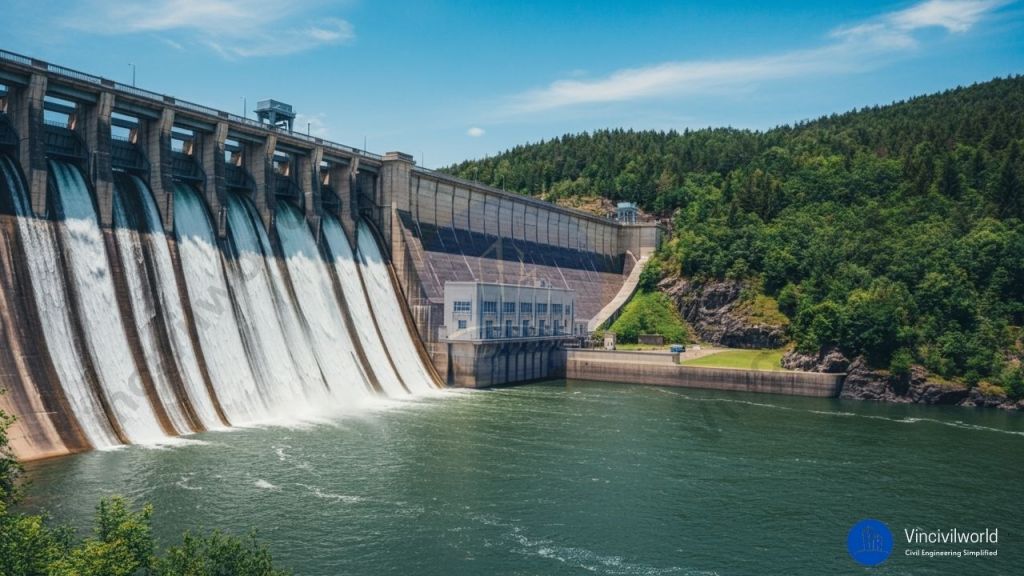
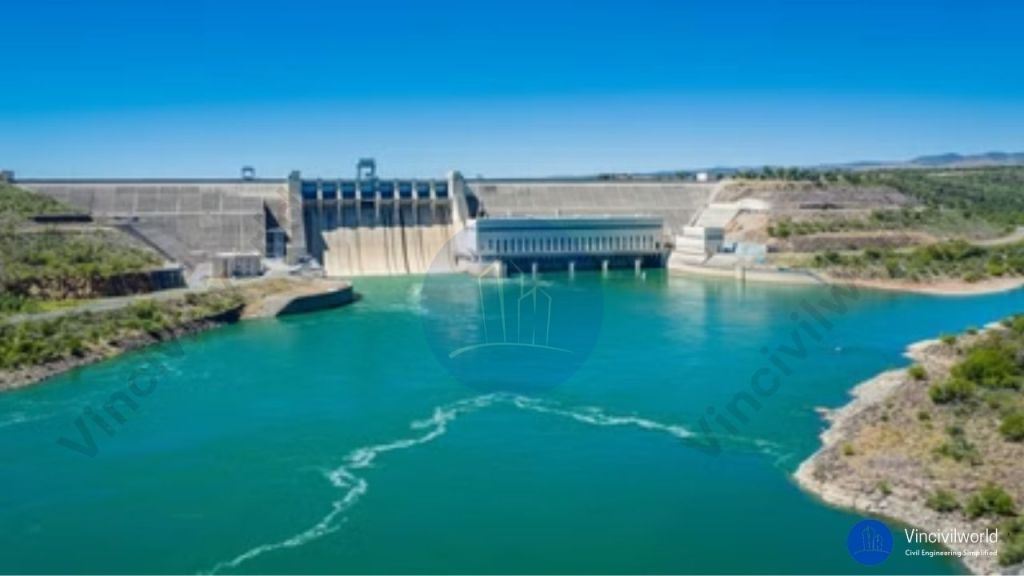
Dams are obstructions constructed across the water bodies to control the water flow and water levels. Dams serve as a water source for human consumption, irrigation purpose, and power generation. They also help prevent floods when there is a sudden discharge of floodwater. The water that impounds in the dams is also used for recreation purposes and industrial uses. They are mostly made up of rock fill or earthen.

  1. What are dams?
  2. Benefits of dam
  3. Site selection of dams.
  4. Advantages of dams
  5. Disadvantages of Dams
  6. Key Takeaways
  7. Conclusion

What are dams?

The dams are barriers built to restrict and manage the natural flow of rivers, waterways, or streams for human needs. A dam may be a natural one or artificial. They help to confine water and reduces the water rise and flood problems. Dams retain water by forming a reservoir behind the structure. They got an Upstream side and Down stream side. The place where water is collected is called the Upstream side. The water impounded is used as storage and is called Reservoir.

Dams
site selection for dams
Site selection for dams

Also read : Type of Dams – 3 main classification criteria explained

Benefits of dam

The dams provide a range of environmental, economic and social benefits

One of the most important benefits of dams is water storage. The stored water is used for drinking, cleaning, bathing, gardening, irrigation purposes, industrial purposes.

The large dams and reservoirs serve as recreational spots for fishing and boating purposes. Dams play a major role in preventing damages due to floods by collecting and storing excess water during rains and are released as and when required.

The dam is the main source of providing water for irrigation purposes in areas where rain and water are scarce.

Also read : Methods of irrigation – 3 methods full guide

Site selection of dams.

The dam is a massive and strategic structure and needs a perfect site selection before proceeding with construction.Site selection of dams involves assessing factors like geology, river flow, and environmental impact. These factors ensure structural stability and reduce ecological disruption. The right site selection for dams minimizes risks such as flooding and maintenance issues. Soil type, valley shape, and climate also play a key role in site viability.

  • Topography -Making maximum use of the available volume of water is the main objective of a dam. The slope of the area, groundwater table, contour, weather condition, etc is other factors for dam site selection. The bed level at the dam site should preferably be higher than that of the river basin. This is for reducing the dam height and facilitating the drainage of water.
  • Foundation – The foundation should bear the whole weight and pressure of the dam. It should be permeable, thick, and should have adequate strength.
  • Economic criteria – This includes the construction and maintenance cost of the dam. The land value, cost of construction materials and construction time, etc. to be taken into account while selecting a dam site. Quality construction materials required for dam construction have to be available near the proposed location. Always opt for a small length dam with maximum water holding capacity for economising the project. 
  • Height of Dam – The height of the dam should be economical, and should store the maximum amount of water.
  • Earthquake zone – The dam site should not be an earthquake zone. It may cause a collapse of the dam and losses. 
  • Material availability – Materials like rock, aggregate, soil, filler, etc. should be available near the site.
  • Climate condition – The climate of the site should be bearable, possibilities of landslides should not occur.
  • Spillway site: A suitable location for the spillway should be available in the nearby vicinity of the dam. 
  • The dam site should be easily accessible and economically connected to nearby areas. Area required for establishments and labour camps of construction group shall be available nearby in a safe zone.
  • Environmental issues should be taken into consideration while selecting the dam site.
Dam with sluice gate
Dam site selection

Advantages of dams

  • Water storage : Dams are one of the major sources of water for domestic uses. These uses include cooking, cleaning, bathing, washing, drinking water, and gardening. They also provide water for agricultural and industrial purposes. The water is supplied through the canal or with the help of a pipe system from the dam.
  • Irrigation – The water from the dams is diverted through canals. This water reaches fields where the water level is low. It is used for irrigation purposes.
  • Hydroelectric power – The water stored in the dam is passed through turbines for hydroelectric power generation.
  • Flood prevention – The water level of river, streams, etc are maintained by constructing dams across it. This prevents the loss and damages from unexpected floods. 
  • Recreation – The water stored in the dam is used for fishing, boating, and other recreational activities.
  • Debris control – Dam also provides the retention of hazardous material and protects the environment.

Disadvantages of Dams

  • Groundwater table – Stagnation of water in the dams alters the groundwater table.
  • Ecosystem – The dams prevent the fish migration and help in the breeding of mosquito which affects the ecosystem.
  • Water temperature – The aquatic temperature is varied by the dams, which causes a serious problem for aquatic lives.
  • Greenhouse effect – The reservoirs emit greenhouse gases which leads to global warming.
  • Rehabilitation – The discharge of water from the river affects the peoples living in the downstream area.

Key Takeaways

  • Importance of Site Selection: Effective dam construction relies on careful site selection, considering hydrological and geological factors.
  • Advantages of Dams:
    • Provide water storage for irrigation and drinking.
    • Offer flood control and management.
    • Generate hydroelectric power, contributing to energy supply.
  • Disadvantages of Dams:
    • Can lead to environmental degradation and loss of biodiversity.
    • May displace local communities and affect livelihoods.
    • Alter aquatic ecosystems and sediment transport.
  • Mitigation Strategies: Comprehensive environmental assessments and proper planning can help address negative impacts.
  • Stakeholder Engagement: Involving local communities in the decision-making process enhances public acceptance and addresses concerns.
  • Balanced Decision-Making: Understanding both advantages and disadvantages of dams is vital for informed policy and engineering choices.
  • Sustainable Practices: Prioritizing sustainability in dam projects ensures long-term benefits for both society and the environment.

Conclusion

The process of dams site selection requires careful consideration of various factors. It involves balancing the advantages of water management and energy generation. These must be weighed against the disadvantages related to environmental and social impacts. By prioritizing sustainable practices and involving communities in decision-making, the negative consequences of dams can be minimized. Policymakers and engineers must adopt an integrated approach to site selection for dams. This approach ensures the benefits provided align with ecological preservation. It also supports social equity. A well-informed strategy will help develop dams that positively impact society. It will also protect natural resources for future generations.

Component of a bridge|Bridge components-Types, functions

Component of a bridge/ bridge components plays a very important role in maintaining the stability and functional requirements of the bridge structure. Each bridge component has its functions. The bridge component types and functions vary as per the site conditions, design requirements, and functional requirements. This article is about a total overview of the components of bridge/bridge components.

A bridge is a structure built over physical obstacles such as water bodies like rivers, lakes, canals, etc, and valleys, roads, etc with minimal obstructing to the area below. During ancient times bridges are made by falling of trees, providing stepping stones, and by tying a rope from the trees. Bridges are the most important components of a highway, railway, and urban roads. Brides play an important role in the socio-economic, politics, culture, defence, etc of a region and a country.

  1. Component of a bridge / Bridge components
    1. Bridge components – Substructure
      1. Bridge components – Abutments
        1. Types of Abutments
      2. Wing walls and return walls
      3. Piers
      4. Foundation
    2. Component of a bridge – Super structure or decking components
      1. Bridge bearings
      2. Decking components
  2. Key Takeaways
  3. Conclusion
  4. Latest posts

Also read : Components of a road – Elements and their function

Also read : Components of a railway track – Types and functions

Component of a bridge / Bridge components

The components of the bridges are divided broadly into .

Diagram illustrating the components of a bridge, highlighting substructure and superstructure elements.
Illustration depicting the components of a bridge, highlighting substructure and superstructure elements.

a) Sub- structure

c) Super structure or decking component

Components of a bridge below the bearing constitute substructure and components above the bearings constitute superstructure or decking components.

You tube video – Components of a Bridge

VIDEO SHOWING BRIDGE COMPONENTS/COMPONENT OF A BRIDGE

Bridge components – Substructure

The main function of the substructure is to support the superstructure components and transfer the loads to safe strata. The major substructure components of a bridge are as follows.

a) Abutments

b) Wing walls and return walls

c) Piers

d) Pier cap

e) Foundation

Bridge components – Abutments

Abutments functions as vertical supports to the superstructure components at the bridge end. They are the endpoints of a bridge and acts as an approach for the roadway. Abutments retain the roadway backfill and base materials and act as lateral support to the embankments approach. Because of these properties, the abutments are designed as retaining structures.

A single span bridges got two abutments which serves as a vertical support and lateral support. Abutments also resist lateral movement of earth fill of the road approaches.

Illustration of abutment components showing vertical loads, deck beam, beam seat, and back wall for retaining backfill.
Illustration of the components of an abutment, highlighting its role in supporting deck beams and resisting lateral loads.
components of abutment

Abutment are of various types depending on the design requirements and load considerations.

Cross section diagram of a bridge abutment showing components like aggregate fill, compacted subgrade, back fill, approach slab, expansion joint, and deck slab.
Cross section illustration of a bridge abutment showing its structural components and layering.
Cross section of abutment
Types of Abutments
  • Closed Abutment
  • Stub or Perched Abutment 
  • Pedestal or Spill-through Abutment
  • Integral End Bents
  • Mechanically Stabilized Abutment

Wing walls and return walls

Wing walls are located near to the abutments as an extension of abutments or as independent structures. They act as a retaining wall to resist the earth in the approach areas. Wing walls may be placed right-angled to the approach way or splayed as shown in the figure.

Piers

Piers are intermediate vertical supports provided between bridge spans. The main function of a pier is to transfer the loads coming on the superstructure to the foundations. Pier got pier caps to provide sufficient bearing areas for the transfer of superstructure loads.

Piers are basically compression members and are designed for vertical loads but in high seismic areas they are designed for lateral loads also.

Underneath view of a bridge showing its structural components, including piers and beams, over a water body.
View of bridge piers supporting the superstructure above water, showcasing essential components of bridge stability.
Piers

Foundation

Foundations are constructed to transfer loads coming on the superstructure and substructure to a larger area and hard strata. The foundations may be an open foundation or pile foundation or some other foundation type depends upon nature or soil strata and design considerations. The foundation has to be provided at sufficient depth to ensure protection and chances of failure against the scouring and undermining process.

Also read : Foundation types – Shallow and deep foundations

Also read : Pile foundations – Types and advantages

Component of a bridge – Super structure or decking components

The superstructure constitutes deck slabs, deck beams/girders, trusses, cables, arches, handrails, parapet, etc. The superstructure components depend on the type of bridge-like concrete, composite, steel, etc. The following are the basic superstructure components.

a) Bearings

b) Bridge deck

Diagram illustrating the components of a bridge superstructure, including deck slab, deck beam, bridge bearings, and parapet.
Diagram illustrating the superstructure components of a bridge, including deck slab, deck beam, bridge bearings, and parapet.
SUPERSTRUCTURE COMPONENTS

Bridge bearings

Bridge bearings are components of the bridge that provides a resting surface between the bridge pier and the bridge deck. The main function of the bearing is to control movements and reduces the stresses involved.

A bridge bearing carries the loads or movement in both vertical and horizontal directions from the bridge superstructure and transfers those loads to the bridge pier and abutments. The loads can be live load and dead load in vertical directions, or wind load, earthquake load, etc., in horizontal directions.

Close-up view of a bridge bearing system, showing the connection between the bridge deck and the support structure below.
Close-up view of a bridge bearing, showcasing its structural connection between the bridge deck and pier.
Bridge bearing

Decking components

Decking is the surface over which the traffic like road or rail passes. The decks are supported on beams, girders (prestressed or post-tensioned ) viaducts, prefabricated segments, steel girders or hanged through cables. The whole decking components are supported by pier which transfer the loads to reliable soil strata.

The deck beams shall be conventional rectangular type or of I – GIRDERS (Concrete or steel)

Construction of a bridge showing concrete beams supported by scaffolding and equipment.
Construction of a bridge superstructure featuring concrete beams supported by piers.
Types of Deck support beams

The surface of the deck may be of the concrete or bituminous for movement of traffic.

There are a lot of miscellaneous components like strip seal expansion joints which separates the deck spans, Hand rails are provided on the deck side as a barrier and protection.

Key Takeaways

  1. Bridge Importance: Bridges connect regions over obstacles like water bodies and valleys.
  2. Component Categories: Divided into substructures and superstructures.
  3. Substructure Components: Includes abutments, wing walls, piers, pier caps, and foundations.
  4. Abutments: Serve as vertical and lateral support, retaining roadway backfill and providing bridge endpoints.
  5. Wing Walls: Act as retaining walls near abutments, resisting earth in approach areas.
  6. Piers: Provide intermediate vertical support between spans, transferring loads to foundations.
  7. Foundations: Ensure stability against scouring and undermining, transferring loads to the ground.
  8. Superstructure Components: Comprise deck slabs, beams, trusses, cables, arches, handrails, and parapets.
  9. Bridge Bearings: Control movements and reduce stresses, transferring loads to piers and abutments.
  10. Decking: Forms the surface for traffic, supported by beams and girders, ensuring efficient load distribution.
  11. Miscellaneous Components: Include expansion joints and handrails for protection and separation of deck spans.

Conclusion

Understanding bridge components is crucial for maintaining stability and functionality. The substructure, including abutments, piers, and foundations, supports and distributes loads to the ground, while the superstructure, comprising decking, beams, and bearings, facilitates traffic flow and load transfer. Abutments provide vertical and lateral support, retaining backfill and serving as endpoints. Piers act as intermediate supports, and foundations ensure stability against environmental factors. The superstructure supports traffic with decks and beams, transferring loads through bearings to the substructure. These components work together to create safe, efficient, and durable bridges, highlighting the importance of comprehensive design and construction in bridge engineering.

Latest posts

Blockboard vs Plywood – Which one do you choose?

Blockboard vs plywood, Most people get confused with these terms because of the similarity in looks, and both products are popularly used in interior works, home decor, and furniture works. In reality, both these materials are different types of engineered wood and possess entirely different properties, and are used for specific interior applications.

Blockboard, with its core of softwood strips sandwiched between veneers, is known for its strength and durability. In contrast, plywood features multiple layers of thin veneer glued together, providing flexibility and stability. As you weigh plywood vs block board, consider how each material meets your needs for load-bearing, cost, and aesthetics. Blockboard plywood is often preferred for heavy-duty applications, while plywood and blockboard both offer versatility for different uses. This blog explains and clarifies the differences and properties of ply board/block-board and can make the right choice.

  1. What is plywood?
  2. What is Plyboard or blockboard?
  3. Blockboard vs Plywood- A comparison
    1. Manufacturing process – Blockboard vs Plywood
    2. Ease of handling – Plywood vs Blockboard
    3. Strength and durability
    4. Water and moisture resistant properties
    5. Physical properties
    6. Screw holding capacity
    7. Flexibility in Applications: Blockboard vs Plywood
    8. Applications: Blockboard vs Plywood
    9. Sizes available
    10. Service Life: Blockboard vs Plywood
    11. Economy
    12. Sound insulation properties
  4. Key Takeaways
  5. Conclusion

What is plywood?

Plywood is an engineered wood panel manufactured by joining sliced wood veneers 2-4 mm thick in a cross-layered pattern and pressed under high temperature to form sheets.Unlike blockboard, plywood is flexible and resistant to warping. This makes it ideal for a wide range of applications, from furniture to construction. When comparing blockboard vs plywood, plywood’s adaptability and ease of use stand out.

Must Read : Plywood Types – MR Resistant ,BWR & BWP or Marine ply

Must Read : WPC board vs plywood – Which is best?

What is Plyboard or blockboard?

Plyboard or blockboard is an engineered wood panel made of a core comprising of softwood wooden strips or blocks placed edge to edges sandwiched between two wood veneer layers. This construction gives it strength and durability, making it ideal for heavy-duty applications like furniture and doors. These veneer layers are glued and pressed under high pressure and temperature to form a plyboard/blockboard. Compared to plywood, blockboard is thicker and provides better load-bearing capacity. When considering blockboard vs plywood, blockboard excels in situations requiring robust support and rigidity.

Also read : WPC Boards – Advantages, Disadvantages and uses

Blockboard vs Plywood- A comparison

Let us have a comparison between the properties , types and uses of Plyboard and plywood/blockboard. This comparison highlights key differences to help you choose the best material for your project.

  • Composition and Manufacturing process
  • Ease of handling
  • Strength and durability
  • Water and moisture resistant properties
  • Physical properties
  • Screw Holding capacity
  • Flexibility in applications
  • Sound insulation properties
  • Sizes available
  • Economy
  • Service life

Manufacturing process – Blockboard vs Plywood

Blockboard/PlyboardPlywood
Small wooden strips are placed
edge to edge sandwiched between sliced wooden veneers.
Plywood is made in an odd number of veneer layers starting from 3 layers
more depending on the thickness of the plywood.
Block boards are made in either
3 layers or 5 layers. It is like a
wooden frame filled with small
wooden strips and covered by
wooden veneers on the faces.
The veneers are arranged in a cross layered pattern.

Blockboard vs plywood involves different core materials and manufacturing methods. Blockboard has a core of softwood strips with outer veneers, while plywood features alternating layers of veneer. Each method affects the material’s strength, flexibility, and final use.

Blockboard vs Plywood

Ease of handling – Plywood vs Blockboard

Blockboard/plyboardPlywood
Blockboard mostly uses softwood core and hence blockboard is lighter than plywood.Plywood grades use dense hardwood and the layers are pressed to form plywood.
Due to their lightweight nature, they are easy to transport and handle.plywood is solid and heavier than Blockboard.

Blockboard uses softwood for its core, making it lighter compared to plywood, which uses dense hardwood veneers. Consequently, blockboard is easier to handle and move, while plywood’s weight can make it more challenging to work with.

Strength and durability

Plyboard/BlockboardPlywood
Mostly uses softwood in the core. Softwoods are soft and have low strength and hence blockboards have moderate strength.Mostly uses hardwood veneers arranged in a uniform cross-layered pattern. Plywood is much stronger than blockboard.
Plyboard is strong compared to particleboard and MDF but is less durable as compared to plywood.Low-density plywood can even take moderate loads. They are strong and durable when compared with blockboards/plyboards.
Blockboard looks plain from the outside, but minor gaps are inside the core.Plywood layers are uniform in both directions and no gaps will be there.

Blockboard provides robust strength due to its core of softwood strips, making it suitable for heavy-duty applications. However, it can be affected by moisture. Plywood, with its layered veneer construction, offers consistent strength and high durability, making it resistant to environmental changes and suitable for diverse uses.

Water and moisture resistant properties

Plyboard/BlockboardPlywood
Blockboards retains moisture and more prone to water and moisture damages.Plywood grades like BWR (Exterior Grade)and Marine ply are less suspectable to water and moisture.
They can be made waterproof by using BWP Grade (Boiling Water Proof) resin for bonding the strips.Plywood grades like BWR (303 grade) and Marine ply (710 grade) are superior to block boards in terms of moisture and water-resistant properties.

Physical properties

Plyboard/BlockboardPlywood
Bending and sagging
Plyboard is more stiffer than plywood
and do not bend when used as
long pieces. Block board is preferred over plywood when used as lengthy
panels and furniture.
Long pieces of plywood may sags from the centre. Plywood is
less stiffer than blockboard.
Warping and Cracking
It has good dimensional stability and so is highly resistant to warping and crackingIt is resistant to warping and cracking.
Splitting on edges
Plyboard does not split on edges while cuttingPlywood split on edges while cutting.
Block board is comparatively easy to cut.Plywood splinter on edges and is very difficult to cut.

Blockboard vs plywood differs in density, thickness, and other physical properties. Blockboard, with its softwood core, is typically thicker and less flexible but provides a smooth surface. Plywood, made from layered veneers, is denser, more flexible, and offers better dimensional stability.

Screw holding capacity

Plyboard/BlockboardPlywood
Blockboards have very good screw holding capacity, than particle board and MDF. They can hold nails very well and thus are used for making custom made furniture. Also they are used as core in flush doors, where screw holding capacity is essential.Got excellent screw holding capacity due to the cross layered arrangement of veneers. The hinges do not come out easily.
Some times the screws tend to go between
the gaps of the wood pieces. Skilled carpenters
can identify and manage the problem

In the blockboard vs plywood comparison, plywood typically offers better screw holding capacity. The layered veneer structure of plywood provides more grip, making it suitable for applications where secure fastening is essential. Blockboard, with its softer core, may have screws loosen over time and is less reliable for high-stress fastening.

Screw holding capacity - Blockboard vs plywood
Screw holding capacity- Plywood vs Blockboard

Flexibility in Applications: Blockboard vs Plywood

AspectBlockboardPlywood
Application VersatilityLess versatile; best suited for applications requiring solid and stable support, such as heavy-duty furniture and doors.Highly versatile; used in a wide range of applications including cabinetry, wall panels, and structural components.
CustomizabilityLimited in terms of bending or shaping; typically used in flat applications.More flexible; can be easily cut, bent, and shaped for various designs and structures.
Use CasesIdeal for applications requiring strength and stability but less flexibility.Ideal for both structural and decorative purposes due to its adaptability and ease of modification.

Plywood is more flexible in applications due to its ability to be shaped and customized easily. In contrast, blockboard is less adaptable, making it suitable primarily for stable, heavy-duty applications.

Applications: Blockboard vs Plywood

AspectBlockboardPlywood
Typical UsesCommonly used for heavy-duty furniture, long bookshelves, benches, doors, partitions, and panels where solid support is needed.Widely used in cabinetry, wall paneling, flooring, structural components, and various DIY projects due to its versatility.
Suitability for Interior DesignSuitable for high-end furniture and cabinetry where a smooth finish and robustness are required.Ideal for a broad range of interior design projects, including furniture, shelving, and decorative panels.
Structural UsesBest for applications requiring solid core strength but less flexibility in design.Common in structural applications like roof sheathing, subflooring, and wall sheathing due to its strength and flexibility.

Blockboard is ideal for applications needing solid support, such as heavy-duty furniture and doors. Plywood, being versatile and flexible, is used in a wide range of applications from cabinetry and wall paneling to structural components.

Sizes available

Plywood

  • The most commonly manufactured plywood size is 8 x 4 ft. (2449 x 1219 mm)
  • It is available in various thicknesses ranging from 3 mm to 25 mm.

Blockboard

  • The most commonly manufactured and sold block board size in India is 8 x 4 ft. (2449 x 1219 mm).
  • Available thickness are 16mm,19mm,25mm

Service Life: Blockboard vs Plywood

AspectBlockboardPlywood
DurabilityGenerally durable but may have a shorter service life if exposed to moisture without proper sealing.Highly durable with a longer service life, resistant to environmental changes and moisture when properly treated.Always use BWR and Marine ply for water prone areas.
MaintenanceRequires regular maintenance and sealing to extend service life, particularly in humid conditions.Low maintenance; retains durability with minimal upkeep and resists moisture and environmental factors effectively.
LongevitySuitable for applications where moderate longevity is acceptable but may degrade faster under adverse conditions.Ideal for long-term use; maintains performance and appearance over extended periods.

Plywood generally has a longer service life compared to blockboard. While blockboard is durable, it may require more maintenance and protection from moisture to ensure longevity. Plywood, on the other hand, offers extended durability and requires less maintenance, making it suitable for long-term applications.Blockboard should be kept away from water and moisture. They got a better life and durability compared to MDF and particle boards. Blockboards are available in BWR and BWP varieties. They can resist moisture better.

Plywood vs Blockboard
Plywood

Economy

Blockboard is comparatively cheaper than plywood.

Sound insulation properties

Block boards are poor conductor of sound, heat and electricity and offer good sound and thermal insulation properties.Hence are used in partitions etc.

Key Takeaways

  • Blockboard: Lighter than plywood, ideal for heavy-duty applications requiring solid support and stability.
  • Plywood: More versatile and flexible, suitable for a wide range of applications including structural and decorative uses.
  • Strength & Durability: Plywood is generally stronger and more durable, especially in moisture-prone areas.
  • Screw Holding Capacity: Plywood offers better screw holding due to its dense veneer layers.
  • Service Life: Plywood has a longer service life with lower maintenance needs, while blockboard requires more care, especially in humid conditions.
  • Economy: Blockboard is usually cheaper, making it a budget-friendly option for certain applications.

Conclusion

When choosing between blockboard and plywood, it is essential to consider the specific requirements of your project. Blockboard is an excellent choice for heavy-duty furniture, doors, and long shelves, offering solid support at a lower cost. However, it requires careful handling in moisture-prone areas to ensure durability. Plywood, with its superior strength, flexibility, and moisture resistance, is the preferred material for a broad range of applications, from structural elements to decorative finishes. Its longer service life and lower maintenance needs make it a reliable choice for both residential and commercial projects. Ultimately, your selection should align with your project’s demands, budget, and expected longevity.

Must Read : Plywood vs Natural wood – which is best?

Shotcrete – A total overview||Shotcrete vs Gunite

Shotcrete is a method of placing concrete where concrete/mortar is sprayed at high velocity to an overhead or vertical surface. Concrete is conventionally placed on the ground or to the formwork and compacted using appropriate vibration methods.

What is shotcrete? 

Shotcrete is a wet or dry mix of mortar/concrete sprayed to a vertical or overhead surface with high velocity. The mortar/concrete mix is conveyed through a hose and sprayed with a nozzle with high velocity. The force imparted by this application process consolidates the concrete/mortar resulting in an excellent bonding with almost all substrates. Shotcrete is also called sprayed concrete. The pressure will be maintained to around 20-30 N/cm2.

When mentioning about shotcrete another term which is commonly used is gunite or guniting.

Shotcrete process
Shotcrete process

What is gunite or guniting ?

Guniting and shotcrete are more or less the same. The difference between shotcrete and gunite is basically in the method of spraying and mixing ingredients.

Shotcrete spraying is accomplished through either of the following process.

a) Dry mix process

b) Wet mix process

The dry mix process is called gunite or guniting

In Gunite / dry mix process the dry materials are premixed and placed in a hopper. With the help of compressed air, the dry materials are driven to the nozzle. Water gets mixed with the ingredients from a separate source just before going out of the nozzle. The mixed material hit the surface to be applied at a super high velocity through the nozzle.

In the wet-mix process/Shotcrete, the ingredients are premixed with water like conventional concrete and placed in a hopper. Just like the dry-mix process, the wet-mix process uses compressed air to shoot the concrete through a hose. This is also called sprayed concrete were fully mixed concrete or mortar is sprayed through a nozzle.

Shotcrete of walls
Shotcrete of walls

Both these process are used depending on the area of application and site conditions.

Shotcrete vs Gunite – A comparison

Both of these methods have there pros and cons. The uses are distinguished depending on the area of application and nature of the job.

GUNITESHOTCRETE
In the gunite process, we can stop and start the job after some interval, and still, the material will stick on to the old surface due to the high velocity at which the material is applied.Shotcrete material is premixed and to be consumed within a specified time or else the material strength and qualities will be affected.
The applicators get much more work time since the cement mixing is done at the site. With gunite, you can stop and start the application without creating any cold joints. They got super high strength accompanied by low shrinkage.The joints formed in shotcrete due to any stoppage of work leads to a cold joint and the next layer applied after a certain period behaves as a different layer. A cold joint may develop and cracks may happen.
A super-skilled operator is required for gunite. The total quality, consistency, and strength of the gunite depend on the skill of the operator. And the ratio of water, cement sand mix. The nozzle operator controls the application, adjusting water levels as needed to get the right mix consistency.Highly skilled workers are not needed for a shotcrete application. The crew doesn’t have to be as skilled because the concrete comes already mixed and no need for any mixing or proportioning at the site. It’s easier to add specialised admixtures to the concrete
The high water content will ruin the mix and less water content will clog the hose and nozzle. Therefore care should be taken to maintain optimum water content.You don’t need to add water as it comes premixed with water. Sometimes water is added to improve the consistency of the mix in transit mixtures at site. This reduces the strength of the mix and cause shrinkage cracks.
Guniting gives a strong and uniform surfaceShotcrete gives a strong and consistent surface
Gunite produces a lot of oversprays called Rebound wastage. These rebound wastage are not to be reused and generate huge wastes. Disposing and housekeeping the area requires extra manpower.Wastage is less compared to Gunite in case of shotcrete.
Guniting is less expensive than shotcrete. Large-sized aggregates are not used in concrete, and mostly it will a cement-sand mix.Shot Crete is more expensive than gunite and uses aggregate up to 20 mm or as per design mix recommendations.
Completion time is slow compared to shotcreteThe shotcrete process is faster than gunite and got higher production rates.
Gunite is easier to clean up than shotcrete.
The hose is lighter and easier to use
Because you add water at the nozzle, the concrete is very fresh when you spray it.
If the hose gets clogged, it can be tough to clear which could be dangerous for the crew and property

The bottom line is that both gunite and shotcrete have their advantages and disadvantages. The truth is both will produce a high-quality, watertight, durable surface if you do the processes correctly. A super-skilled operator for doing the works improves the quality of the process.

Advantages of shotcrete

Shotcrete-sprayed concrete is increasingly becoming popular because of its extremely economical and flexible application process.

  • Shotcrete has got several advantages when compared to conventional concrete. For swimming pools, water retaining structures shotcrete is an ideal choice. They are easier to spray and admixtures can also be included to enhance mix qualities.
  • Shotcrete is durable and it imparts more strength to structures.
  • The process of application of shotcrete makes the concrete dense and less porous than conventional concrete.
  • They help in reducing shrinkage cracks, cold joints and produce an even, nonporous and durable concrete.
  • They help in reducing the construction time and reduce valuable time and money incurred as formwork costs and makes the work far more easier.
  • Shotcrete/gunite can save money in terms of shuttering, labour costs and can shorten the project delivery schedule.
  • Cold joints and areas where shuttering possibility is minimum can also be done using shotcrete methods.
  • It is possible to create any shape using shotcrete which is not possible using conventional concrete.
Gunite work
Gunite work

Application of Shotcrete/guniting

Shotcrete is extensively used in a wide range of applications due to there ease and flexibility in placing and capability of producing a dense and non porous concrete surface. They are used for..

  • Shotcrete is used for the construction of thin, lightly reinforced sections such as curtain walls.
  • Used for shell or folded plate roofs.
  • Used for underground structures and tunnels, lining works. For pre-stressed tanks, swimming pools, water retaining structures for treatment plants, etc.
  • Shotcrete/gunite is used for repairing deteriorated concrete and retrofitting works.
  • Used for structural steel encasing works.
  • Shotcrete is used for the formation of canal lining, reservoirs, and repairing of linings.
  • They are best suited for applications in underground structures, basement waterproofing works, water retaining structures, deep excavation slope protection, etc.

Disadvantages of Shotcrete/Gunite

  1. The success of shot crete depends on the skill of the operator.
  2. Shotcrete cost is higher than conventional concrete.
  3. Chances of concrete loosing its quality due to delay in spraying or pouring water to increase workability.
  4. Getting a perfect bond with some surfaces is very difficult.

Share this:

Crib retaining walls, Bin retaining walls & Gabion Walls

Retaining walls are rigid walls used for supporting soil laterally so that it can be retained at different levels on the two sides. The soil got a natural angle of repose and when it exceeds the range a retaining wall structure has to be provided.

They are vertical or near vertical structures constructed to hold soil between two terrains when the slope exceeds the natural one. The slope can be vertical or steep or much above the range of angle of repose.

Also read : Retaining walls – All Types, Materials, features and uses

In this article we are mentioning about some special type of retaining walls

Gravity retaining walls are made of stone, bricks, concrete or any other heavy material.  Gravity walls are made with or without mortar They are designed to counter the earth pressure by their self weight. Following are the special types of gravity retaining walls.

a) Crib retaining wall

b) Bin retaining wall

c) Gabion retaining wall

Crib Retaining walls

Crib retaining wall or crib lock retaining wall is one of the oldest types of retaining wall. They consist of cribs or cells made of timber, concrete, and plastic/fibres. The cribs or interlock areas are filled with free-draining materials or earth back-fill, eliminating the hydro-static pressure and enabling a free escape of water.

Most common materials used for crib wall construction is 

  • Timber crib retaining walls
  • Precast crib retaining walls

Timber crib retaining walls

Timber crib walls use timber to form the cells of the crib. The cells are filled with free-draining stone materials for maintaining the mass of the wall. Water drainage can happen freely through the cribs. The timber sections are interlocked to make the walls.
They can also be planted with trees to create a natural appearance. These types of walls are ok up to a height of 5-6 mtrs and mostly used for landscape walls etc.

Timber crib retaining walls

Precast concrete crib retaining walls

This system consists of a precast concrete header and stretcher units. They are erected to form precast crib retaining walls.
Precast concrete cribs are the cheapest form of earth-retaining systems and are used for landscaping structures, plant terraces, and other works with heights around 10- 20 mtr with proper professional design.
They do not require any skilled labour to do the erection. Trees or shrubs are planted to give natural and excellent looks. Crib walls are erected for small curves and are considered a very flexible material.

Precast Concrete Crib retaining walls

Bin retaining walls

Steel bin walls are made from corrugated steel sheets and are usually bolted together and then filled with crushed rock or other free-draining material. They are mostly used for bank erosion protection, holding encroaching slopes, breakwaters, etc. They can resist unforeseen ground movements that may cause failure to other types of retaining walls.

Gabion Retaining walls

Gabion retaining wall systems are one of the oldest forms of gravity wall. Gabion walls are manufactured by factory fabricating a galvanised hexagonal wire mesh of varying diameters into box cages. These box cages are site filled with locally available stones and fully closed and laid in a pattern as per design. They are used in areas where the foundation conditions are not favourable for adopting any other retaining structures. The concept of a gabion wall is to increase the shear capacity of rock by providing the box cages. They can accommodate substantial ground movements without failures. Gabion boxes are free-draining structures that can reduce hydro-static pressure drastically.

Gabion Retaining walls

The main advantage of these types of systems is that they do not need an exclusive foundation structure. Gabion walls are installed directly over the surface in specified patterns according to design requirements.
The mesh is PVC protected or coated with special coatings to protect from rusting in areas subjected to continuous water flow.
These walls provided a Good visual appeal of the product and the satisfying rock finish look.
Gabion walls are erected mainly for soil stabilisation behind the wall. They can also act as a cover wall. The gabion boxes are stacked in layers with a proper design. They are a very economical alternative for concrete retaining walls and rock anchors for soil stabilisation works and slope protection works.

Also read : MSE retaining walls or Mechanically stabilised Earth walls

Types of Retaining walls – All types,materials,features and uses.

Retaining walls are rigid structures used for supporting soil laterally and retained at different levels on the two sides. These structures are vertical or near-vertical. They are constructed to hold soil between two terrains when the slope exceeds the natural angle of repose. The slope can be vertical or steep or much above the range of angle of repose. Understanding retaining wall types is crucial for selecting the right wall based on soil conditions, load requirements, and project design.

Key retaining wall types include gravity retaining walls. These rely on weight for stability. Buttress retaining walls provide extra support. Elements like retaining wall heel and toe enhance stability, making these walls effective and durable solutions.

This article is about the types of retaining walls, materials used and features.

  1. What is a retaining wall?
  2. Design criteria of retaining wall
  3. Retaining wall types
    1. Gravity Retaining walls
    2. Cantilever retaining walls
      1. The loads induced on various components
    3. Counter-fort retaining walls
    4. Buttressed retaining walls
    5. Sheet piled retaining walls
    6. Piled retaining walls
    7. Anchored retaining walls

What is a retaining wall?

Retaining walls are critical engineering structures designed to stabilize and support terrain by restraining soil mass at different elevations. These versatile architectural elements are essential in landscape design, civil engineering, and construction projects. They prevent erosion, manage slope stability, create usable spaces on uneven terrain. Retaining walls provide critical structural support in areas with significant elevation changes.

Engineers and landscape architects utilize various types of retaining walls, each with unique characteristics and applications. The selection depends on factors such as soil conditions and load requirements. Other considerations include site topography, budget constraints, aesthetic considerations, and project design. These factors ensure long-term durability and safety. Common retaining wall types include gravity walls, cantilever walls, and anchored walls, each using distinct methods to provide stability.

Design criteria of retaining wall

The main criteria behind the design of the retaining wall are to counter the downward slope movement of back filled soil by gravity. The lateral pressure developed behind the wall depends on the angle of internal friction & cohesive strength of retained materials. The lateral pressure can also be liquid (hydro-static pressure), and pressure from any type of back-fill material like sand, granular material, fly ash, etc. A proper drainage system is to be provided to reduce the hydro-static pressure.

Retaining wall types

There are several types of retaining wall depends on the nature and type of soil and situations they are to be used.

  • Gravity retaining wall
  • Cantilever retaining walls
  • Counter-fort retaining wall
  • Buttressed retaining wall
  • Sheet pile retaining wall
  • Bored pile retaining wall
  • Anchored retaining wall

There are a lot of innovative and alternated methods used for retaining walls

Retaining wall Types

Gravity Retaining walls

Gravity retaining walls are executed with stone, bricks, concrete, or any other heavy material. They are done with or without mortar and are designed to counter back-fill soil pressure by their self-weight.
Dry retaining walls do not require rigid footing. However, they must be designed to counter sliding. They also need to address overturning and bearing loads acting on the structure.
These types of retaining walls are mainly adopted in landscape areas and also in locations with height is around 2-3 meters.

Gravity retaining wall

Gravity retaining walls are used for larger heights using composite gravity walls. Composite gravity walls include precast crib walls or timber walls filled with granular materials, Gabion walls, Geowalls, etc.
The gravity wall when provided with a small amount of reinforcement is known as semi gravity retaining wall. The load transfer mechanism remains the same as that of gravity retaining walls.

Gabion wall

Cantilever retaining walls

Cantilever retaining walls are the most common retaining wall type. They are reinforced concrete structures wherein the lateral earth pressure is countered by the cumulative action of total structural members.
Cantilever retaining walls consist of a stem, a base slab which is divided into toe slab and heel slab as shown in the figure.

Cantilever retaining walls


The vertical stem wall is extended to the back fill side or heel side and is called a heel slab and the slab on the other side is a toe slab as shown in the figure.
The stem wall, toe slab, and heel slab act as cantilevers fixed injunction and spanning to other ends. The back filling of soil over the heel slabs imposes additional stability against lateral pressure and stabilises the wall against overturning and sliding.

The loads induced on various components

a) Heal slab and toe slab = Upward soil pressure from the bottom and tends to bend upward. Rebar is placed in a tension zone.
b) stem= Lateral earth pressure tends to bend in the opposite direction of back-fill.
These types of walls are economical and can be used for heights around 5-7 mtr. They are much lighter than gravity walls and require comparatively small foundations. These types of walls can be constructed as to cast in situ and precast and prestressed concrete depending on the site requirements.

Prestressed retaining wall & Retaining wall

Counter-fort retaining walls

Counter-fort retaining wall is a cantilever retaining wall used when the height is around 7 mtr or more. For economising the structure, vertical bracing called counter-forts are provided on the back fill side. These counter-forts connect the heel slab and stem as shown in the figure. The stem and heel slabs between counter-fort act as continuous slabs and negotiate the high bending movements. The counter-forts function as tension stiffness and reduce the bending and shear stresses. These types of retaining walls are used for heights ranging from around 8-12 mtr.

Counter-fort Retaining walls

Buttressed retaining walls

Buttress retaining walls have the vertical bracing located on the front side of the retaining wall in place of the back-fill side like that of counter-fort retaining walls. The structural action of the stem remains the same as the counter-fort walls.

Sheet piled retaining walls

Sheet pile walls are erected using steel sheets into a slope to be protected or for excavations up to a required depth. Sheet pile retaining wall economical till a height of 6m and cannot negotiate huge loads. Sheet pile acts as a temporary wall that is driven into the excavation area for protecting the area from collapsing. They provide high resistance to driving stresses. They can also be reused and are considered the most economical retaining solutions. They can be bolted and driven easily and do not deform on driving. The problem with sheet piles is the noise it creates while driving.

Sheet pile

Piled retaining walls

These types of retaining walls consist of a sequence of bored piles. The bored piled retaining walls are often accompanied by erection earth anchors, shot-creating the pile gaps, and provision of additional supports depending on the site conditions and designs. Bored pile retaining walls are used in areas where sheet pile tends to create a lot of noise and disturbs the areas.
These types of piles are used for temporary and permanent works. They can hold huge lateral pressure and are used for holding earth for high depth excavations without disturbing the nearby structures. Bored pile retaining walls are classified into contiguous pile walls, tangent pile walls & secant pile walls according to the sequence of piling works.

Piled retaining wall

Anchored retaining walls

Anchored retaining walls, also known as tie-back systems, are essential structural components used in construction. They are mostly used to stabilize earth and as support structures. Anchored Retaining walls deliver lateral support to walls. They prevent soil from shifting or eroding. These walls are commonly used in applications like deep excavations, embankments, and hillside retention etc.