Fiber-reinforced concrete (FRC), an advanced form of Reinforced Cement Concrete is finding wide applications these days. Fiber-reinforced concrete (FRC) is a versatile and durable composite material consisting of a cementitious matrix with uniformly dispersed fibers. The addition of discontinuous, discrete fibers to cement, mortar or concrete mixes can enhance the concrete properties. Ever thought why do we add different kinds of fibres to the Reinforced Cement Concrete and what are the different types of fibres that we add? Stay with me till the end of this blog and we will find answers to all these questions.
Before proceeding further, make sure you check out our blog, Reinforced Cement Concrete (RCC)|Definition|Advantages to have your concepts clear.
First, let’s have a look at the basics of fiber-reinforced concrete and its applications.
What is Fiber-reinforced concrete?
Fiber-reinforced concrete (FRC) is a versatile and durable composite material consisting of a cementitious matrix with uniformly dispersed fibers. The addition of discontinuous, discrete fibers to cement, mortar or concrete mixes can enhance the concrete properties. These fibers act as reinforcement throughout the concrete matrix, and control cracking due to plastic shrinkage and drying shrinkage. Fiber-reinforced concrete reduces the permeability of concrete and reduces water bleeding.
Fiber reinforced concrete finds extensive applications in various infrastructure works, industrial flooring works and other construction works that demand enhanced durability and crack control. FRC improves the flexural and impact resistance and hence we prefer it for structures subjected to dynamic or heavy loads.
Now, let’s discuss the reason behind the addition of fibres to the reinforced concrete.
Principle of Fiber-reinforced concrete
Fibre-reinforced concrete uses discrete fibres to improve its mechanical properties, making it stronger, more durable, and resistant to cracking. Fiber is a small piece of circular or flat reinforcing material possessing certain characteristics and properties. These fibers are of steel, glass, synthetic polymer fibers and natural fibers like jute or hemp.
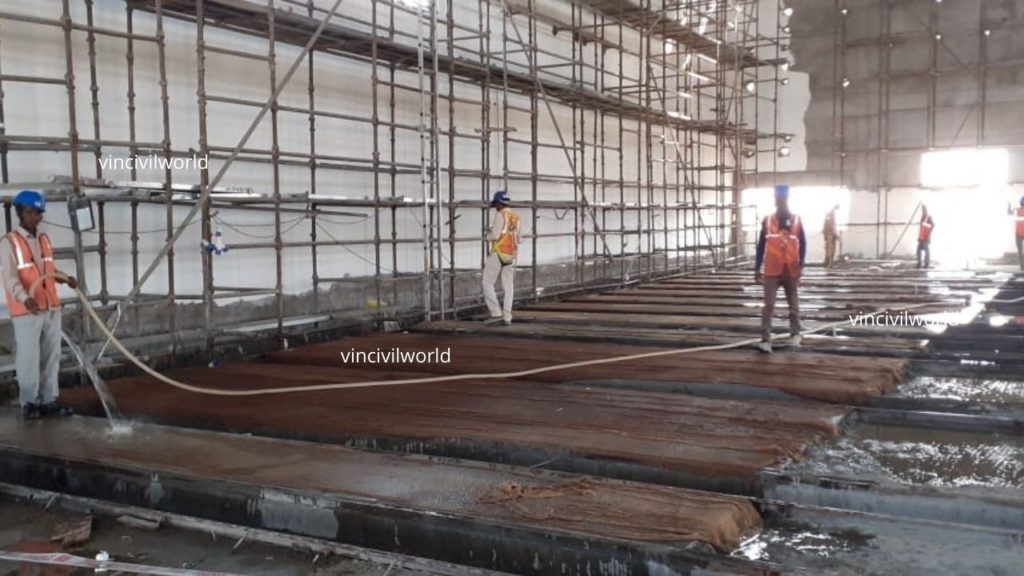
Fibers are available in various sizes ranges from a few millimeters to a few centimetres. They are uniformly distributed throughout the concrete matrix. The features of Fiber reinforced concrete depends on the character and percentage, diameter and length of fibers and water-cement ratios. Typically fiber reinforced concrete is used in shotcrete but can also be used in normal concrete.
The addition of fibres to concrete controls the shrinkage cracking, lower permeability, and reduce water bleeding. Some fibers enhance impact, abrasion, and shatter resistance. However, they do not increase flexural strength or replace structural steel reinforcement.
We measure the amount of fiber as a percentage of total volume (Vf) and typically ranges from 0.1 to 3%. Aspect ratio (l/d) affects strength and toughness, but long fibers can hinder workability. Recent research shows limited impact resistance improvement, with microfibers performing better than longer fibers.
Types of Fiber-reinforced concrete
The type of fiber-reinforced concrete depends on the nature of the structure and applications. Let us have a look at the most common types of fibre reinforced concretes commonly used in construction.
- Steel Fiber Reinforced Concrete
- Polypropylene Fiber Reinforced (PFR) Concrete
- GFRC Glass Fiber Reinforced Concrete
- Asbestos Fibers
- Polyester fiber
- Carbon Fibers
- Macro synthetic fibers
- Organic Fibers
- Cellulose fibers
- Micro-synthetic fibers
- Synthetic Fiber Reinforced Concrete (SFRC)Natural Fiber Reinforced Concrete (NFRC)Carbon Fiber Reinforced Concrete (CFRC)Basalt Fiber Reinforced Concrete (BFRC)Nylon Fiber Reinforced Concrete (NyFRC)Polyvinyl Alcohol Fiber Reinforced Concrete (PVAFRC)High-Performance Fiber Reinforced Concrete (HPFRC)
Steel fiber-reinforced concrete
SFRC is a composite material that includes a certain amount of steel fibers in the concrete mix. These fibres can change the properties of concrete and thereby enhance the performance of concrete. The typical diameter lies in the range of 0.25 to 0.75mm. Steel fibers having a rectangular c/s are produced by silting the sheets about 0.25mm thick.

SFRC offers numerous advantages, including improved tensile strength, crack resistance, impact resistance, and durability. The steel fibers act as reinforcement, effectively bridging cracks and enhancing the concrete’s structural integrity. The steel fiber types are as per ASTM A.820 Type I: cold-drawn wire, Type II; cut sheet, Type III: melt-extracted, Type IV: mill cut and Type V: modified cold-drawn wire.
SFRC finds applications in industrial floors, pavements, tunnels, and precast elements, where increased toughness and load-bearing capacity are required. It is also widely used in applications prone to dynamic loading, such as blast-resistant structures and earthquake-resistant buildings.
Glass fiber-reinforced concrete
Glass Fiber Reinforced Concrete (GFRC) is a composite material incorporating fine glass fibers into the concrete mix. These fibers, typically around 3-12 mm in length, enhance the concrete’s strength, durability, and flexibility. GFRC is commonly used in architectural applications, such as cladding, facades, and decorative elements, due to its lightweight nature and ability to create intricate designs.

You can get the full details about glass fiber-reinforced concrete here. Glass Fiber Reinforced Concrete – GFRC Ingredients and Uses
Polypropylene Fiber Reinforced Concrete (PFRC)
Polypropylene Fiber Reinforced Concrete (PFRC) is a composite material that combines polypropylene fibers with concrete. One of the cheapest & abundantly available synthetic fiber/ polymer is polypropylene. They are resistant to most chemicals and only the cementitious matrix will deteriorate first. These discrete fibers, typically ranging from 6 to 30 mm in length uniformly dispersed in concrete will control cracking due to plastic and drying shrinkage.
We usually use these fibers in concrete to control cracking due to plastic shrinkage and drying shrinkage. The fibers act as reinforcement and reduce the permeability of concrete and thus reducing the bleeding of water and improving crack resistance, impact resistance, and durability. Polypropylene fibers being hydrophobic can be easily mixed as they do not need lengthy contact during mixing and only need to be evenly distressed in the mix.
Polyester fiber reinforced concrete
Polyester fiber-reinforced concrete is a composite material that incorporates polyester fibers into the concrete mix. These fibers, typically short and discrete, improve the concrete’s toughness, crack resistance, and impact resistance. Polyester fibers due to the high tensile strength and resistance to alkalis make them suitable for various construction applications that demand enhanced durability.
Carbon fibers
Carbon fiber reinforced concrete (CFRC) is a composite material that combines concrete with carbon fibers about 5-10 microns in diameter having carbon atoms. The carbon fibers, known for their exceptional tensile strength and stiffness, low weight, high chemical resistance, high-temperature tolerance and low thermal expansion impart their qualities to the concrete.
We manufacture carbon fibers by baking plastic resins. They have high strength-to-weight ratio. Carbon fibers form the most recent and probably the most spectacular addition to the range of fiber available for commercial use. Since they are more vulnerable to damage than even glass fiber, we generally treat them with resin coating.
Macro synthetic fibers
Macro synthetic fibers are synthetic fibers used as reinforcement in concrete. These fibers, typically longer and thicker than traditional fibers, are manufactured from a blend of polymers. These fibers are developed for shot create or sprayed concrete. But they find extensive applications in floor slabs for enhancing the concrete’s toughness, crack resistance, and impact resistance.
They offer improved durability and control of plastic shrinkage cracking. This makes them suitable for various construction applications in marine and coastal structures which require enhanced performance and reduced maintenance.
Advantages of fibre-reinforced concrete
- Enhanced Durability: FRC increases the impact, fatigue, and abrasion resistance of concrete structures while minimising cracking. It increases the tensile strength and durability of the concrete.
- Crack prevention: The use of fibres reduces the spread and enlargement of cracks by controlling plastic and drying shrinkage cracking.
- Permeability Reduction: Fibres make concrete less permeable, which reduces water bleeding and improves resistance to moisture infiltration.It reduces the air voids and water voids and the inherent porosity of gel.
- Improved Impact Resistance: Certain types of fibres enhance the impact resistance of concrete, making it more resilient against sudden loads and external forces.
- Increased Toughness: The bridging action of the fibres, which absorbs energy and prevents abrupt failure, gives FRC an improved level of toughness.
- Design Flexibility: Using fibres in concrete allows for design flexibility, enabling the creation of complicated shapes and architectural freedom.
- Simplicity: Using fibre reinforcement instead of or less frequently than standard steel reinforcement simplifies construction operations.
- Better Workability: Fibres can make concrete mixes more workable and cohesive, making placement and compaction easier.
- Corrosion Resistance: In some circumstances, fibre reinforcement can reduce the likelihood that concrete buildings will corrode.
- Sustainable: Fibre-reinforced concrete is a sustainable solution since it can increase the longevity of structures and lessen the reliance on non-renewable resources.
- Creep Resistance: Fibres such as graphite and glass have excellent resistance to creep, while the same is not true for most resins. Therefore, the orientation and volume of fibres have a significant influence on the creep performance of rebars/tendons.
Shall we wrap up?
Conclusion
In this blog, we saw the properties, uses, types and advantages of fiber-reinforced concrete. If you have any queries please feel free to ask in the comments.