Monolith- The Technology, Merits and Demerits Full Guide

Monolith is a well-known concept in the world. The technology is used to construct high-rise buildings and skyscrapers. The monolithic structure can withstand high loads (up to 8 points) without being broken, which makes it a suitable candidate to be used in seismic zones.

Let’s look at what monolithic houses are, their benefits and drawbacks, and the construction process.

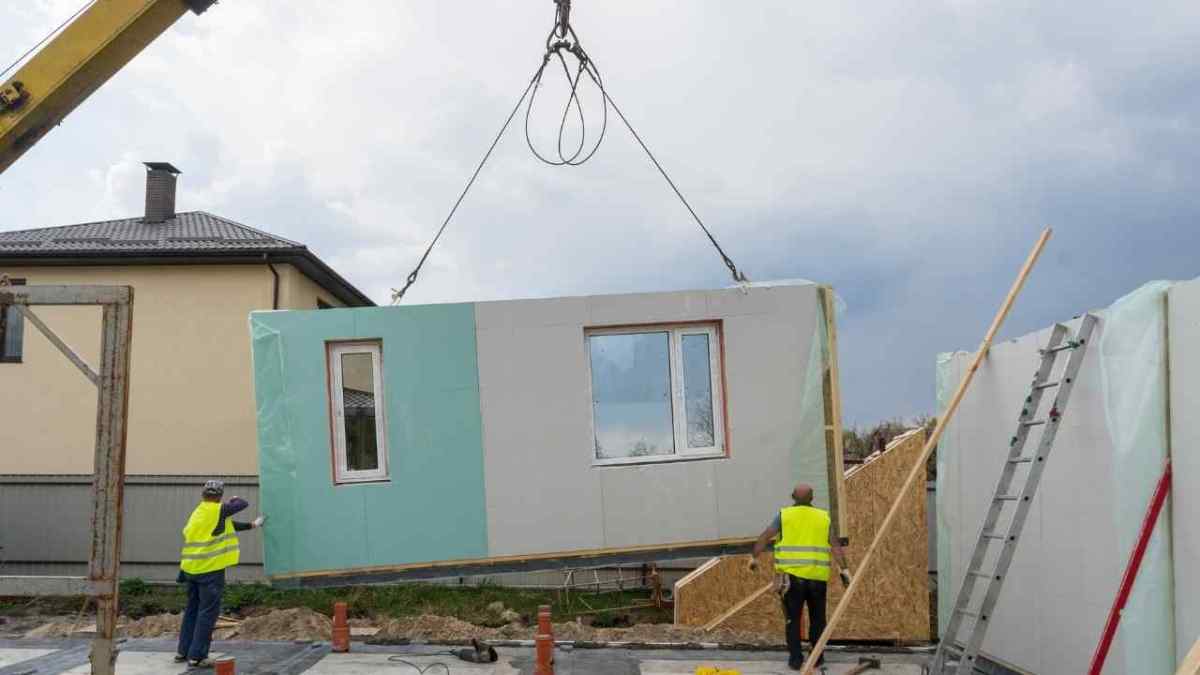
The Technology of Monolith building

Monolith
Monolith

The technology’s essence lies in pouring reinforced concrete sections of a monolithic house during erection. Since there is no load on this part of the wall, any sound (brick, block, sheet) or low-strength material (wood, PVC panel with insulation, glass) may be used to fill the gaps between slabs.

In this technology a few variants of the frame are used:

Steel rods of various diameters are used to make the reinforcement cage for a monolithic building. Many of the frame’s components are welded or bound together. However, since it takes more time and effort, the last bonding technique is rarely used.

Formwork construction

Circular or stay-in-place formwork is used for this housing. A framework structure is a large sound panel (panel formwork) or prefabricated pouring form (tunnel formwork) that prevents the concrete mixture from flowing and allows the shape to be saved during the setting time.

There are various types of formwork construction in use:

  • Horizontal
  • Vertical
  • Creeping
  • For rounded elements

In apartment buildings, monolithic houses with stay-in-place formwork are more popular. There are single-story monolithic cottages.

Concrete mixture and grouting

Concrete mixtures may be manufactured immediately on the building ground in a mixing batch or a special concrete goods plant, depending on the monolithic construction scale. In the second case, concrete is transferred to the moto mixer.

Works with setting concrete

The concrete is densified after it has been filled into a formwork. This phase is required to remove airlocks, which impede the mixture’s efficiency. The per vibrator or external vibrator is used to densify the concrete mixture. The smoothness of the surface of the walls and ceiling is influenced by the consistency of the densification of the concrete mixture, which in turn affects the fine finish budget.

Form stripping

After the concrete has reached the required strength, the formwork is removed and passed on to the next stage of grouting.

Merits and Demerits of Monolith Building

Monolith Building
Monolith Building

Monolithic houses have both benefits and drawbacks. Let’s make a distinction between them.

One of the prime benefits would be the speed of construction. Monolithic buildings, which are similar to brick houses in design, are constructed faster than the previous ones. Equality of design is also a compelling point.

The majority of houses are constructed in a specific pattern that is characterized by their constructional peculiarities. A monolithic building, on the other hand, has no bounds. Plans for such houses can be varied, multilevel, and have ceilings of varying heights, which is not typical of block or brick houses.

The complete absence of open joints in a monolithic house has a range of benefits, including:

  • Increase in sound isolation level
  • Thermal insulation improvement
  • Extension of house life
  • Increase in strength
  • Protection from cracking
  • Lowering of construction weight

You should pay attention to its disadvantages also Monolithic structures permit the easy propagation of sound and vibrations making soundproofing of the rooms a difficult task. Also, it demands a large amount of finishing work.

Shape tests on Coarse Aggregates- Flakiness index test and Elongation Index Tests.

Shape test on coarse aggregates constitutes flakiness Index and elongation index tests. The particle size and shape of aggregate is one of the major factors affecting the quality of the concrete.

Shape test on Coarse Aggregates

  • Flakiness index test
  • Elongation index test

Must read : Aggregate crushing test- Strength of aggregate

Must read : Bitumen – 9 lab tests on bitumen for flexible pavements.

Shape test on coarse aggregate – Flakiness index test

The particle shape of aggregates is determined by the percentages of flaky and elongated particles contained in it. for concrete and construction of bituminous works the presence of flaky and elongated particles are not suitable and cause failures and breaking during heavy loads.

The Flakiness index of aggregates is the percentage by weight of particles whose least dimension (thickness) is less than three- fifths (0.6times) of their mean dimension. This test is not applicable to sizes smaller than 6.3mm

The Elongation index of an aggregate is the percentage by weight of particles whose greatest dimension (length) is greater than nine-fifths (1.8times) their mean dimension. This test is not applicable for sizes smaller than 6.3mm.

Flake materials may cause voids in concrete and has to be kept under limit to ensure the quality of the concrete.

Relevant IS codes: 

  • IS:2386(PartI)-1963

Apparatus used

  • Weighing machine
  • Metal gauge
  • IS sieve

Test procedure

First we have to find the flakiness index.

Dimensions of thickness and length gauges
  • For finding the flakiness index, we have to test at least 200 pieces of any fraction and weigh them.
  • Then sieve the sample through IS sieves according to the table below.
  • After that to determine the flakiness index separate the aggregate retained in the sieve.
  • Then pass each aggregate through the corresponding slot in the thickness gauge.
  • Finally, we calculate the flakiness index.
  • The flakiness index is the total weight of material passing through the gauge to the total weight of the sample. It is expressed in terms of percentage. Weigh the flaky material passing the gauge to an accuracy of at least 0.1 per cent of the test sample.
  • The formula for flakiness index is

F.I = (Weight of aggregate passing through the slot of the thickness gauge / Total weight of the sample) * 100

Thickness gauge
Thickness gauge

Must read : Los Angeles abrasion test on aggregates

Shape test on Coarse Aggregates- Elongation index test

The presence of elongated particles in the aggregate is undesirable for construction. Also, this shape test is made in coarse aggregate. The elongation shape test is not applicable for aggregates with a smaller size than 6.3 mm.

Relevant IS codes: 

  • IS:2386(PartI)-1963

Apparatus used

  • Weighing machine
  • Metal gauge
  • IS sieve

Test procedure

  • For finding the flakiness index, we have to test at least 200 pieces of any fraction.
  • Then sieve the sample through IS sieves according to the table below.
  • After that pass, each fraction through the gauge individually.
  • Now using a weighing machine, weigh the total amount of fraction retained.
  • Finally, we calculate the elongation index.
  • The elongation index of an aggregate is the weight of the particle whose greatest dimension is greater than 1.8 times its mean dimension.
  • The formula for elongation index is 
Shape test on aggregates

E.I = Weight of the aggregate retained on length gauge / Total weight of aggregate x 100

Conclusion

The shape tests give only a rough idea of the relative shapes of aggregates. Flaky and elongated particles should be avoided in pavement construction, particularly in surface course.

Timber – 5 Important Quality Tests and Procedures.

Timber is wood suitable for construction purposes. In order to find the quality and sustainability of the Timbers, Various Quality tests are performed.

They are natural polymeric material that nearly does not age. Moreover, the structure of the wood ensures efficient strength and load capacity.
Wood can be split into two classes. They are natural and man-made. Hence some examples of man-made timber are plywood, fibreboard, impregnated wood, etc.

PROPERTIES OF GOOD QUALITY TIMBER

The timber should posses the following qualities.

  • It should have a good uniform dark colour.
  • Timber should be free from defects such as shakes, flaws, dead knots, etc.
  • It should possess regular annual rings.
  • The freshly carved surface of the wood should have a sweet smell.
  • Moreover, It should have a heavyweight.
  • The cellular tissue and fibres should be compact and hard.
  • A good timber should be durable and possess elasticity. 
  • It should be resistant to fungus, insect, etc.
  • Also, timbers with compact texture have good resistance to fire. 
  • It should be inert from mechanical, chemical and physical agencies.
  • A good quality wood should hold loads from structures.
qualities of good timber

Also Read : Bitumen – 9 lab tests on bitumen on flexible pavement

Also Read : Bricks – 8 Reliable tests to ensure quality.

TEST ON TIMBER

In order to find the quality and sustainability of the Timbers, Various Quality tests are performed. In this article, we have listed a few test procedures.

  • Moisture content test
  • Tensile strength test
  • Compressive strength test
  • Shear strength test
  • Bending test

MOISTURE CONTENT TEST OF TIMBER

This test determines the moisture content in wood. However, wood contains a small amount of moisture content. A weighing machine and a drying oven are important apparatus for the water absorption test. 

moisture content test of timber

Relevant IS codes:

IS I 2380 ( Part VI ) – 1977

Test procedure

  • Initially, Take the specimen with a size of 5cm x 5cm x 2.4cm.
  • Then using a weighing machine weigh the specimen. Mark it as W1.
  • After that oven-dry the timber at a temperature of 103-degree celsius. 
  • Later, take out the specimen when becomes dry.
  • Again weigh and mark the weight of the dry specimen as W2.
  • Finally, calculate the percentage of moisture content by

% of moisture content = Weight of moisture in sample/ Dry weight of sample = (W1 – W2)/ W2

TENSILE STRENGTH TEST OF TIMBER

The tensile strength test defines the strength and ability to withstand breaking. Also, we can determine the load-carrying capacity of the wood.

Relevant IS codes:

IS I 2380 ( Part VI ) – 1977

Test procedure

Tensile test on timber
  • Firstly, take a specimen with 5cm x 5cm and 20cm in length.
  • Then place the specimen on the base plate of the instrument. 
  • After that apply load either parallel or perpendicular to the grains. 
  • Mark the load at which the wood breaks.
  • Finally, calculate the tensile strength of the wood.

Tensile strength = Maximum load applied / Cross sectional area

COMPRESSIVE STRENGTH TEST

The compressive strength test defines the crushing strength of the timber. Furthermore, this test determines the load which the wood can support over a period.

Relevant IS codes:

IS I 2380 ( Part VI ) – 1977

Test procedure

Compressive test
Compressive test
  • Initially, take a specimen with a size of 5cm x 5cm x 20cm. 
  • Then place the specimen in the compressive testing machine.
  • Following this, apply load parallel to the grains.
  • The specimen should be free from defects. Gradually increase the load.
  • Then note down the load at which the timber breaks. 
  • Lastly, calculate the compressive strength from the below formula.

Compressive strength = Load at which the specimen breaks/ Total area of the specimen

SHEAR STRENGTH TEST

The shear strength is important when timber is used as slabs. The load should be applied parallel to the grains. 

Relevant IS codes:

IS I 2380 ( Part VI ) – 1977

Test procedure

Shear test apparatus
  • The size of the specimen for shear strength is 5cm x 5cm x6.25 cm. 
  • Then cut the corner of the specimen.
  • Thus it produces failure on 5cm x 5cm surface.
  • However, this failure occurs tangentially or radially. 

BENDING STRENGTH TEST

The Bending strength test is necessary when we use timber as a beam. Through this test, we can find the modulus of rupture and modulus of elasticity.

Relevant IS codes:

IS I 2380 ( Part VI ) – 1977

Test procedure

Bending test on timber
  • For this, take a specimen of 5cm x 5cm x 7.5 cm in size
  • The specimen should be free from defects and deterioration.
  • Then drop a hammer with specific weight from a certain height.
  • Thus we get the impact bending.
  • Lastly using the load and deflection, calculate bending strength.

Also Read : Los Angeles abrasion test on aggregates

What is Prefabrication in construction? Advantages and Disadvantages

Prefabricated construction, or “prefab,” is a method of construction that  uses components made off-site in a factory, which are then transported put together on-site to create a structure. Prefabrication is an amazing technology that helps to reduce time and have many more benefits.Construction has always been about the speed and efficiency that can be ensured with the materials and techniques of construction.

In this blog, we will find out all the details about the same.

Let’s start from the definition.

What is prefabrication?

Prefabricated construction, or “prefab,” is a method of construction that uses components made off-site in a factory, which are then transported put together on-site to create a structure.

With different advantages to offer, there are a few different common types of prefab. You may want to consider incorporating any of these solutions, depending on your particular building project.

So, that’s the basic details. We will discuss about the benefits in next section.

Other related posts from vincivilworld

Benefits of prefabrication

Prefabrication setup

1. Mitigating the labour shortage:

  • It is already difficult for contractors to find labour, but construction still needs to take place.
  • It decreases labour productivity much more as on-site building continues piecemeal.
  • Therefore, prefabrication helps businesses speed up timelines, make the most of their on-site labour, improve efficiency, and succeed in the marketplace.

2. Cost-effectiveness:

  • It also costs less to transport partial assemblies from a factory than to move pre-production resources to each site.
  • Plus, as labour efficiency increases, personnel-related costs decline.

3. Time savings:

  • Time is the essence of the rainy season, and prefabrication will help you manage tighter timelines.

4. Quality control:

  • Factory tools can provide added quality assurance as opposed to repetitive construction on-site.
  • In addition, consistent factory indoor environments remove much of the weather effects on manufacturing, while streamlined manufacturing and production improve job site safety on the whole.

5. Lower environmental impact:

  • Accelerated offsite production of parts results in reduced emissions and work disruption.
  • This preserves wetlands or protected areas nearby and minimises local flora and fauna disturbance.
  • The controlled, dry environment of modular construction saves water consumption and allows scrap and other materials to be recycled.
  • Plus, fossil fuel consumption plummets with less on-site traffic and streamlined transportation.

6. Better safety and security:

  • By reducing a construction site’s timeframe, you simultaneously decrease the amount of time that the site is vulnerable to vandalism or robbery.

7. Flexibility:

  • It is easy to disassemble and move modular construction to various sites.
  • This greatly decreases the demand for raw materials, minimises the resources spent and overall reduces time.
  • Modular construction also allows for versatility in the structure’s design, allowing for an infinite number of possibilities.
  • Since prefabricated building units can be used in various spaces, their neutral aesthetics can be combined with almost any form of construction.

8. Reduced Site Disruption:

  • There is much fewer truck traffic, machinery and material suppliers around the final construction site as several parts of a building are completed in the factory.
  • The disturbance of conventional workplaces suffering from noise, emissions, waste and other common irritants is therefore minimal.
  • This structured design approach offers a much more productive productivity environment and removes unwanted disruptions and interruptions typical of construction sites.

Time to know the challenges of prefabrication.

Challenges of Prefab Construction

Construction site of prefabricated building
  • The joints to be given should be well-built enough to convey all sorts of stresses, connecting the core structure and the components.
  • The strength and solidity of the whole building totally depend on the strength of the joint.
  • Therefore, rather than component-based analysis, it is important to have detailed studies on the whole system.
  • One of the key challenges in embracing prefabrication technology in construction requiring accuracy and precision is the need for skilled labour on-site and the lack of on-site automation.
  • Skill development and native automation are also mandatory for prefabricated systems to be installed.
  • It is likely to get damaged during the erection or transport of heavy machinery units, so the arrangement of the units must be performed precisely and this process in a congested area becomes sloppy.
  • Labour maintenance is another concern because prefabricated construction requires skilled labour as it differs from in-situ construction, which requires machine-oriented expertise both on-site and in the production process.

Now, let me show you the advantages of prefabrication

Advantages of Prefabrication

  • Prefabrication technology has several advantages, such as energy efficiency revision, minimal waste and inspection, efficient construction, work speed, protection, sustainability and quality.
  • As self-supporting ready-made components are used, the need for formwork, shuttering and scaffolding is substantially lowered.
  • Building time is thereby decreased, resulting in lower labour costs.
  • Reduced the quantity of waste materials relative to building on site.
  • Reduction in construction time to allow an earlier return of the invested principal.
  • Construction guarantees precise compliance with building codes and excellent quality assurance.
  • Along with quality control and factory sealing, high-energy performance.
  • It is possible to place prefabrication sites where skilled labour is more readily accessible and the costs of labour, electricity, materials, space and overhead are reduced.
  • Prefabrication permits building throughout the year, regardless of the weather (related to excessive cold, heat, rain, snow, etc.).
  • Material waste from the building is less.
  • Regardless of climatic conditions.
  • Security and worker comfort levels are higher in the off-site building.

Last, but not the least the disadvantages should be known.

Disadvantages/Limitations of prefabrication

Material assembly for prefab construction

The subsequent constraints are known to have restricted design choices, decreased reselling value, high initial expenditure, non-suitability for foundation and precast unit transport.

There are even more drawbacks. They are the following:

  • Leakage occurs in joints in prefabricated parts.
  • For huge prefabricated parts, transportation costs can be high.
  • To ensure affordability through prefabrication, increased production volume is required.
  • Initial costs for construction are higher.
  • The initial production of designs is time-consuming.
  • Large prefabricated parts require heavy-duty cranes and measurement of precision from handling to position on site.
  • Local employment can be lost, as skilled labour is needed.
  • Modular building design and construction requires high levels of cooperation between project parties, particularly architects, structural engineers and manufacturers.
  • These buildings usually depreciate more rapidly than standard site-built housing due to their shorter economic existence.

Hope the time you spent for the article was worth it. Let me know if you have any doubts in comments.

Happy learning!

Aggregate crushing test to find Strength of aggregate

Aggregate crushing test is done to find out the strength of aggregate which is the fundamental and essential components of concrete, flexible pavements, etc. More than 70 to 80 per cent of the volume of concrete is aggregate. Aggregates are a very important component of concrete, so the quality really matters when it comes to aggregates. Furthermore, their uses include flexible pavements, railway ballast, etc.

Different tests are to be performed to ensure the quality requirements of aggregates for the specific uses.

Tests on aggregates

Different types of tests are done to determine their properties like

  • Strength
  • Toughness
  • Hardness
  • Shape
  • Water Absorption etc.

Must Read : Bricks – 8 reliable tests to ensure quality

Must Read : Bitumen – 9 Lab tests on bitumen for flexible pavements

Following are the types of aggregate tests conducted to ascertain the suitability of aggregates.

  • Aggregate Crushing test
  • Abrasion test
  • Impact test
  • Water absorption test
  • Flakiness index test
  • Elongation index test
  • Bulk specific gravity test
  • Polishing test

Aggregate Crushing test (IS 2386(Part 4):1963 & BS 812110:1990)

Aggregate crushing test values indicates the strength of aggregate and hence it is very significant. Similarly we can say crushing value is the relative measure of resistance of an aggregate under gradually applied compressive loads. Higher crushing strength means lower crushing value and vice versa. If the aggregate crushing value is less than 10, means an exceptionally strong aggregate, Whereas crushing value of 35 and above means a weak aggregate.

Relevant codes for aggregate crushing test

  • IS 2386(Part 4):1963
  • BS 812110:1990

Apparatus required

  • Compressive Testing Machine
  • Crushing Mould: A steel cylinder 15 cm diameter with plunger and base plate.
  • Weighing machine,
  • Sieve: Size of 12.5 mm, 10 mm and 2.36 mm
Aggregate crushing value test apparatus

Aggregate crushing Test procedure

  • Oven dry the aggregates
  • Firstly, sieve the aggregate using Indian standard sieves.
  • Then collect the specimen passed through 12.5 mm and retained on a 10mm sieve.
  • Thus is the test sample of aggregate.
  • Then put the cylinder on the base plate and weight it (W). 
  • The aggregate sample should be filled in 3 layers , each layer is subjected to 25 strokes using tamping rod.
  • After that weigh the materials with cylinder and record as (W1)
  • Weight of aggregate will be (W1-W). ie : (Weight of cylinder with aggregates – Weight of cylinder)
  • Level the aggregate surface carefully before inserting the plunger so that it rests horizontally over the surface.
  • Place the cylinder with plunger below a compression testing machine.
  • Apply load at a uniform rate so that a total load of 40T is applied in a span of 10 minutes.
  • Then release the load and remove the material from the cylinder.
  • Following, sieve again on 2.36mm IS sieve. 
  • Then weigh the material passing through the sieve and record it as W2. 
  • Finally, calculate the specimen crushing value using the formula below. 

Aggregate crushing value = (W2 x 100) / (W1-W)

W1-W = weight of dry sample

W2 = Weight of fraction passing through the sieve after application of load.

For a good quality aggregate, the crushing strength value is low.

Recommended crushing values

Flexible pavementsCrushing value
Soling50
Water bound Macadam40
Bituminous macadam40
premix carpet30
Dense mix carpet30
Rigid pavements
Other than wearing course45
Surface or Wearing course30

The aggregates used in roads and pavement construction must be strong enough to withstand crushing under roller and traffic. If the aggregate crushing value is 30 or higher’ the result may be anomalous and in such cases the ten percent fines value should be determined instead.

Reservoir vs Dams || Reservoir- Types and functions

Reservoirs are artificial or natural structures used for collecting and storing for further usages. The reservoir is formed by constructing dams across rivers, valleys, and streams. The Reservoir is located on the upstream side of dams and prevents floods by managing the water flow apart from serving as a storage basin.

Also Read : Types of Dams – 3 Classification Criteria Explained.

Also Read : Components of a bridge – Types and Functions Explained

Functions of Reservoirs

Reservoirs are man made lake or a fresh water body that plays an important role a lot of ways as listed below.

  • Water supply
  • Flood control
  • Environmental management
  • Hydroelectric power management
  • Navigation
  • Irrigation
  • Development of fish and wildlife
  • Soil conservation
Reservoir behind dam

Also Read : Components of a dams-12 Dam Components explained.

Types of reservoirs

Reservoirs are broadly classified into three types.

  • Valley dammed reservoirs
  • Back-side reservoirs
  • Service reservoirs

Valley dammed reservoirs

Valley dammed reservoirs are located between mountain valleys where there is an existing water body. A dam is built in the narrowest portion for holding the water.

Bank-side reservoirs

Bank side reservoirs are made by diverting water from rivers and streams to an existing reservoir. These reservoirs can be located in different geographical locations.

Service reservoirs

Service reservoirs are man made reservoirs located above the ground or below the ground. The huge water towers/ water tanks and sumps are service reservoirs.

Service Reservoir
Service reservoir

Reservoir components and terms

There are some specific terms for defining the water level and storage capacity of a reservoir

Pool level

The water level at a particular point of time is called the pool level. No water can be collected above the maximum pool level. No water can be drained below the minimum pool level.

Useful Storage

The volume of water within the normal pool level and minimum pool level is known as useful storage.

Dead storage

The volume of water underneath the minimum pool level is known as dead storage.

Surcharge Storage

The volume of water within the normal pool level and maximum pool level is known as surcharge storage.

Reservoir yield

The volume of water discharged within a certain interval of time is reservoir yield.

Reservoir Planning

Accurate planning is necessary for locating a reservoir. For planning a reservoir the following points are taken into consideration.

Topography

A Broad natural valley opts as the site of a reservoirs. The valley can be U- shaped or V-shaped. For reservoirs sites, flatland and plains are not considered.

Ground water condition

The groundwater investigation is done by analysing the water table level and reservoir level.Hence it is an ideal situation for the reservoirs site if the water table level and the top reservoir level is the same. No loss or gain is ensured.

Permeability

Permeability is a default nature as the rocks are porous. It is considered when the water table is below the reservoirs level. It is a significant characteristic for investigation.

Hydrological Investigation

This involves the study of runoff pattern. Leakage quantity should be minimum. Storage capacity calculation and maximum discharge rate are also estimated.

Difference between dams and reservoirs

DAMSRESERVOIR
Structural barriers built across,rivers
valleys,streams etc for the purpose of
storing and managing water flow.
Reservoir is a large water body formed behind the constructed dam structure across a river,stream,etc
Dams are reinforced concrete structures or structures made of bricks rubble etc erected across water bodies to control the water flow.The reservoir is the water that accumulates behind the constructed dam.
Create site for hydro electric power generation. This can improve the industrial development and living standards of people living in that region.Stores water for later usage, water for human consumption and excess water for agricultural and industrial uses.
Dams fluctuates oxygen levels and restricts migration of fishes in the river.Reservoirs leads to the displacement of people.
Dams are tourist attraction sitesHelps in water transportation

Reservoir Sedimentation

Rivers transport sediments. During heavy rainfall, sediments are carried by the water to the reservoir. Silts are accumulated due to soil erosion. These get collected in the dead storage.
Sedimentation depends on Rainfall intensity, Soil nature, Soil type, topography and vegetation. The sediment deposit replaces the water storage. Thus water supply and flood control are affected.
The sediments should be removed eventually. Hydraulic flushing, dredging, Explosive mobilization are methods adopted for sedimentation removal.

Reservoir
reservoir

Environmental impacts of Reservoirs.

  • The construction of the reservoir prompts severe effects on the environment.
  • Since the water is stored, the rate of transpiration is high. This changes the moisture concentration.The climate of the surrounding area is affected. It causes natural temperature fluctuation. This causes heavy rainfall and deprives the traditional rainfall patterns.
  • Reservoirs disturb the flow and composition of the rivers. The water from the downstream has high energy, it enhances the water flow by eroding the river bed.
  • The change in the river composition affects the upstream and downstream habitats. The reservoirs disturb the fish and birds migration.
  • Studies show that reservoirs emit greenhouse gases. Anaerobic bacterias are seen in the river bed releases carbon dioxide and methane. This occurs in tropical regions.
  • They also cause troubles for people living near the reservoir site. Old and failing dams lead to disasters.
  • Reservoir induced seismicity is a phenomenon of provoking earthquake by reservoirs. This happens when water sweeps into the minor cracks under the bed.

Updates in civil engineering, architecture finishes, building construction, Environmental Engineering