All posts by Vinod Gopinath

How to Design a Progressive House that Grows and Transforms?

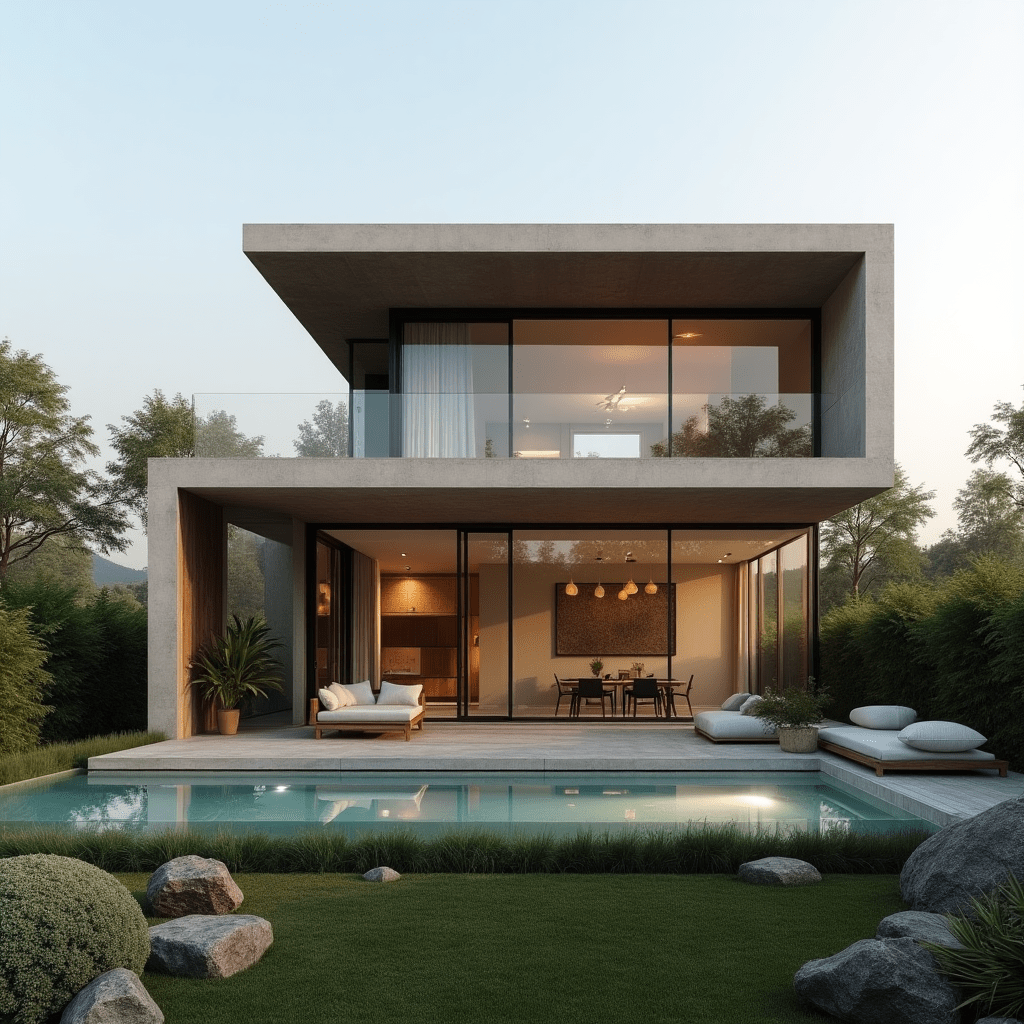
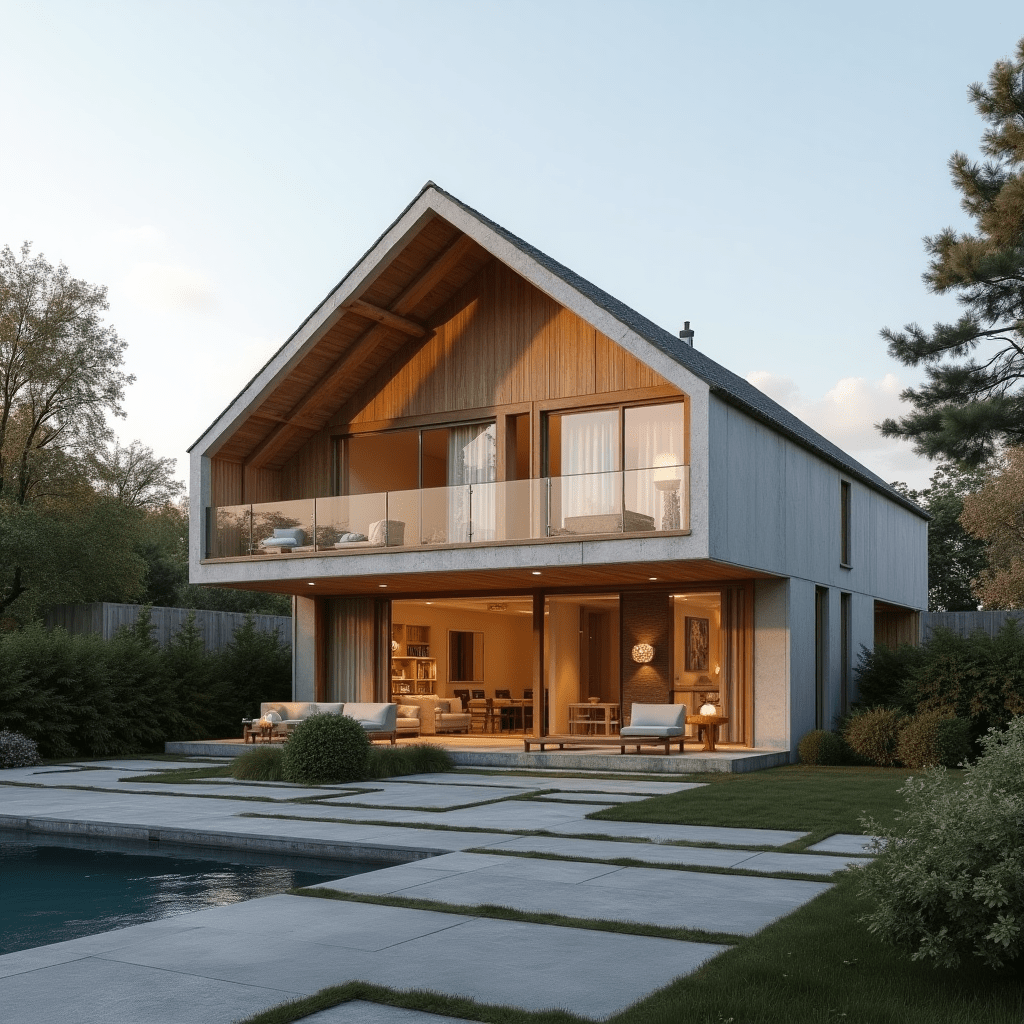
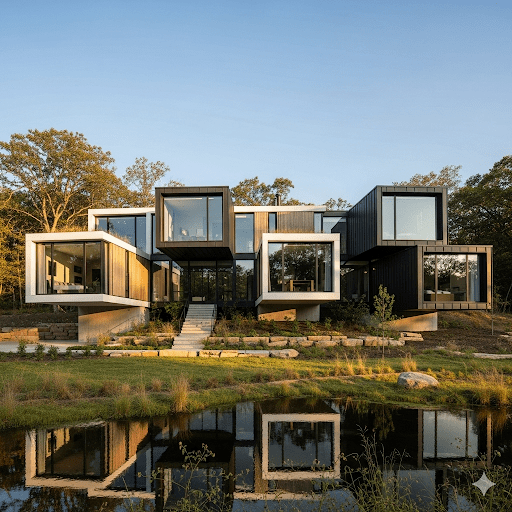
Progressive house design is a paradigm shift in residential architecture. This form of flexible architecture accepts change as an inherent part of life, creating a home that can physically adapt and expand to meet the evolving needs of its occupants. Unlike a static house, this embodies the very essence of adaptable housing, making the home a living entity. It is a testament to the fact that people’s lives are in a constant state of flux, thus creating a truly future-proof house. The strategy involves staged home building, where the home’s growth is carefully planned in successive phases. This modern approach often utilizes modular home construction, which makes all expansions efficient, predictable, and highly cost-effective.

This article will detail how to design a progressive house design, exploring its benefits, strategies, and the architect’s role.

  1. The Problem with “Static” Houses
  2. Strategies for Designing a Progressive House
  3. The Role of the Architect and Design Work
  4. The Advantages of a Progressive House Design
  5. Key take aways
  6. Conclusion
A modern progressive house design featuring a two-story structure with large glass windows, a spacious outdoor terrace, and a swimming pool surrounded by greenery.
A modern progressive house design featuring open spaces, large glass windows, and a pool, exemplifying adaptable architecture.

The Problem with “Static” Houses

Most houses are built with the assumption that the owners’ needs will remain constant, leading to several issues:

  • Material Rigidity: They are often constructed using heavy, rigid materials. This makes interior or exterior modifications a complex and costly endeavor.
  • The “Final” House Mindset: The prevailing belief is that a house is a one-time, final investment. This leads to designs that are over-scaled for current needs. They often assume a future that may never fully materialize.
  • Standardized Shortcomings: Manufacturers mass-produce many prefabricated or standardized homes with a “one-size-fits-all” mentality, so they lack equipment for future adaptation.
A modern progressive house with a sleek design, featuring large windows and a wooden facade, surrounded by a landscaped garden and a pool.
A modern progressive house showcasing adaptable design, blending aesthetics with functionality.

This static approach is a stark contrast to the fluid nature of a progressive house design. It is inherently a future-proof house and is the equivalent of a lightweight, manoeuvrable sailboat. It is economical and can easily adjust its course as conditions change.

Strategies for Designing a Progressive House

Designing a progressive house is not about guessing the future. It is about intelligent planning and design. It’s about creating a blueprint that allows for growth in a logical, phased manner, a key principle of staged home building. Children’s products are often designed to adapt to their rapid growth. Similarly, a progressive home’s initial construction perfectly suits immediate needs. It also prepares for future expansion. The entire process is a clear roadmap for creating true adaptable housing/progressive house design.

Architectural diagram of a progressive house design, showcasing various stages of construction and future expansion phases.
Architectural diagram showcasing the staged development of a progressive house design, illustrating phases for expansion and adaptability.

Here’s a practical guide based on a common scenario: a couple starting their family.

  1. Identify Current Needs: List the essential rooms and spaces required for your life right now. For a couple, this might include a master bedroom, a home office, a single bathroom, a kitchen, and a living area.
  2. Anticipate Future Needs: Think about potential life changes. List the spaces that will be required to accommodate them. This could include two additional children’s rooms, a guest bathroom, a dedicated laundry room, or a garage.
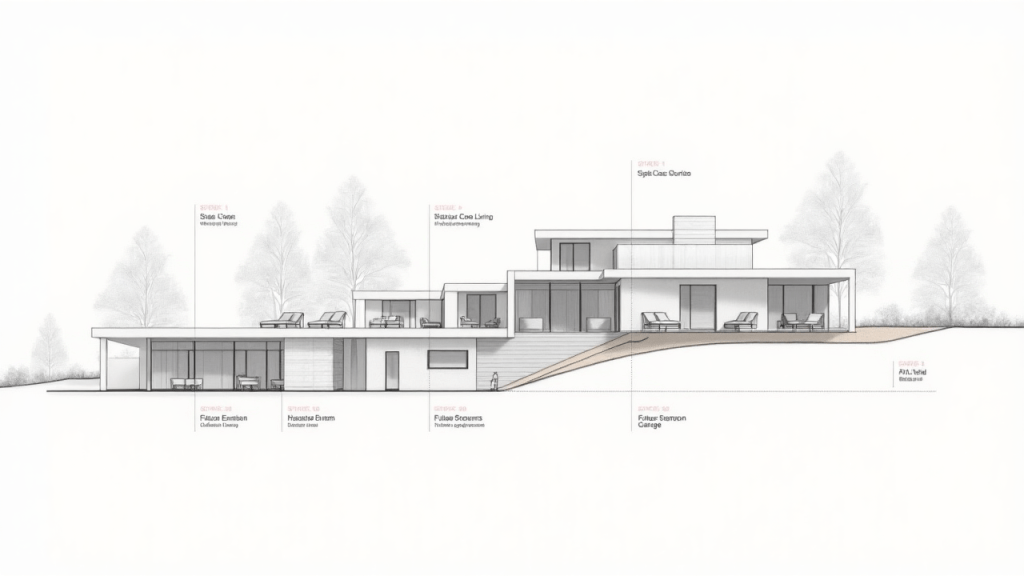
  3. Define and Prioritize Stages: Break down the construction into clear, manageable stages. This is the core of adaptable housing.
    • Stage 1: Construct the essential core.
    • Stage 2: Build the additions for the growing family.
    • Stage 3: Add the remaining desired spaces.

This phased approach provides a clear financial and logistical roadmap for your home’s development.

The Role of the Architect and Design Work

The architect is a crucial partner in this process. Their role is to educate clients and provide design alternatives. This embodies flexible architecture. This progressive mindset is not yet widespread. As a result, clients don’t ask for it, and architects don’t offer it. However, some innovative firms like La Panadería are championing this approach. They view the home as a continuous, collaborative process and a prime example of modular home construction.

A modern architectural design showcasing a futuristic house concept, with distinct levels and materials, emphasizing adaptability and innovative design. The text overlay highlights 'The Role of the Architect and Design Work.'
The role of the architect in progressive house design, showcasing a modern structure that embodies flexible architecture.

When working on the progressive house design, consider these technical strategies:

  • Modular Home Construction: Choose a system that allows for easy and seamless expansion.
  • Lightweight Interior Walls: Use materials like drywall that are easy to remove or relocate.
  • Strategic Plumbing and Electrical: Install plumbing in foundational walls to accommodate future bathrooms.
  • To future-proof the structure, engineers should design the foundation and roof from the start. This prevents the need for major structural overhauls later.

The Advantages of a Progressive House Design

Embracing a progressive house design offers numerous benefits:

  1. Financial Flexibility: You can spread the total budget for your home across multiple stages. You can invest incrementally as your financial situation allows.
  2. Cost and Time Efficiency: A smaller initial build is less expensive. It also takes less time to complete. This is a key advantage of staged home building.
  3. Lower Initial Investment: You only pay for the space you need right now. This makes homeownership accessible with a much smaller upfront budget.
  4. Increased Manageability: A smaller project is easier to oversee and manage. This reduces stress and potential complications.
  5. Acquired Experience: You gain invaluable hands-on experience during the first stage. This makes subsequent expansions a smoother, more confident process.
A modern progressive house featuring a unique architectural design with multiple box-like structures, large glass windows, and a surrounding landscape with a pond.
A modern progressive house design showcasing flexibility and adaptability, featuring modular construction and open spaces.

In conclusion, a progressive house design is a smart, strategic choice. It represents a shift from static, permanent structures to adaptable housing. This truly reflects the dynamic nature of human life. It’s a powerful antidote to the cost and complexity of a “definitive” house. With smart planning and a modular home construction approach, you can build a home that is always ready for what comes next.

Key take aways

Progressive house design is a strategic architectural approach that transforms static homes into dynamic, evolving living spaces. It’s a form of flexible architecture that fully embraces life’s constant changes.

This concept is centered on staged home building. By carefully building in phases, homeowners can spread out costs, which makes homeownership more financially accessible and entirely manageable for any budget.

A progressive home is a truly future-proof house. You can create adaptable housing where you quickly reconfigure rooms to suit different needs, like turning an office into a child’s nursery.

The process often relies on modular home construction. This efficient method uses prefabricated components to make future expansions and modifications seamless, quick, and remarkably cost-effective.

Conclusion

In conclusion, progressive house design offers a forward-thinking alternative to traditional static homes. This is a form of flexible architecture that embraces a strategic and planned approach to growth. Staged home building allows for a more financially manageable journey into homeownership. It’s a truly future-proof house that provides the ultimate form of adaptable housing by evolving with its occupants. By relying on modern techniques like modular home construction, you can make the expansion process efficient, predictable, and remarkably cost-effective.

Geosynthetics- Types and applications.

Geosynthetics are engineered materials used in civil, geotechnical, and environmental works to enhance strength, stability, and performance. Common types of Geosynthetics include geotextile, geogrids, and geomembrane, each designed for specific functions. Engineers apply geotextile in separation, filtration, and drainage. They use geogrids to reinforce soil in roads and embankments. Geomembrane serves as an impermeable barrier for landfills, ponds, and reservoirs. Other types such as geonets, geocells, and geocomposites expand their versatility. The applications of Geosynthetics range from erosion control and slope stabilization to waste management and water conservation projects. Furthermore, by integrating geogrids, geotextile, and geomembrane into infrastructure, engineers achieve durable, cost-effective, and sustainable solutions. Consequently, these materials are indispensable in modern construction and environmental protection.

Geosynthetics are a much-talked-of topic as they are finding a wider range of applications nowadays. For this reason, according to Fortune Business Insights, the global Geosynthetics market was valued at USD 27.16 billion in 2018. Consequently, the global Geosynthetics market is expected to grow at a CAGR of 6.6 percent, reaching USD 45.25 billion by 2026. This growth is largely due to the fact that growing construction activities are driving the global Geosynthetics market. The rising applications in erosion management, landfill, and filtration also contributes for that.

All those who are curious about this multi-faceted material have landed in the right spot. In this blog, I will show you full details about Geosynthetics. Are you ready to dig deeper about it?

  1. What is Geosynthetics?
  2. Types of Geosynthetics
    1. Geotextiles
      1. Applications of Geotextile
    2. Geogrids
      1. Applications of Geogrids
    3. Geomembranes
      1. Applications of Geomembranes
    4. Geonets
      1. Applications of Geonets
    5. Geosynthetic Clay Liners (GCLs)
      1. Applications of GCLs
    6. Geofoam
    7. Applications of Geofoam
    8. Geocells
    9. Applications of Geocells
  3. Geosynthetics Applications
    1. Separation
      1. Applications
    2. Reinforcement
    3. Barrier
    4. Drainage
    5. Protection
  4. Advantages of Geosynthetics
    1. Key Advantages of Geosynthetics
  5. Disadvantages of Geosynthetics
  6. Key Takeaways
  7. Conclusion

What is Geosynthetics?

Before we learn about Geosynthetics types, let’s have a basic understanding about Geosynthetics material.

Geosynthetics are synthetic or polymer-based materials. They are used in civil engineering, construction, and environmental projects. These materials improve soil behaviour and overall structural performance. Geosynthetics are manufactured in various forms. They are applied between soil, rock, or other geotechnical engineering-related materials. This enhances stability, controls erosion, and manages water flow. In addition to this, geosynthetics act as reinforcement, filtration, drainage, or containment elements. They reduce construction costs. They also extend the lifespan of infrastructure. Furthermore, these materials are lightweight, durable, and resistant to chemical or biological degradation, thus making them suitable for diverse conditions.

Workers installing geogrids and erosion control measures on a slope during a civil engineering project.
Construction workers installing geogrids for soil reinforcement and slope stabilization.

Consequently, engineers widely use them in roads, embankments, and landfills. They are also used in canals and coastal protection. These applications provide sustainable solutions. They combine technical efficiency with environmental protection. Ultimately, these solutions make them indispensable in modern engineering practices.

Types of Geosynthetics

Types of geosynthetics are categorized based on their structure and functions in engineering works. Consequently, each type offers unique benefits that enhance soil stability, drainage, reinforcement, and environmental protection.

  • Geotextile
  • Geogrids
  • Geonets
  • Geomembranes
  • Geosynthetic claylines
  • Geoform
  • Geocells

Now we are good to go to know about each types of geosynthetics.

Geotextiles

Geotextile is a permeable geosynthetic material used in civil engineering to improve soil behavior and stability. To be specific, key features of geotextile include durability, flexibility, permeability, and resistance to chemical and biological degradation.

A close-up image showing a black geosynthetic membrane laid between two types of soil, with gravel on one side and sand on the other, illustrating the separation function in civil engineering applications.
Geotextile fabric used for soil separation and erosion control, showcasing its application in construction.

Applications of Geotextile

  • Soil separation in roads and railways
  • Filtration in drainage systems
  • Reinforcement for embankments and retaining walls
  • Erosion control on slopes, canals, and riverbanks
  • Protection in landfills and coastal structures

Geogrids

Geogrid is a geosynthetic material made of polymer grids, specifically designed to provide soil reinforcement and load distribution. In addition to this, key features of geogrids include high tensile strength, dimensional stability, and resistance to environmental degradation.

Close-up view of geogrid installation on a construction site, showcasing the mesh-like structure used for soil reinforcement and load distribution.
A close-up view of a geogrid installed on a construction site, showcasing its application in soil reinforcement and load distribution.

Applications of Geogrids

  • Reinforcement of roads, highways, and railways
  • Stabilization of slopes and embankments
  • Retaining wall reinforcement
  • Load support in paved and unpaved areas
  • Base reinforcement for airports and industrial platforms

Geomembranes

Geomembrane is an impermeable geosynthetic barrier used for containment and fluid control in engineering projects. Important features of geomembranes are chemical resistance, flexibility, waterproofing capability, and long service life.

A large geomembrane liner deployed in a dug-out containment area, surrounded by construction materials and equipment, showcasing its application in environmental engineering.
A geomembrane installation at a landfill site, showcasing its role in waste containment and environmental protection.

Applications of Geomembranes

  • Lining of landfills and waste containment facilities
  • Water reservoirs, canals, and ponds
  • Mining operations for heap leach pads
  • Secondary containment in hazardous industries
  • Waterproofing in tunnels and dams

Geonets

Geonet is a geosynthetic material with a net-like structure used mainly for drainage and liquid collection. Key features of geonets include high compressive strength, chemical resistance, and durability under soil loads.

Close-up view of a black geogrid material, featuring a grid-like structure designed for soil reinforcement in civil engineering applications.
Close-up of a geonet, a three-dimensional geosynthetic material designed for drainage and fluid collection applications, showcasing its complex, grid-like structure.

Applications of Geonets

  • Leachate collection in landfills
  • Subsurface drainage in roads and railways
  • Gas venting systems in waste facilities
  • Drainage behind retaining walls
  • Erosion control layers in slopes

Geosynthetic Clay Liners (GCLs)

GCLs are factory-manufactured hydraulic barriers composed of bentonite clay between geotextiles or geomembranes. Essential features of GCLs include low permeability, self-sealing ability, and environmental resistance.

Close-up of a geotextile material, showcasing its woven and non-woven layers, used for soil separation and filtration in civil engineering applications.
Geosynthetic clay liner (GCL) showcasing its layered structure, used for containment and waterproofing in civil engineering applications.

Applications of GCLs

  • Landfill liners and capping systems
  • Secondary containment for hazardous waste
  • Water reservoirs and canals
  • Mining sites for seepage control
  • Waterproofing in tunnels and foundations

Geofoam

Geofoam is a lightweight geosynthetic fill material made of expanded polystyrene (EPS) blocks. Important features of geofoam include low density, high compressive strength, ease of installation, and thermal insulation.

Construction workers handling large blocks of geofoam material on a site, with gravel and concrete barriers in the background.
Workers handling geofoam blocks for lightweight fill applications in construction.

Applications of Geofoam

  • Lightweight fill for embankments and bridge approaches
  • Slope stabilization in weak soil areas
  • Road construction to reduce settlement
  • Backfill behind retaining walls
  • Thermal insulation in cold regions

Geocells

Geocell is a three-dimensional honeycomb-like geosynthetic structure used for soil confinement and reinforcement. Key features of geocells include flexibility, load distribution, and excellent erosion resistance.

Excavator depositing soil on geocell structure for soil confinement and reinforcement in civil engineering.
A construction worker using heavy machinery to apply soil over a geocell structure, enhancing soil stability and preventing erosion.

Applications of Geocells

  • Slope and channel protection
  • Soil stabilization for weak subgrades
  • Load support in unpaved roads and railways
  • Retaining wall reinforcement
  • Coastal and riverbank erosion control

Geosynthetics Applications

Engineers widely use geotextile, a versatile geosynthetic material, in civil engineering. For example, they apply it for soil separation and filtration. Furthermore, it has applications in reinforcement, drainage, and erosion control, all of which ensure stability and sustainability in construction projects.

Separation

Separation uses a flexible geosynthetic material, often a porous geotextile, placed between two dissimilar materials to maintain consistency and functionality of each layer.

Applications

  • Paved roads
  • Unpaved roads
  • Railroad bases

Reinforcement

The introduction of geogrids or geocells into soil or separated materials enhances the overall strength of the system by providing structural reinforcement.

Applications

  • Mechanically stabilized and retained earth walls
  • Steep soil slopes

Barrier

Geomembranes act as impermeable barriers that prevent the movement of liquids and gases between soil layers, ensuring effective containment.

Applications:

  • Pavement overlays
  • Waste containment systems

Drainage

Certain geosynthetics, for example non-woven geotextiles and geocomposites, allow fluids to pass through low-permeable soils, thereby ensuring proper drainage and reducing track or soil faults.

Applications:

  • Road and railway drainage
  • Retaining wall drainage
  • Landfill leachate collection

Protection

Geosynthetics provide cushioning and surface protection. For example, geotextiles protect geomembranes during construction by reducing friction and preventing damage.

Applications

  • Erosion protection
  • Cushioning layers in landfills
  • Protection of geomembrane liners

Advantages of Geosynthetics

Engineers increasingly use geosynthetics because of their multiple benefits in civil engineering and environmental applications. For instance, they improve soil performance and extend infrastructure lifespan. Furthermore, they provide cost-effective, sustainable alternatives to traditional construction methods, thus making them indispensable in modern projects.

Key Advantages of Geosynthetics

  • Enhance soil stability and strength
  • Reduce construction and maintenance costs
  • Provide effective drainage and filtration
  • Offer impermeable barriers for containment
  • Control erosion and protect slopes
  • Lightweight and easy to install
  • Chemically and biologically resistant
  • Increase durability and service life of structures
Two workers in safety gear welding a geomembrane on a construction site with heavy machinery in the background.
Workers welding geomembrane on a construction site, showcasing essential geosynthetic installation for containment.

Disadvantages of Geosynthetics

  • To ensure the long-term efficiency of the formulated resin in geosynthetics, therefore, engineers must use additives like antioxidants, ultraviolet screeners, and fillers.
  • On the other hand, since geosynthetics are polymeric, their exposed lifespan is shorter than when they are unexposed.
  • Furthermore, for certain soil types (such as Loess soils, fine cohesionless silts, or extremely turbid liquids), the clogging of geotextiles, geonets, and/or geocomposites is a difficult design challenge.

What do you think of these synthetic materials which has a range of applications? Let us know in the comments.

Key Takeaways

  • Geosynthetics are highly versatile engineered materials with applications in civil, geotechnical, and environmental projects. To illustrate their versatility, the primary types include geotextiles, geogrids, geomembranes, geonets, and geocells, each with a unique structure and function.
  • Furthermore, they perform key functions like separation, reinforcement, drainage, filtration, and containment, thereby enhancing the performance and stability of soil. In essence, geosynthetics are a cost-effective and sustainable alternative to traditional methods, reducing construction time, extending project lifespan, and providing superior performance.
  • Considerations: Despite their advantages, their durability can be impacted by exposure to UV light, and specific soil types may pose clogging challenges.

Conclusion

In conclusion, geosynthetics have become an indispensable component of modern engineering and construction. Engineers find geosynthetics indispensable because of their ability to enhance soil properties and provide sustainable, cost-effective solutions. Consequently, they use geosynthetics in a wide array of applications. These range from reinforcing roads and stabilizing slopes. They are also used to create impermeable barriers for environmental protection. As the global construction market continues to expand, so too will the demand for these multi-faceted materials. While a few challenges exist, such as material longevity and suitability for specific soil types, geosynthetics offer significant benefits. They increase durability, reduce maintenance, and enhance environmental efficiency. These qualities position them as a critical tool for building a more resilient and sustainable future.

Top Light Weight Work Boots for Construction Workers

For those who spend long hours on the job, lightweight work boots are more than just footwear — they’re essential gear. Whether you’re in construction, electrical work, automotive repair, or any skilled trade, the right boots can significantly enhance comfort, safety, and efficiency. In this guide, we’ll explore what makes light weight work boots so valuable, break down the features you should prioritize, and highlight some top-rated choices that deliver both performance and durability.

  1. Why Choose Lightweight Work Boots?
    1. Minimized Fatigue and Enhanced Comfort
  2. Improved Movement and Agility
    1. Boosted Productivity and Job Performance
  3. What to Look for in Quality Lightweight Work Boots
    1. Durable Yet Light Materials
    2. Protective Toe Options
    3. Waterproofing and Airflow
    4. Electrical Hazard (EH) Protection
    5. Slip and Oil-Resistant Outsoles
  4. Recommended Choices: Best Lightweight Work Boots for Men
  5. Choosing the Right Pair for Your Job

Why Choose Lightweight Work Boots?

Minimized Fatigue and Enhanced Comfort

Spending all day on your feet takes a toll, especially with heavy boots weighing you down. Traditional work boots can cause quicker exhaustion and discomfort in the legs and feet.

Lightweight options are engineered to combat this issue. With cushioned footbeds, responsive midsoles, and breathable uppers, they help reduce strain and make long shifts more manageable. These features not only improve comfort but also help prevent common foot ailments such as calluses, blisters, and even plantar fasciitis. In the long term, they also reduce your chances of suffering injuries like sprains or muscle strain.

Image Source – https://pixabay.com/photos/chemical-costume-protection-1636375/

Improved Movement and Agility

Light boots allow for quicker, easier movement — a huge advantage when navigating busy or tight workspaces. Whether climbing ladders, walking long distances, or crouching frequently, flexibility and mobility are essential.

Modern lightweight boots often use materials like mesh, high-grade nylon, or streamlined leather that maintain toughness without the added weight. Many incorporate anatomical footbeds or flexible soles designed to move naturally with your foot, giving you greater agility on the job.

Boosted Productivity and Job Performance

When your feet feel good, you’re able to concentrate better and maintain your energy throughout the day. Comfortable and mobile boots can lead to fewer breaks, improved focus, and overall higher productivity.

Investing in high-performance lightweight work boots is a smart move for long-term success. You’re not just buying footwear — you’re enhancing your performance, protecting your health, and setting yourself up for a more efficient workday.

Image Source – https://pixabay.com/photos/work-boot-boots-shoes-footwear-4133815/

What to Look for in Quality Lightweight Work Boots

Durable Yet Light Materials

Lightweight doesn’t mean flimsy. Look for boots constructed from strong yet light materials like engineered mesh, performance leathers, or reinforced nylon. These should be resistant to abrasion and able to stand up to jobsite wear and tear.

Rubber or synthetic outsoles should offer slip and oil resistance while keeping the overall boot weight down. Many models also use shock-absorbing or air-infused midsoles to provide comfort without sacrificing strength.

Protective Toe Options

If your job involves heavy tools or hazardous materials, toe protection is critical. Fortunately, you don’t have to rely on steel toes anymore.

Composite and aluminum toe caps offer excellent protection with much less weight. Composite toes, made from materials like Kevlar, plastic, or carbon fiber, are ideal for non-metallic, non-conductive protection. Aluminum toes are similarly protective but much lighter than traditional steel. Always ensure your safety toe boots meet ASTM standards for impact and compression to ensure compliance and maximum safety.

Image Source – https://pixabay.com/photos/brown-leather-shoes-boots-2564856/

Waterproofing and Airflow

If you’re often in damp or unpredictable environments, waterproof boots are a must. Seek out models with sealed seams, waterproof membranes, or treated leather uppers to keep moisture out.

Simultaneously, breathability is essential to avoid overheating and sweating inside your boots. Look for shoes with moisture-wicking linings or ventilated uppers to promote air circulation and maintain dryness throughout the workday.

Electrical Hazard (EH) Protection

Those working near live electricity should ensure their shoes offer EH protection. This means the boots are made using non-conductive materials and are tested to resist electrical currents — typically up to 18,000 volts for a minute — as per ASTM F2413 guidelines. Remember, EH-rated boots are an additional precaution, not a substitute for proper electrical safety procedures.

Slip and Oil-Resistant Outsoles

Worksites can present all kinds of surface hazards, from slick oil patches to uneven terrain. A quality lightweight work boot should offer traction-enhancing outsole patterns and slip-resistant rubber compounds. Outsoles made from oil-resistant materials also ensure your boots won’t break down or lose grip prematurely due to chemical exposure.

  • The Marin (Soft and Composite Toe)The Marin remains a top-tier option for men needing a lightweight yet durable work boot. Offered in both soft toe and composite toe variations, this 6-inch boot is crafted with barnyard-resistant leather sourced from Texas steer, ensuring both rugged durability and long-term wear. Waterproof and versatile, it’s designed to withstand a variety of tough jobsite conditions without adding bulk.

Image Source – https://bruntworkwear.com/cdn/shop/files/BRUNT-Boots-PDP-Marin-Soft-Toe-Right-3.jpg

  • YURINOX BOOTS UNIONSPACEThe UNIONSPACE boot by YURINOX offers a lightweight, durable option with an ankle-high design and a dual-layer sole made from PU and rubber, providing excellent slip resistance and long-lasting wear. Its black nubuck upper is breathable and water-resistant, while the special lining wicks away sweat to keep feet comfortable all day. Equipped with a composite safety toe for impact protection and a Kevlar puncture-resistant sole to block sharp objects, these boots also resist oil, chemicals, and slips, making them a reliable choice for safety-conscious workers who need agility and comfort on the job.

Image Source – https://yurinoxworkwear.us/upload/iblock/8c3/4gc17ky3ew85s5nszu6yw0f0bzdmw3t8/2.webp

Choosing the Right Pair for Your Job

Every jobsite is different, so think carefully about your work conditions when choosing your boots. Consider how long you’re on your feet, whether you deal with electrical hazards, and if you’re often exposed to water or slippery surfaces.

Try on multiple pairs if possible, and walk around to evaluate comfort and fit. The right boot should provide immediate comfort and meet all your functional and safety requirements. At Yurinox Workwear, we understand the challenges of demanding trades and provide a curated selection of light weight construction boots tailored to meet them. Whether you need waterproof protection, safety toe options, or easy slip-on styles, our range is built to support your performance from the ground up.

Components of Road pavement structure – Parts of a road and functions

Components of a road or parts of a road plays an important part in ensuring the safety and service life of a road. Components of a road is designed to meet the design requirements, functional requirements etc. This article is about the components of road/parts of a road and its functions.

Understanding the road pavement structure is crucial for designing and maintaining effective roadways. Key road components include the carriageway or pavement, roadway or formation width, camber or cross slope, kerbs, medians, road margins, and the right of way (ROW). Each part serves a specific role within the overall road section. This blog will explore these components of the road. It will detail the role of each road section. The blog will explain how they contribute to the road’s durability and performance.

  1. Components of a Road
    1. Carriage way or pavement width
      1. Carriage width as per IRC
    2. Road way or formation width
    3. Camber or cross slope
    4. Kerbs
    5. Medians or traffic separators
    6. Right of way
    7. Road margins

Components of a Road

The road components are crucial for ensuring road durability and safety. Each part of the road, from the carriageway to the right of way (ROW), plays a specific role in the road section. Understanding these components and their functions helps in maintaining effective road performance. The main road sections are listed below.

  • Carriage way or pavement
  • Road way or formation width
  • Camber or cross slope
  • Kerbs
  • Medians
  • Road margins
  • Right of way ( ROW)
Diagram illustrating the components of a road, including carriageway, formation width, shoulders, right of way (ROW), and road margins, with labels highlighting each component.
Illustration of the key components of a road, including the carriageway, shoulders, road margins, and right of way.
COMPONENTS OF A ROAD

Video showing the components of a road

Video on components of a road

Also read : Alignment of road – Factors affecting – obligatory points

Also read : Classification of road – Full details

Carriage way or pavement width

The paved part or surface of the road for traffic movement without any restriction is called the carriageway. The width of the carriageway/ pavement width depends on the number of traffic lanes. The number of lines is decided based on the type of road, service importance, and traffic density.

The carriageway or pavement width is a critical road component that determines the space available for vehicle movement. It directly affects traffic flow, safety, and overall road performance. Properly designed pavement width ensures efficient use of road space and supports the road’s intended load-bearing capacity.

The carriageway is divided into a single carriageway and a dual carriageway as shown in the figure.

Illustration comparing the dimensions of a single carriageway and a double carriageway for road design, highlighting vehicle width and total road width measurements.
Illustration of single and double carriageway road designs, highlighting vehicle width and lane specifications.
SINGLE CARRIAGE WAY AND DUAL CARRIAGE WAY

The maximum permissible width of a vehicle is 2.44 and the side clearance for single lane traffic is 0.68 m. The required minimum lane width is 3.75 m for a single lane road. For the dual carriageway, the pavement width is two times 3.75 mtr. ie: 7.5 mtr.

Each country has its own specification for carriage way widths.

Must read : Road pavement layers – Components and function

DUAL CARRIAGE WAY
Diagram illustrating the width dimensions of a dual carriageway, showing measurements for vehicle space and lane configuration.
Diagram illustrating the width specifications for dual carriageway design, detailing lane dimensions and spacing.

Carriage width as per IRC

CARRIAGE WIDTH
Table showing the class of road and their corresponding width specifications for single lanes and multi-lane pavements.
Table outlining the width specifications for various classes of roads, including single and multi-lane options.

Road way or formation width

Width of formation or roadway width is the sum of the widths of pavements or carriage way including separators and shoulders. This does not include the extra land in formation/cutting. (Ref : Diagram)

Camber or cross slope

Camber or cross slope provided to raise the middle of the road in the transverse direction to drain of water. Inadequate slopes result in flooding of water on the pavement which may deteriorate the surface in course of time. The too steep slope is undesirable for it will erode the surface.

Illustration showing different types of camber in road design: parabolic camber, straight line camber, and a combination of straight and parabolic camber.
Illustration of different camber types used in road design, showcasing parabolic and straight line camber techniques essential for effective drainage.

Camber or cross slope serves as Surface protection especially for gravel and bituminous roads. They protect the sub grade by providing proper drainage. This also enables quick drying of pavement. This in turn protects the vehicles from slipping and thereby increases safety.

The value of camber depends on the type of material used for making it and rainfall density in that region.

Kerbs

Kerbs are dividing line between carriage way and shoulders, footpath or islands. The following are the different types of kerbs.

Low or mountable kerbs allows the vehicle to enter the shoulder area with little difficultly. Height of 10 cm above pavement level & Edge will have a slope allowing vehicle to step over easily.

Semi barrier type kerbs are used when the pedestrian traffic is high. Their height is 15 cm above the pavement edge. This type of kerb prevents encroachment of parking vehicles. In an acute emergency, it is possible to drive over this kerb with some difficulty.

Barrier type kerbs are designed to discourage vehicles from leaving the pavement. 

Diagram illustrating different types of kerbs used in roadway construction, including mountable, semi-barrier, barrier type, and submerged kerbs.
Illustration of different types of kerbs used in road construction, highlighting their dimensions and functions.

Submerged kerbs are used in rural roads as edges between the pavement edge and shoulders. 

Function of kerb

  • Drainage control
  • Demarking of walkways
  • Roadway demarking
  • Maintenance assistant
  • Assisting road side development.

Medians or traffic separators

ROAD SEPARATED WITH MEDIANS

They are physical or painted separation provided to separate two road ways. Mainly used to differentiate vehicles based on speed.

Right of way

Right of way or ROW is the land to be acquired for the road along its alignment. The right of way depends on the importance of the road, traffic an possibility of expansion in the future. They include the total elements of the road like carriageway, shoulders, drainage system, cuttings, and embankment slopes, etc.

Diagram illustrating the components of a road, including formation width, road margins, right of way (ROW), carriageway, and shoulders.
Diagram illustrating the essential components of a road including carriageway, shoulders, road margins, formation width, and right of way.

Factors influencing the width of ROW

a) Width of formation

b) Embankment depth and cutting depth

c) Side slopes of embankment or cutting

d) Drainage system

e) site distance considerations

f) Future widening & Service roads.

Road margins

The portion of the road beyond the carriageway and on the roadway can be generally called road margin. Various elements that form the road margins are given below.

They include

  • shoulders
  • Parking lines
  • Bus bay
  • Service roads
  • Cycle track
  • Footpath
  • Guard rail

For more details about road margin : Must Read

Road margins- 6 types of road margins in highway

Flow Table Test: Key Method for Concrete Workability

Flow table test of concrete is a common method to measure the workability of fresh concrete. It is especially useful for mixes that are too fluid for the slump test. This test helps check how easily concrete flows, which is important for quality construction. In the flow table test for concrete, a flow table apparatus spreads the concrete, and the flow diameter is measured. Compared to the slump test, the flow table test procedure for concrete works better with high workability and self-compacting mixes. Knowing the difference between flow table test vs slump test helps engineers choose the right method. By following standards like ASTM C124 or EN 12350-5 and IS1199, the flow table test apparatus for concrete gives reliable results. This makes it a key test for concrete workability in construction projects.

In this article, we will explain the purpose and importance of the flow table test for concrete, especially in measuring workability and consistency for high-fluidity mixes like Self compacting Concrete (SCC) . You will learn about the standard codes (including IS 1199:1959, IS 5512:1983, ASTM C124, and EN 12350-5), the apparatus required, and the step-by-step procedure for conducting the test. We will also discuss the advantages, limitations, and practical applications of the flow table test in civil engineering projects. By the end, you’ll understand when and why to use the flow table test for concrete, and how it helps ensure quality and performance in construction

  1. Significance of Quality tests on concrete
  2. Production stage quality tests on fresh concrete
  3. Flow table test for Concrete
  4. Standards for flow table test of concrete
    1. Flow table test of concrete as per IS 1199 (Part 6): 2018
      1. Flow table test apparatus Used as per IS 1199
    2. Flow table Test procedure
    3. Calculation for Flow table test
  5. Key Takeaways
  6. Conclusion

Significance of Quality tests on concrete

Quality tests on concrete are essential for ensuring strength, durability, and performance in construction. These tests help engineers assess the workability of fresh concrete and the quality of hardened concrete. Common quality tests on concrete include checks during the production stage (on fresh concrete before placing), tests on hardened concrete specimens, and evaluations performed directly on finished structures. Including tests like the flow table test for concrete ensures reliable results and consistent quality throughout a project.

A laboratory setting for concrete testing, featuring a man in a safety vest and hard hat, observing a concrete compression testing machine alongside molds and tools.
A construction engineer analyzing concrete samples in a laboratory, highlighting the importance of quality tests for concrete workability.

Quality tests performed on concrete are classified into

  • Production stage quality tests ( On fresh concrete before placing)
  • Hardened stage quality tests ( hardened concrete specimens)
  • Non Destructive tests On structures ( tests done on the structures )

Also read : Bitumen tests – 9 lab tests for bitumen

Production stage quality tests on fresh concrete

Production stage quality tests on fresh concrete are crucial for ensuring the right workability and consistency before placement. These tests help engineers select the best mix for construction and maintain quality control. Key tests include the slump test, compaction factor test, Vee-Bee test, Kelly ball test, and the flow table test for concrete.

This article focuses on the flow test of concrete, explaining its procedure, importance, and how it compares with other workability tests like the slump test and compaction factor test.

Flow table test for Concrete

The flow table test for concrete is a simple laboratory method used to measure the workability and flowability of fresh concrete, especially for highly workable mixes where the slump test is not suitable. In this test, the workability of concrete is determined by observing how much the concrete spreads on a flow table after being jolted. This spreading, or flow, directly indicates the concrete’s consistency and fluidity, which are essential for quality control in construction.

The flow table test is particularly useful for high or very high workability concrete that would otherwise collapse in a standard slump test. It provides insights into the consistency and cohesiveness of the mix, helping engineers ensure that the concrete can be easily placed and compacted without segregation. This method is best suited for concrete with a nominal maximum aggregate size less than 38 mm.

Flow table apparatus for conducting the flow table test on concrete, featuring a metal cone mold, tamping rod, and handle for easy lifting.
Flow table test apparatus showcasing the metal cone mold, tamping rod, and handling features, essential for measuring the workability of concrete.

Standards for flow table test of concrete

  • IS 1199 (Part 6): 2018
  • ASTM C 124 – 39 (Re-approved 1966)
  • BS 1881 :105: 1984

Flow table test of concrete as per IS 1199 (Part 6): 2018

The flow table test as per IS 1199 (Part 6): 2018 is a standardized method to determine the workability and flowability of fresh concrete, especially for self-compacting concrete. It measures the spread of concrete after the flow table is repeatedly dropped, indicating the concrete’s consistency and ability to flow without segregation.

Flow table test apparatus Used as per IS 1199

The following apparatus are used to perform the flow table test:

  • Flow table
  • Mould
  • Scale
  • Hand scoop
  • Trowel
  • Tamping rod

Flow Table: A metal table with a flat surface and a hinged base, dropped to measure the concrete’s spread, indicating its workability.

Scale: A measuring device used to accurately measure the diameter of the concrete spread on the flow table, ensuring precise results.

Hand Scoop: A tool used to transfer concrete into the mold, ensuring an even and consistent sample for testing.

Trowel: A flat, metal tool used for smoothing and leveling the concrete surface within the mold, ensuring uniformity.

Flow table test apparatus for measuring concrete workability, featuring a metal cone, tamping rod, and a handle for lifting.
Flow table test apparatus for measuring the workability of fresh concrete, featuring a metal cone mould and tamping rod.

Tamping Rod: A rod used to compact the concrete inside the mold, removing air pockets and ensuring consistency in the sample.

Mould: A metal conical mold used to shape the concrete sample before spreading, essential for standardized measurements in the flow test. The shape of the mould for the flow table test is a cone frustum. The base diameter of the mould is 25 cm and the upper diameter is 17 cm. It has a height of 12 cm. A handle is also present on the sides of the mould. 

Flow table Test procedure

  • Before starting the test, wet and clean the tabletop and the mould from gritty materials.
  • Keep the mould firmly at the centre of the table. 
  • Now fill two-layer, each layer should be one half of the volume of the mould.
  • Tamp each layer 25 times using a tamping rod uniformly. 
  • After tamping the top layer, struck off the excess concrete using the trowel.
  • Also, clean the area of the table outside the mould. 
  • Then remove the mould immediately by steady upward pull. 
  • Raise the table and drop at 12.5 mm, 15 times in 15 seconds. 
  • Measure the diameter of the concrete spread about its 6 direction and compute its mean value. 

Calculation for Flow table test

The percentage increase in the average diameter of the spreading concrete over the base diameter of the mould is called the flow of concrete.

Flow% = (Spread diameter in cm – 25) / 25 * 100

The value of flow test varies from 0 to 150%.

According to ‘A.M. Neville, honorary member of the American Concrete Institute’, this flow table test is appropriate for concrete mixes having a flow of 340 to 600 mm.

Key Takeaways

The flow table test is an essential method for assessing the workability and flowability of fresh concrete, especially for high-fluidity and self-compacting mixes where the slump test is inadequate. By following standards like IS 1199 (Part 6): 2018, this test provides reliable, repeatable results crucial for quality control in construction projects. The apparatus is simple, and the procedure is straightforward, making it widely accessible in laboratories. The test helps engineers ensure the mix can be easily placed and compacted without segregation. This directly impacts the durability and performance of the finished structure. Understanding the differences between the flow table and slump tests is important. It helps in selecting the appropriate method for each concrete type. This ensures optimal construction quality.

Conclusion

In conclusion, the flow table test, as outlined in IS 1199 (Part 6): 2018, is a vital tool for evaluating the workability of fresh concrete, particularly for mixes with high workability or self-compacting properties. Its ability to measure the spread of concrete after jolting provides valuable insights into the mix’s consistency and cohesiveness. This ensures that the concrete will perform well during placement and compaction, reducing the risk of defects and enhancing structural integrity. By integrating the flow table test into routine quality control, engineers and builders can achieve better consistency, durability, and performance in concrete structures, ultimately contributing to safer and longer-lasting construction projects.

Furrow Method of Irrigation – Definition, Types and Advantages

The furrow method of irrigation is a method of laying out water channels in such a way that gravity provides just enough water for suitable plants to grow. It is typically formed through the deliberate placement of ridges and furrows. The furrow method of irrigation is one of the surface irrigation methods. Straight furrows and contour furrows are subdivisions. I will explain the important details about each of them. Also, we will find out the types methods and advantages of furrow irrigation in the blog.

Furrow Irrigation Method is a traditional surface irrigation technique. It is effective and widely used for row crops such as maize, cotton, sugarcane, and vegetables. In this method, water flows through shallow, parallel channels also known as furrow, between crop rows, allowing it to infiltrate the soil and reach plant roots efficiently. This approach is particularly beneficial for crops sensitive to water logging, as it minimizes direct water contact with stems and crowns. Synonymous with terms like furrow irrigation system, gravity flow irrigation, and furrow watering method, this technique is adaptable to various soil types and gentle slopes. Moreover, it offers advantages such as reduced water evaporation, cost-effectiveness, and simplicity in design and maintenance. With innovations like alternate and surge furrow irrigation enhancing its efficiency, the furrow method remains a cornerstone in sustainable agricultural practices.

So, without any due let’s look into the basics of the furrow method of irrigation.

  1. What is the Furrow Method of Irrigation?
  2. Furrow spacing for crops
  3. Types of Furrow Method of Irrigation
    1. Straight furrow
    2. Contour furrow
  4. Construction of furrow method of irrigation
  5. Advantages of furrow irrigation
  6. Key Takeaways
  7. Conclusion

What is the Furrow Method of Irrigation?

In this section, you will get the answer to what is furrow irrigation. The furrow method of irrigation is a method of laying out water channels in such a way that gravity provides just enough water for suitable plants to grow. It is typically formed through the deliberate placement of ridges and furrows.

Furrow Method of Irrigation- One of the Types of Surface Irrigation
A field with parallel rows of green plants being irrigated using the furrow irrigation method, featuring visible water channels between the rows.
Furrow method of irrigation effectively channels water between rows of crops, optimizing growth while minimizing evaporation.
  • The furrow method of irrigation is very much used for row crops like maize, jowar, sugarcane, cotton, tobacco, groundnut, potatoes etc.
  • In this method, only one-half to one-fifth of the surface is wetted, and thus evaporation losses are very much reduced
  • A furrow consists of a narrow ditch between rows of plants.

Let’s dig deep now.

Furrow lengths range from 3m or less for gardens to 500 m for field crops. The most common range is from 100 to 200 m. If the furrows are too long, losses from deep percolation may occur. Soil erosion may happen near the upper end of the field. Furrows are typically provided with slopes that range from 0.2 to 6%. Accordingly, to ensure surface drainage, a minimum furrow grade of 0.05% is required.

Related posts from vincivilworld

Furrow spacing for crops

Furrow spacing for corn, potatoes, sugarcane, and other row crops is determined by the proper spacing of the plant rows, with one irrigation furrow provided for each row. But in the case of In orchard irrigation, furrow spacing is kept between 1 and 2 metres. If the spacing is kept more, it is essential to check the distribution of moisture after each watering by auger boring.

Generally, It is more effective if the spacing is increased. Accordingly, if the spacing is maintained, it is crucial to auger bore after each watering to assess the moisture distribution. Furrow depths in low-permeability soil can range from 20 to 30 cm. When irrigating root crops, it is critical to have furrows that are deep enough and streams that are small enough that water does not come into contact with the plant. Generally, furrows for row crops like cotton, tobacco, and potatoes are typically 25cm wide and 8 to 10cm deep.

That’s it about the general details of the furrow method of irrigation. Let me show you the types now.

ALSO READ: Check flooding and Border strip methods of irrigation

Types of Furrow Method of Irrigation

Depending upon the alignment, furrows may be of two types.

  1. Straight furrow
  2. Contour furrow

Straight furrow

  • Straight furrows are used where the land slope is nominal.
  • These are aligned more or less along straight lines parallel to each other and along the slope of the land.
  • These are normally adopted where the slopes do not exceed 0.6%.

Contour furrow

  • Contour furrows are practically laid along the contours. Therefore, these are not straight but are curvilinear in the plan.
  • With contour furrows irrigation, the direction of flow is across a sloping field rather than down the slope to reduce water velocity.
  • The furrows are laid out with enough grade to carry the irrigation streams. Head ditches are run across the slope or downhill using drop structures as needed, to feed the individual furrow.
  • The contour furrows method can be successfully used in nearly all irrigable soil.
  • Light soils can be irrigated successfully across sloped up to 5 per cent. Where the soils are stable and will not be cultivated, slopes up to 20 per cent can be irrigated by contour furrowing.

ALSO READ: Rainwater Harvesting Methods: Everything You Need To Know

Stored the details in the brain, right? Let me walk you through the construction method of furrows now.

Construction of furrow method of irrigation

Furrow Irrigation
Furrow Irrigation
A tractor cultivating soil with deep furrows on a hillside, illustrating the furrow method of irrigation.
A tractor working on creating furrows for irrigation, demonstrating the furrow method used for effective water management in agriculture.
  • Furrows are made before planting, at the time of planting or after the plants have grown large enough not to be covered up.
  • The time of furrowing depends upon the crop grown and the method of planting used.
  • Often young plants are irrigated by small furrows until a good root system is developed. Thereafter, the furrow is made larger.
  • The furrows at any stage must be large enough to carry the water needed for irrigation.
  • In most soils, crops are grown on the top of the ridge while in deep sand, it is better to have the seeding near the bottom of the small furrow.
  • An alternate method specially adapted to sandy soils is to transplant vegetables in the furrow, irrigate it once or twice and then establish furrows between the rows after plants have grown larger.
  • Furrows are made with various cultivating tools depending on the type of crop to be grown.
  • Large furrows are normally made with a double mould board plough or lister.
  • A wooden plough with furrower attachment can also be used in place of listers. Disc-drum corrugator furrower is very useful to make small size furrows in sandy soil.

ALSO READ: Concept of green building- 4 comprehensive concepts easy read!

Time to have some positivity. The advantages of the furrow method of irrigation are given in the next section.

Advantages of furrow irrigation

irrigating plants -Furrow method
Irrigating plants
View of furrow irrigation method, showcasing parallel water channels in agricultural land, demonstrating effective water distribution for crops.
Furrow irrigation method showcasing water-filled channels between rows of crops, effectively minimizing evaporation and supporting plant growth.

In furrow irrigation, water contacts only 1/5 to ½  of the land surface, reducing pudding and crusting of the soil. Losses due to evaporation are also reduced. Evaporation losses are also reduced. Previously, cultivation is possible in heavy soil and can be adapted to use without erosion on a wide range of natural slopes by carrying furrows across a sloping field rather than down the slope. It is especially beneficial for crops that have been harmed by water contact. Similarly, Labor requirements for land preparation and irrigation are drastically reduced. Moreover, field ditches do not waste any land.

Key Takeaways

  • Efficient Water Use: Furrow irrigation delivers water directly to plant roots, minimizing evaporation and conserving water resources.
  • Cost-Effective: This method requires minimal infrastructure and energy, making it economical for farmers.
  • Crop Suitability: Ideal for row crops like maize, cotton, and sugarcane, especially those sensitive to waterlogging.
  • Adaptability: Can be implemented on various terrains, including flat and gently sloping lands.
  • Soil Conservation: Properly designed furrows reduce soil erosion and maintain soil fertility.
  • Labor Intensive: Requires manual labor for construction and maintenance of furrows.
  • Water Distribution Challenges: Uneven water distribution can occur if not properly managed.
  • Not Suitable for Sandy Soils: High infiltration rates in sandy soils can lead to inefficiencies.
  • Potential for Salt Accumulation: Continuous use may lead to salt buildup in the soil, affecting crop yield.
  • Limited Precision: Less precise than modern irrigation methods like drip or sprinkler systems.

Conclusion

Furrow irrigation remains a widely used and effective method for irrigating row crops, particularly in regions where resources are limited. Its simplicity and cost-effectiveness make it accessible to many farmers. However, to maximize its benefits, careful planning and management are essential to address challenges such as labor requirements, water distribution, and soil conditions. By understanding the specific needs of their crops and land, farmers can implement furrow irrigation effectively, contributing to sustainable agricultural practices.

Liked the concept of the furrow method of irrigation? Let me know your thoughts in the comments.

MUST READ GOOGLE 1st RANKING POST: Road margins- 6 types of road margins in highway

Happy learning!