Shotcrete – A total overview||Shotcrete vs Gunite

Shotcrete is a method of placing concrete where concrete/mortar is sprayed at high velocity to an overhead or vertical surface. Concrete is conventionally placed on the ground or to the formwork and compacted using appropriate vibration methods.

What is shotcrete? 

Shotcrete is a wet or dry mix of mortar/concrete sprayed to a vertical or overhead surface with high velocity. The mortar/concrete mix is conveyed through a hose and sprayed with a nozzle with high velocity. The force imparted by this application process consolidates the concrete/mortar resulting in an excellent bonding with almost all substrates. Shotcrete is also called sprayed concrete. The pressure will be maintained to around 20-30 N/cm2.

When mentioning about shotcrete another term which is commonly used is gunite or guniting.

Shotcrete process
Shotcrete process

What is gunite or guniting ?

Guniting and shotcrete are more or less the same. The difference between shotcrete and gunite is basically in the method of spraying and mixing ingredients.

Shotcrete spraying is accomplished through either of the following process.

a) Dry mix process

b) Wet mix process

The dry mix process is called gunite or guniting

In Gunite / dry mix process the dry materials are premixed and placed in a hopper. With the help of compressed air, the dry materials are driven to the nozzle. Water gets mixed with the ingredients from a separate source just before going out of the nozzle. The mixed material hit the surface to be applied at a super high velocity through the nozzle.

In the wet-mix process/Shotcrete, the ingredients are premixed with water like conventional concrete and placed in a hopper. Just like the dry-mix process, the wet-mix process uses compressed air to shoot the concrete through a hose. This is also called sprayed concrete were fully mixed concrete or mortar is sprayed through a nozzle.

Shotcrete of walls
Shotcrete of walls

Both these process are used depending on the area of application and site conditions.

Shotcrete vs Gunite – A comparison

Both of these methods have there pros and cons. The uses are distinguished depending on the area of application and nature of the job.

GUNITESHOTCRETE
In the gunite process, we can stop and start the job after some interval, and still, the material will stick on to the old surface due to the high velocity at which the material is applied.Shotcrete material is premixed and to be consumed within a specified time or else the material strength and qualities will be affected.
The applicators get much more work time since the cement mixing is done at the site. With gunite, you can stop and start the application without creating any cold joints. They got super high strength accompanied by low shrinkage.The joints formed in shotcrete due to any stoppage of work leads to a cold joint and the next layer applied after a certain period behaves as a different layer. A cold joint may develop and cracks may happen.
A super-skilled operator is required for gunite. The total quality, consistency, and strength of the gunite depend on the skill of the operator. And the ratio of water, cement sand mix. The nozzle operator controls the application, adjusting water levels as needed to get the right mix consistency.Highly skilled workers are not needed for a shotcrete application. The crew doesn’t have to be as skilled because the concrete comes already mixed and no need for any mixing or proportioning at the site. It’s easier to add specialised admixtures to the concrete
The high water content will ruin the mix and less water content will clog the hose and nozzle. Therefore care should be taken to maintain optimum water content.You don’t need to add water as it comes premixed with water. Sometimes water is added to improve the consistency of the mix in transit mixtures at site. This reduces the strength of the mix and cause shrinkage cracks.
Guniting gives a strong and uniform surfaceShotcrete gives a strong and consistent surface
Gunite produces a lot of oversprays called Rebound wastage. These rebound wastage are not to be reused and generate huge wastes. Disposing and housekeeping the area requires extra manpower.Wastage is less compared to Gunite in case of shotcrete.
Guniting is less expensive than shotcrete. Large-sized aggregates are not used in concrete, and mostly it will a cement-sand mix.Shot Crete is more expensive than gunite and uses aggregate up to 20 mm or as per design mix recommendations.
Completion time is slow compared to shotcreteThe shotcrete process is faster than gunite and got higher production rates.
Gunite is easier to clean up than shotcrete.
The hose is lighter and easier to use
Because you add water at the nozzle, the concrete is very fresh when you spray it.
If the hose gets clogged, it can be tough to clear which could be dangerous for the crew and property

The bottom line is that both gunite and shotcrete have their advantages and disadvantages. The truth is both will produce a high-quality, watertight, durable surface if you do the processes correctly. A super-skilled operator for doing the works improves the quality of the process.

Advantages of shotcrete

Shotcrete-sprayed concrete is increasingly becoming popular because of its extremely economical and flexible application process.

  • Shotcrete has got several advantages when compared to conventional concrete. For swimming pools, water retaining structures shotcrete is an ideal choice. They are easier to spray and admixtures can also be included to enhance mix qualities.
  • Shotcrete is durable and it imparts more strength to structures.
  • The process of application of shotcrete makes the concrete dense and less porous than conventional concrete.
  • They help in reducing shrinkage cracks, cold joints and produce an even, nonporous and durable concrete.
  • They help in reducing the construction time and reduce valuable time and money incurred as formwork costs and makes the work far more easier.
  • Shotcrete/gunite can save money in terms of shuttering, labour costs and can shorten the project delivery schedule.
  • Cold joints and areas where shuttering possibility is minimum can also be done using shotcrete methods.
  • It is possible to create any shape using shotcrete which is not possible using conventional concrete.
Gunite work
Gunite work

Application of Shotcrete/guniting

Shotcrete is extensively used in a wide range of applications due to there ease and flexibility in placing and capability of producing a dense and non porous concrete surface. They are used for..

  • Shotcrete is used for the construction of thin, lightly reinforced sections such as curtain walls.
  • Used for shell or folded plate roofs.
  • Used for underground structures and tunnels, lining works. For pre-stressed tanks, swimming pools, water retaining structures for treatment plants, etc.
  • Shotcrete/gunite is used for repairing deteriorated concrete and retrofitting works.
  • Used for structural steel encasing works.
  • Shotcrete is used for the formation of canal lining, reservoirs, and repairing of linings.
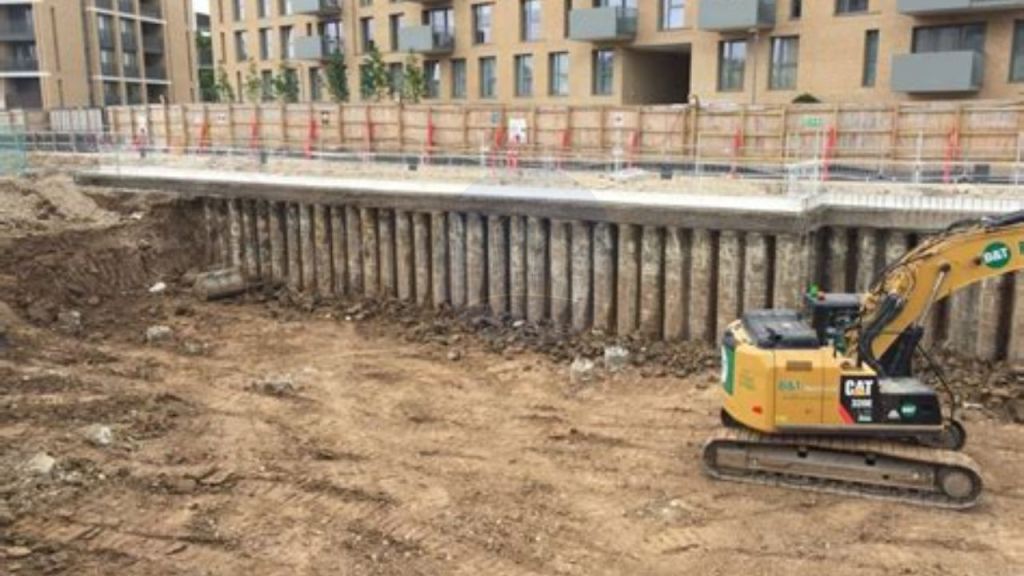
  • They are best suited for applications in underground structures, basement waterproofing works, water retaining structures, deep excavation slope protection, etc.

Disadvantages of Shotcrete/Gunite

  1. The success of shot crete depends on the skill of the operator.
  2. Shotcrete cost is higher than conventional concrete.
  3. Chances of concrete loosing its quality due to delay in spraying or pouring water to increase workability.
  4. Getting a perfect bond with some surfaces is very difficult.

Share this:

Floating House- 2 Types of Floating Houses & Amazing Examples

Floating house is always an attraction to those who care for the aesthetics and beauty of their residence. More than anything, they have the advantage to sustain the flood. Floating houses are the ones that are built with a load that is equal to or less than the uplift force of the water that aids in floating the house on the water. Traditional houses, such as houses on boats, have mobility, whereas floating houses are those houses used as living spaces on water that are minimally mobile other than moving vertically with the tide. A float house, unlike a houseboat, is not self-propelled, though some smaller float houses can be propelled by attaching an outboard motor to them.

Today, we are going to find out all the interesting aspects of this civil engineering wonder.

  1. What are floating houses?
  2. Types of floating houses
    1. 1. House that permanently float
    2. 2. House that floats during flood
  3. Examples of a floating house
  4. Principle of a floating house
  5. Principle of a vertically moving floating house
  6. Services available with a floating house
  7. Life in floating houses
  8. Need for floating houses
  9. Moving houses
  10. What good would it do to hire an outside firm to do the cutting of our lumber?
  11. Conclusion

What are floating houses?

“Floating”  term in the foundation  engineering is used when the soil beneath the footing does not experience any extra load , as the load of the structure is equal  or less than the soil displaced.

Floating houses are similar in concept and normally defined those houses which are constructed on water in a way that the load of the structure is equal or less than the uplift force of the water which helps in floating the house on water.

Now, let me show you the different types of floating houses.

Types of floating houses

There are two types.

  1. House which permanently float
  2. House that floats during flood

We will learn each of them in depth next.

1. House that permanently float

These type of floating houses are constructed by the mechanism that allows it to float permanently.

Green roofed Schwimm Haus Boat by German architects.
Floating houses - Green Roofed Schwimm

2. House that floats during flood

These are houses that float only during flood water, else get placed on the ground ,particularly during dry season if there is no water.

The figure below shows floating houses during flood. They are an easiest homemade solution with foam blocks under your home. The 4 guide posts keep the house in place as it rises, just like a floating docks

Houses that float during flood
Floating houses that float during floods

There is a home in Kerala which was widely appreciated for the innovation.

The whole building is made of steel (GI pipe). The walls are made of multi wood sheet on both sides.

The home is built by P Gopalakrishnan Achari from Ernakulam district in Kerala. To avoid the floating house from being swept away by the floodwaters, he placed four steel pistons at 25 feet into the earth in four corners through the walls.

Floating house in kerala

The house is supported on the inner rods of these pistons.

During floods, the house will move up along with the air tank with the piston.

When the water recedes, it will automatically come back to the normal level. The house will not move an inch on to the sides.

Also read: Self healing concrete|Bacterial concrete-Preparations& Advantages

Now, let’s look into some exciting examples of floating houses.

Examples of a floating house

  1. The figure below depicts a house that was built on a steel platform structure with steel pontoons.
House built on steel platform
Floating house built on steel platform

2. The house shown below is designed by Morphosis Architects and students from UCL. They collect its own water, generates its own electricity, and is capable of floating as high as 12 feet on rising flood waters.

Flotation is made possibly by a single unit of expanded polystyrene foam coated in glass fiber reinforced concrete.

Floating house in which floating by expanded polystyrene foam coated in glass FRC

3. The building in the figure below is amphibious home that rests on land but are built to rise when waters rise. When the river swells the house will float as much as 18 feet. It floats back down as the water subsides.

It is designed by Factor Architecten.

Also read: Infrared Thermography in Civil Engineering: Applications & Pros and Cons Simplified

In the next section, let’s discuss some technical jargon. After all, the beauty emerged from it, right?

Principle of a floating house

  • Floating house do not require foundation and are based on the  principle  of buoyancy. Thus known as  buoyant   homes.
  • Base of the structure  should be such that it help in floating as well as able to take dead load, live load and other load to encountered by the  house.
  • The houses may be constructed on boat, hollow pipe, light weight pads and similar materials which help in floating as well  as take up load.

That was the principle behind it. Next, let us particularly look into the technology behind vertically moving floating houses.

Principle of a vertically moving floating house

  • A steel frame that hold the floatation blocks is attached to the underside of the house.
  • There are four ‘vertical guidance’ poles not far from the corners of the house.
  • The tops of poles attached  to steel frame.
  •  The poles  telescopes out of the ground, allowing the house to move up and down.

What about the services that would be available in a floating houses?

Services available with a floating house

  • All the ducts and wires for water, gas, electricity and sewage disposal in such amphibious homes are flexible , designed to remain functional even when the house rises several metres from its usual  position
  • Solar panels are provided for energy requirements
  • In-cino-let toilets which burn waste are provided
  • Drinking water is collected from rainstorms and filtered into glass partition wall  inside
  • The  inner  temperature  is regulated in case of geothermal pond loop

Here comes, the most interesting aspect. How about the life in the miracle?

Life in floating houses

  • Relaxing
  • Romantic
  • Comfortable
  • Low storage space
  • Less accommodation
  • Cost
  • Heating/cooling
  • Maintenance
  • Safe during flood

Okay. So, now it feels so good. In an environmental friendly approach, is it relevant?

Need for floating houses

  • The sea level  is said to have risen by 20cm in last centuary.
  • It is expected to rise  by three amount in the 21st centuary.
  • So floating house will not be a fashionable style but necessary.
  • Safe  in  flood prone  areas  during floods.

Finally, let’s give quick trip through the moving houses which is a cousin of floating houses.

Moving houses

  • Envelope of houses can be fabricated , shown to customer and towed to the site.
  • The whole structure will require to be anchored to the  foundation.
  • If house owner wants to shift, it can be dismantled and reinstalled at other place.
  • Interiors  can  be placed as per the requirements  through  modular  parts  like  kitchen ,bath  etc.

Time to wrap up.

What good would it do to hire an outside firm to do the cutting of our lumber?

The building industry is very competitive and requires pinpoint accuracy when it comes to building floating houses. Preparing a timber layout and constructing estimates before being hired requires a significant lot of knowledge and time. Your time is money, and it might be used to increase profits and extend your floating houses business’s reach.

Contact Nedes estimating first if you need a precise wood quote for an upcoming floating house or company plan. For many of the world’s greatest and smallest construction projects, we laid the first wooden beams. Our team of professional estimators has decades of experience in the construction sector and floating houses are no different. In addition, we are aware that a thorough wood plan is required when producing estimates for construction projects. To ensure an error-free design and correct sizing of all components, we use state-of-the-art estimating technology. Our Lumber Takeoff Services are what you need, so contact us now.

Conclusion

  • India has islands, coastal areas and areas highly prone to  flood.
  • So there need to construct  floating house and have expertise  in this type of construction.
  • There is need to develop  technology for  moving  houses which can be  transported and constructed  early  particularly  during  disaster or when required to be shifted  due to other consideration.

So, how was the journey through floating houses? I found it really awesome. Let me know your thoughts in the comments.

Photo credits: (https://insteading.com/)

Infrared Thermography in Civil Engineering: Applications & Pros and Cons Simplified

Heard about infrared thermography? We are going to deal with the topic in today’s blog.

I will walk you through the principle behind the technology, the classification based on its working, applications and the advantages and disadvantages.

What is Infrared thermography?

Infrared thermography uses thermographic cameras to detect radiation in the long-infrared range of the electromagnetic spectrum and generate images of that radiation, called thermograms.

The figure below shows the procedure of IRT.

Schematic Representation of IRT
Source: Vollmer et al. (2010)

The principle behind infrared thermography is that the heat flow through the body is  affected by the  presence of internal anomalies. The main heat transfer mechanisms are conduction and radiation.

Now, let’s peep into the classification of infrared thermography.

Classification of infrared thermography

There are two types of classification based on different parameters.

1. Based source Of heating

  • Passive Thermography- Passive thermography explicitly tests the surface temperature for measurement, as the interest area would have irregular hot-spot as compared with the surroundings
  • Active Thermography- In active thermography, to detect inhomogeneities and cavities, heat is directed into a test piece. When a test object is heated or cooled, surface temperature variations are caused by local differences in the thermal conductivity and heat power of the test sample.

2. Based on method of heating

  •  Pulse Thermography-  Infrared pulse thermography is a non-contact, non-intrusive NDE process commonly used for aircraft structure inspection. To unleash a thermal wave into the material for the detection of defects within the material, the technique employs a burst of high-intensity thermal excitation.
  • Lock-in Thermography- Lock-in thermography is a method that uses a laboratory power supply and reed relays to automatically and repeatedly power a device at regular intervals while the device’s temperature response is integrated and measured over time.

In the next section, I will show you the advantages and disadvantages of infrared thermography.

Advantages of infrared thermography

Digital and Infrared image of a building
[Source: Vollmer et al. (2010)]

The main advantages of IRT are as follows.

  • Early detection of defects
  •  No hazard 
  •  Quick
  •  No time constraints

Disadvantages

The disadvantages of IRT are,

  • High Equipment Cost
  • Dependency on the environment conditions
  • Dependency on the surface conditions
  • Difficult to measure the depth of a flow

That’s it about the pros and cons. Let’s move on to the last section that talks about the interesting applications of infrared thermography in civil engineering.

Applications of infrared thermography

1. Bridge deck assessment

Bridge deck deterioration is an issue to be addressed with seriousness. Delamination and disintegration of concrete lead to this. Inadequacy of Traditional methods like sounding, chloride, corrosion potential gives way to IRT to be considered as the better alternative.

2. Testing for fibre reinforced plastic wrapped columns

  • Subsurface debonds form between the fabric and the underlying member
  • This affects the strength and ductility of the member
  • IRT in rehabilitation work and periodic monitoring
  • External Heat source is used
  • Detection of  subsurface debonds
  • Repair using resin or replacement

3. Thermal Measurement And Control Of HMA Pavement Construction

The figure below shows the continuous thermal measurement system.

Continuous Thermal Measurement System
Continuous Thermal Measurement System:
(a) Sensing Bar mounted to Paver (b) Display Screen
[Source: LeClair et al. (2015)]
  • IRT can be used for real-time measurements of the surface temperature of the installed asphalt mat
  • Map thermal contour on the surface of a material
  • Identify temperature anomalies in cold areas

4. Energy Efficiency Assessment in Buildings

  • It is used to identify and minimize the source of unnecessary heat flows.
  • It makes use of the actual and expected 3D spatio-thermal models using EPAR
  • The technique optimizes R-values using retrofit
  • It helps to achieve optimal thermal comfort for occupants
  • It also improves energy efficiency in buildings

5. Building Moisture Inspection

  • In this application, IRT is utilized as a diagnostic tool to evaluate moisture
  • It uses Moisture detector as a supporting device
  • IRT identifies critical areas that were not detected visually
  • Structural plans of the building should be checked

With that, we come to the end of this piece of information. Let’s wrap with the conclusion.

Conclusion

  • Infrared thermography is a fast, clean and safe technology
  • IRT is dependent on the sensor and the surrounding environment
  • The defect can only be detected if it possesses enough thermal resistance
  • IRT has wide applications in the realm of NDA as well as Civil engineering

So, how was the trip through infrared thermography for civil engineering? Was your time worth investing here with me?

If so, let me know your thoughts in the comment section.

Enjoy learning!

Crib retaining walls, Bin retaining walls & Gabion Walls

Retaining walls are rigid walls used for supporting soil laterally so that it can be retained at different levels on the two sides. The soil got a natural angle of repose and when it exceeds the range a retaining wall structure has to be provided.

They are vertical or near vertical structures constructed to hold soil between two terrains when the slope exceeds the natural one. The slope can be vertical or steep or much above the range of angle of repose.

Also read : Retaining walls – All Types, Materials, features and uses

In this article we are mentioning about some special type of retaining walls

Gravity retaining walls are made of stone, bricks, concrete or any other heavy material.  Gravity walls are made with or without mortar They are designed to counter the earth pressure by their self weight. Following are the special types of gravity retaining walls.

a) Crib retaining wall

b) Bin retaining wall

c) Gabion retaining wall

Crib Retaining walls

Crib retaining wall or crib lock retaining wall is one of the oldest types of retaining wall. They consist of cribs or cells made of timber, concrete, and plastic/fibres. The cribs or interlock areas are filled with free-draining materials or earth back-fill, eliminating the hydro-static pressure and enabling a free escape of water.

Most common materials used for crib wall construction is 

  • Timber crib retaining walls
  • Precast crib retaining walls

Timber crib retaining walls

Timber crib walls use timber to form the cells of the crib. The cells are filled with free-draining stone materials for maintaining the mass of the wall. Water drainage can happen freely through the cribs. The timber sections are interlocked to make the walls.
They can also be planted with trees to create a natural appearance. These types of walls are ok up to a height of 5-6 mtrs and mostly used for landscape walls etc.

Timber crib retaining walls

Precast concrete crib retaining walls

This system consists of a precast concrete header and stretcher units. They are erected to form precast crib retaining walls.
Precast concrete cribs are the cheapest form of earth-retaining systems and are used for landscaping structures, plant terraces, and other works with heights around 10- 20 mtr with proper professional design.
They do not require any skilled labour to do the erection. Trees or shrubs are planted to give natural and excellent looks. Crib walls are erected for small curves and are considered a very flexible material.

Precast Concrete Crib retaining walls

Bin retaining walls

Steel bin walls are made from corrugated steel sheets and are usually bolted together and then filled with crushed rock or other free-draining material. They are mostly used for bank erosion protection, holding encroaching slopes, breakwaters, etc. They can resist unforeseen ground movements that may cause failure to other types of retaining walls.

Gabion Retaining walls

Gabion retaining wall systems are one of the oldest forms of gravity wall. Gabion walls are manufactured by factory fabricating a galvanised hexagonal wire mesh of varying diameters into box cages. These box cages are site filled with locally available stones and fully closed and laid in a pattern as per design. They are used in areas where the foundation conditions are not favourable for adopting any other retaining structures. The concept of a gabion wall is to increase the shear capacity of rock by providing the box cages. They can accommodate substantial ground movements without failures. Gabion boxes are free-draining structures that can reduce hydro-static pressure drastically.

Gabion Retaining walls

The main advantage of these types of systems is that they do not need an exclusive foundation structure. Gabion walls are installed directly over the surface in specified patterns according to design requirements.
The mesh is PVC protected or coated with special coatings to protect from rusting in areas subjected to continuous water flow.
These walls provided a Good visual appeal of the product and the satisfying rock finish look.
Gabion walls are erected mainly for soil stabilisation behind the wall. They can also act as a cover wall. The gabion boxes are stacked in layers with a proper design. They are a very economical alternative for concrete retaining walls and rock anchors for soil stabilisation works and slope protection works.

Also read : MSE retaining walls or Mechanically stabilised Earth walls

Self Healing Concrete ||Bacterial Concrete -Preparation and Advantages

Self healing concrete is a mind-blowing innovation in civil engineering. It can potentially contribute to ensure a longer lifespan of a structure. In this article, we will find out the details about bacterial concrete. A bacterial concrete is most effective in this category.

Let’s start from scratch.

What is self healing concrete?

The type of concrete that uses the process of self-filling up of cracks by the help of bacterial reaction in the concrete, after hardening is known as Self-healing concrete.

Why self healing concrete is important?

  • Unrepaired cracks lead to a reduction in the service life of the structure. Therefore, it is worth giving attention to.
  • Epoxy resins and other synthetic mixtures are alternatives. (But they are not good for human health)
  • Self healing concrete does not require human intervention

Let’s dive in deep now.

Bacterial Concrete

Concrete which is made by adding bacteria that precipitate calcite is called bacterial concrete.

  • It is microbiologically induced calcite precipitation.
  • Bacterial concrete heals cracks around 0.5 mm thickness.
  • It has improved Compressive & flexure strength than ordinary concrete.
  • Bacterial concrete is well suited for Small & Medium-Sized building
  • It is used on a limited scale & not commercially wide-spread.

We learnt the general details. Let’s be a bit technical now?

Bacteria Used in the self healing concrete

Bacteria used in bacterial concrete
Source : alchetron.com
  • “Bacillus pasteurii ”  is a common soil bacterium which is used in bacterial concrete.
  • Precipitates impermeable calcite layer over the surface of concrete.
  • Acid producing bacteria
  • Remains dormant & be viable for over 200 years under dry conditions

In the next section, let me quickly walk you through the mechanism of the self healing concrete.

Mechanism of Bacterial Concrete

  • Bacillus pasteurii is used along with Calcium Lactate. 
  • Both are added in the wet concrete when the mixing is done.
  • Water seeps in the cracks (or exposure to moisture)
  • Spores of the bacteria germinate & feeds on calcium lactate ,consuming oxygen.
  • The soluble calcium lactate is converted to insoluble limestone.
  • limestone starts to harden, filling the crack automatically
  • The advantage is that oxygen consumed helps in the prevention of corrosion of steel.

That’s it. Now, we will move on to the chemical process in bacterial concrete.

Chemical process of this self healing concrete

The steps in the process are as follows.

  • Water comes in contact with the unhydrated calcium.
  • Calcium hydroxide is produced by the help of bacteria, it acts as a catalyst.
  • This calcium hydroxide reacts with CO2 to form limestone and water.
  • This extra water molecule keeps the reaction going.
  • The limestone then hardens and seals the cracks.

Figure below shows the self healing concrete.

Source: sciencedirect.com

What about us study about the preparation of bacterial concrete now?

Preparation of Bacterial Concrete

There are mainly two methods.

  • By Direct application
  • By Encapsulation

Without delay, let’s meet each of them.

Direct Application

  • Bacterial spores and calcium lactate is added directly when mixing of concrete is done.
  • This doesn’t change the most properties of concrete.
  • When water comes in contact with this bacteria
  • They germinate & feeds on calcium lactate and produces limestone.

Encapsulation Method

  • The bacteria and its food (calcium lactate), are placed inside treated clay pellets.
  • Concrete is prepared.
  • Clay pellets break when crack occurs.
  • Bacteria germinate and eat down the calcium lactate & produce limestone.

Time to chill. Sit back and enjoy the advantages and disadvantages of what we have made through the process.

Advantages of bacterial concrete

  • Increase in compressive and flexural strength compared to normal concrete.
  • Self-repairing
  • Reduction in permeability of concrete
  • Resistance towards freeze-thaw attacks.
  • Low maintenance
  • Improves the durability of steel reinforcements.
  • Bacillus bacteria are harmless to human life.

Disadvantages of bacterial concrete

  • High Cost
  • Growth of bacteria is not suitable in some environment.
  • The clay pellets comprise 20% of the volume of the concrete. This may become a shear zone.
  • Design of mix concrete with bacteria  is not available in any IS code

We have reached the shore. Let’s wind this up with the conclusion.

Conclusion

  • Self healing concrete appears to be much more efficient
  • It has more advantages than disadvantages.
  • So far, Bacterial Concrete is the best approach in the field of self healing concrete

Hope the article served its purpose to quench your thirst to know about self healing concrete. Share your thoughts on this in comments.

Types of Retaining walls – All types,materials,features and uses.

Retaining walls are rigid structures used for supporting soil laterally and retained at different levels on the two sides. These structures are vertical or near-vertical. They are constructed to hold soil between two terrains when the slope exceeds the natural angle of repose. The slope can be vertical or steep or much above the range of angle of repose. Understanding retaining wall types is crucial for selecting the right wall based on soil conditions, load requirements, and project design.

Key retaining wall types include gravity retaining walls. These rely on weight for stability. Buttress retaining walls provide extra support. Elements like retaining wall heel and toe enhance stability, making these walls effective and durable solutions.

This article is about the types of retaining walls, materials used and features.

  1. What is a retaining wall?
  2. Design criteria of retaining wall
  3. Retaining wall types
    1. Gravity Retaining walls
    2. Cantilever retaining walls
      1. The loads induced on various components
    3. Counter-fort retaining walls
    4. Buttressed retaining walls
    5. Sheet piled retaining walls
    6. Piled retaining walls
    7. Anchored retaining walls

What is a retaining wall?

Retaining walls are critical engineering structures designed to stabilize and support terrain by restraining soil mass at different elevations. These versatile architectural elements are essential in landscape design, civil engineering, and construction projects. They prevent erosion, manage slope stability, create usable spaces on uneven terrain. Retaining walls provide critical structural support in areas with significant elevation changes.

Engineers and landscape architects utilize various types of retaining walls, each with unique characteristics and applications. The selection depends on factors such as soil conditions and load requirements. Other considerations include site topography, budget constraints, aesthetic considerations, and project design. These factors ensure long-term durability and safety. Common retaining wall types include gravity walls, cantilever walls, and anchored walls, each using distinct methods to provide stability.

Design criteria of retaining wall

The main criteria behind the design of the retaining wall are to counter the downward slope movement of back filled soil by gravity. The lateral pressure developed behind the wall depends on the angle of internal friction & cohesive strength of retained materials. The lateral pressure can also be liquid (hydro-static pressure), and pressure from any type of back-fill material like sand, granular material, fly ash, etc. A proper drainage system is to be provided to reduce the hydro-static pressure.

Retaining wall types

There are several types of retaining wall depends on the nature and type of soil and situations they are to be used.

  • Gravity retaining wall
  • Cantilever retaining walls
  • Counter-fort retaining wall
  • Buttressed retaining wall
  • Sheet pile retaining wall
  • Bored pile retaining wall
  • Anchored retaining wall

There are a lot of innovative and alternated methods used for retaining walls

Retaining wall Types

Gravity Retaining walls

Gravity retaining walls are executed with stone, bricks, concrete, or any other heavy material. They are done with or without mortar and are designed to counter back-fill soil pressure by their self-weight.
Dry retaining walls do not require rigid footing. However, they must be designed to counter sliding. They also need to address overturning and bearing loads acting on the structure.
These types of retaining walls are mainly adopted in landscape areas and also in locations with height is around 2-3 meters.

Gravity retaining wall

Gravity retaining walls are used for larger heights using composite gravity walls. Composite gravity walls include precast crib walls or timber walls filled with granular materials, Gabion walls, Geowalls, etc.
The gravity wall when provided with a small amount of reinforcement is known as semi gravity retaining wall. The load transfer mechanism remains the same as that of gravity retaining walls.

Gabion wall

Cantilever retaining walls

Cantilever retaining walls are the most common retaining wall type. They are reinforced concrete structures wherein the lateral earth pressure is countered by the cumulative action of total structural members.
Cantilever retaining walls consist of a stem, a base slab which is divided into toe slab and heel slab as shown in the figure.

Cantilever retaining walls


The vertical stem wall is extended to the back fill side or heel side and is called a heel slab and the slab on the other side is a toe slab as shown in the figure.
The stem wall, toe slab, and heel slab act as cantilevers fixed injunction and spanning to other ends. The back filling of soil over the heel slabs imposes additional stability against lateral pressure and stabilises the wall against overturning and sliding.

The loads induced on various components

a) Heal slab and toe slab = Upward soil pressure from the bottom and tends to bend upward. Rebar is placed in a tension zone.
b) stem= Lateral earth pressure tends to bend in the opposite direction of back-fill.
These types of walls are economical and can be used for heights around 5-7 mtr. They are much lighter than gravity walls and require comparatively small foundations. These types of walls can be constructed as to cast in situ and precast and prestressed concrete depending on the site requirements.

Prestressed retaining wall & Retaining wall

Counter-fort retaining walls

Counter-fort retaining wall is a cantilever retaining wall used when the height is around 7 mtr or more. For economising the structure, vertical bracing called counter-forts are provided on the back fill side. These counter-forts connect the heel slab and stem as shown in the figure. The stem and heel slabs between counter-fort act as continuous slabs and negotiate the high bending movements. The counter-forts function as tension stiffness and reduce the bending and shear stresses. These types of retaining walls are used for heights ranging from around 8-12 mtr.

Counter-fort Retaining walls

Buttressed retaining walls

Buttress retaining walls have the vertical bracing located on the front side of the retaining wall in place of the back-fill side like that of counter-fort retaining walls. The structural action of the stem remains the same as the counter-fort walls.

Sheet piled retaining walls

Sheet pile walls are erected using steel sheets into a slope to be protected or for excavations up to a required depth. Sheet pile retaining wall economical till a height of 6m and cannot negotiate huge loads. Sheet pile acts as a temporary wall that is driven into the excavation area for protecting the area from collapsing. They provide high resistance to driving stresses. They can also be reused and are considered the most economical retaining solutions. They can be bolted and driven easily and do not deform on driving. The problem with sheet piles is the noise it creates while driving.

Sheet pile

Piled retaining walls

These types of retaining walls consist of a sequence of bored piles. The bored piled retaining walls are often accompanied by erection earth anchors, shot-creating the pile gaps, and provision of additional supports depending on the site conditions and designs. Bored pile retaining walls are used in areas where sheet pile tends to create a lot of noise and disturbs the areas.
These types of piles are used for temporary and permanent works. They can hold huge lateral pressure and are used for holding earth for high depth excavations without disturbing the nearby structures. Bored pile retaining walls are classified into contiguous pile walls, tangent pile walls & secant pile walls according to the sequence of piling works.

Piled retaining wall

Anchored retaining walls

Anchored retaining walls, also known as tie-back systems, are essential structural components used in construction. They are mostly used to stabilize earth and as support structures. Anchored Retaining walls deliver lateral support to walls. They prevent soil from shifting or eroding. These walls are commonly used in applications like deep excavations, embankments, and hillside retention etc.