Aqueduct is a cross drainage structure constructed to channel water from the rivers or stream to the distribution points. But modern engineering aqueduct is a cross drainage system that constitutes pipes, ditches, canals, tunnels, and supporting structures. These are constructed or laid to convey water from a source to the main distribution points. Aqueducts/cross drainage systems play and important role in maintaining the strategic flow between drainage water with canal water.
Cross drainage works is a modern day aqueduct. It is constructed to intercept a drain crossing or canal crossing. This prevents the water from mixing between these sources.
- Significance of Aqueducts and Cross drainage works
- Cross drainage system/Aqueduct – Need
- Aqueduct /Drainage type selection
- Types of Cross drainage works
- Key Takeaways
- Conclusion
Significance of Aqueducts and Cross drainage works
Aqueducts and cross drainage works play vital roles in managing water flow and maintaining infrastructure integrity. An aqueduct was historically used to transport water across valleys and uneven terrain. It has evolved into essential modern structures. These include syphon aqueducts designed to overcome challenging topography. Cross drainage works, including culverts, bridges, and siphons, ensure efficient water management by directing flow under roads and other obstacles. This blog will explore the various types of aqueducts. It will also discuss cross drainage systems and their functions. Additionally, it will highlight their significance in infrastructure development. We’ll delve into syphon aqueducts and their unique role in hydraulic engineering, highlighting their applications.
Cross drainage system/Aqueduct – Need
The cross drainage system is an expensive structure and has to be avoided. But there may be situations when the following conditions are encountered and the cross drainage is to be provided.
- The cross drainage design can minimise the discharge velocity at the intersection point.
- The ideal condition of aligning the canal without intersecting the drainage is not possible. The increase in the length makes construction difficult.
- A canal is set between head work and the main watershed. The water supply is not intervened by providing cross drainage work.

Must Read : Components of a Dam – 12 components explained
Must Read : Methods of Irrigation – 3 methods fully explained
Aqueduct /Drainage type selection
The primary factors for drainage works are relative bed levels, water levels, canal and drainage discharge. However, the choice of drainage types can be summarised based on
- Alignment of the canal
- Discharge from canal and drainage
- Capacity of Foundation
- Economic condition
- Canal head loss
- The water level of canal and drainage
Must Read : Controlled Flooding – 6 types – Free Flooding – Basin Flooding
Types of Cross drainage works
Cross drainage works are essential in water management. They ensure that irrigation canals and drainage channels can intersect without disrupting their functions. These structures prevent flooding, erosion, and waterlogging, maintaining the efficiency of both irrigation and drainage systems. Cross drainage works are broadly classified into three types. The classification is based on how the canal and drainage interact at the crossing point. Each type is designed to handle specific hydraulic challenges, ensuring smooth water flow across different terrains.
The cross drainage works are broadly classified into three types as shown below
a )Type 1 – irrigation canal passes over the drainage
- Aqueduct
- Syphon aqueduct
b) Type 2 – Drainage passes over the irrigation canal
- Super passage
- Canal syphon
c) Type 3 – Drainage and canal intersection each other of the same level
- Level crossing
- Inlet and Outlet
Type 1 – irrigation canal passes over the drainage
The structures coming in this category are
- Aqueduct
- Siphon Aqueduct
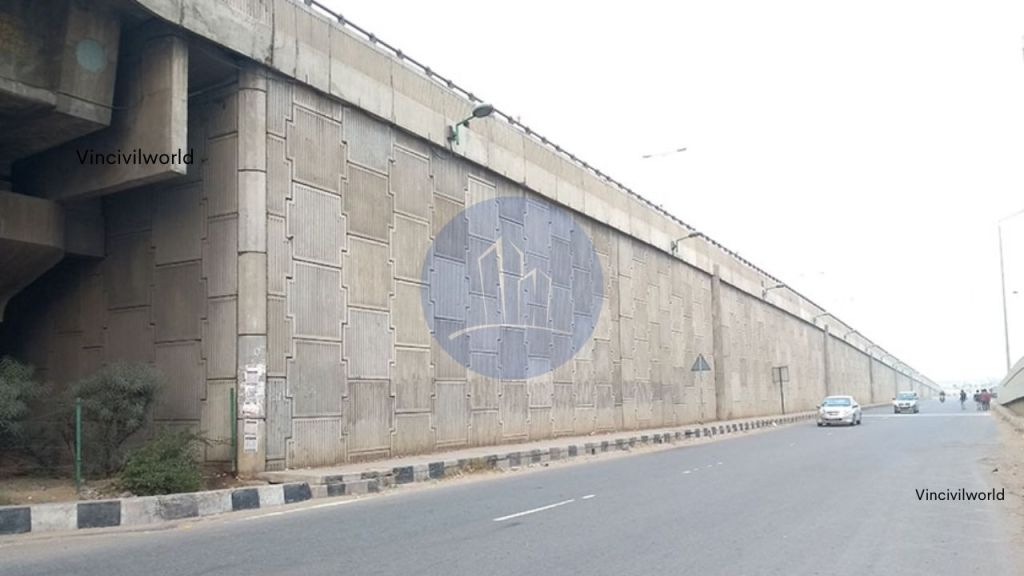
Aqueduct
An aqueduct is a cross drainage work. It is used when the bed level of the canal is above the drainage bed level. This is shown in the figure. The canal water flows from upstream to downstream freely under gravity. The canal trough is rested on a series of piers.
An aqueduct is a structure that carries an irrigation canal over a drainage channel. It is a key component in cross drainage works, ensuring the canal water flows uninterrupted above the drainage. This design prevents the drainage water from mixing with the canal, avoiding contamination and erosion. Aqueducts are vital in areas with uneven terrain, where traditional water management methods fail. They efficiently transport water across valleys and other obstacles. Aqueducts are among the primary types of cross drainage works. This category includes syphon aqueducts, which use enclosed channels to manage higher hydraulic pressures.

The canal water level is known as full supply level or FSL. Drainage water level is referred to as High Flood Level or HFL. This level is below the canal bed level.
The shape of the canal is a rectangular trough or trapezoidal trough. It is similar to a bridge, railway, or roadway.
Advantages of Aqueduct
- They are utilized for irrigational purposes and water supply.
- It is held over piers, made of stone or reinforced concrete.
- The freeboard of 0.5 m is implemented.
- The section of the trough is determined by FSL and the height of the section is determined by HFL.
- An inspection road is given on the sides of the trough.
Syphon Aqueduct
A syphon aqueduct is a type of cross drainage work. The irrigation canal flows over a drainage channel through an enclosed conduit. This design uses siphonic action to maintain water flow, even across steep gradients. In the syphon aqueduct, the canal bed level is below the full supply level. The water flows from upstream to downstream through aqueduct barrels following siphonic action. A sloping apron is provided on both sides to depress the canal level.
The enclosed structure prevents water contamination and erosion, making it ideal for challenging terrains. Unlike open aqueducts, syphon aqueducts handle higher hydraulic pressures effectively. They ensure uninterrupted canal water flow while safely directing drainage beneath. Syphon aqueducts are a crucial part of cross drainage works. They provide a reliable solution in areas where traditional aqueducts not suffice.
In a syphon aqueduct, canal water is carried above the drainage. The high flood level (HFL) of drainage is above the canal trough. The drainage water flows under syphonic action and there is no presence of atmospheric pressure in the natural drain.
Syphonic aqueducts are more often constructed and better preferred than simple Aqueduct, though costlier.

- The section of the trough is determined by the canal water level.
- Cut off walls are provided at both ends.
- The sloping apron is built by using stone or cement concrete.
- The bottom of the siphon aqueduct is impervious.
- The atmospheric pressure is not taken into account.
- They are more prefered than an aqueduct.
- They are expensive.
Type-2- Drainage passes over the irrigation canal
- Super passage
- Canal Siphon
Super Passage
The super passage is type of cross drainage work and a hydraulic structure where drainage passes over the irrigation canal. They contradict the aqueduct. The water from the drainage flows through the troughs under gravity and atmospheric pressure.
This design allows the canal to pass beneath the drainage without interference. The structure prevents the canal from flooding and ensures effective water management. Unlike an aqueduct, the super passage prioritizes the drainage flow, allowing it to cross over the canal. It is essential in areas where drainage water must remain separate from canal water.

The drainage trough is constructed at the road level. These are preferred when drain discharge is less compared to canal discharge. An inspection road cannot be constructed on the sides of the trough. Thus they are not available for an open investigation.
A separate bridge is equipped for the roadway. Also, a ramp is given at the doorway. It is supported by piers.
- To avoid scouring, boulder pitching is given at the bed and banking.
- The section of the drainage is concluded by the high flood level.
- For safety, a freeboard of 1.5 m is given.
- The concrete foundation is provided, But the depth of the foundation is determined by the availability of soil.
Canal Syphon
Canal syphon is implemented when the drainage passes over the canal. The canal water flows under syphonic action and no atmospheric pressure is considered. Since the canal water is under drainage, the exclusion of sediments and silts is impossible.

The inspection road cannot be provided, a separate bridge is constructed for the roadway.
- The selection of trough is designed based on the HFL.
- A ramp is provided for the exit.
- The sloping apron is seen with stone or concrete pitching.
- They have a high head loss.
- These are opposite of syphon aqueduct.
Type 3 – Drainage and canal intersection each other of the same level
- Level Crossing
- Inlet and outlet
Level Crossing
Level crossing is recommended when the canal level and drainage level are the same. The quality and discharge of both canal and drainage water should also be equivalent. A barrier is provided at the upstream level. A regulator is provided at the downstream side.
The components of level crossing are
- Crest wall
- Drainage regulator
- Canal regulator
The top wall of the crest is equivalent to the FSL of the canal. The crest is provided on the upstream side.

The drainage regulator is given at the downstream side. They regulate the flow of water by an adjustable shutter.
The Canal regulator is also kept on downstream at the crossing point. This regulator is used at the peak water supply. Thus the drainage water can be stopped behind.
In peak supply time of canal water parallel to drainage, both the regulators are opened. This clears the drainage water from that of the canal for a certain time interval.
Inlet and Outlets or Canal Inlet
These are provided where the channel and drainage are small. Inlet and Outlet are simple openings. The inlet allows the flow of the water. While the outlet allows the water drain.
The drainage mixed with canal travels through the canal for certain length as shown in the fig. After that the drainage solids are sucked through and outlet provided to create suction pressure disposing to the watershed nearby.

Stone pitching is provided at the bed and banks of the drainage. The maintenance cost of the inlet and outlet system is high. But the construction cost is low. The main disadvantage of this system is that they also cause soil erosion and water pollution.
Key Takeaways
- Cross Drainage Works: Crucial for managing the intersection of irrigation canals and drainage channels without disrupting their functions.
- Aqueducts: Carry irrigation canals over drainage channels, preventing water mixing and ensuring stable flow, especially in uneven terrains.
- Syphon Aqueducts: Handle higher hydraulic pressures, using enclosed conduits to maintain water flow across challenging topographies.
- Design Considerations: Cross drainage work selection is based on factors like alignment, discharge levels, foundation capacity, and economic conditions.
- Preventing Erosion and Flooding: These structures mitigate the risks of flooding, erosion, and waterlogging, contributing to efficient water management systems.
Conclusion
Cross drainage works, particularly aqueducts and syphon aqueducts, play a crucial role in modern water management. These structures are designed to maintain the integrity of irrigation and drainage systems, ensuring uninterrupted water flow across different terrains. Aqueducts, by carrying canals over drainage channels, prevent contamination and erosion. Syphon aqueducts, handling higher pressures, offer advanced solutions for challenging landscapes. These systems are indispensable for maintaining efficient and sustainable water management, safeguarding both agricultural productivity and infrastructure longevity.