enetration Resistance Test is an important method used to assess in-situ concrete strength without causing damage, making it a key part of modern evaluation practices. When engineers ask ,What is Penetration Resistance Test. They refer to a non-destructive technique. This method measures surface hardness by driving a probe into concrete. It correlates penetration depth with strength. This approach fits within Non-destructive test penetration resistance concrete applications, especially where core extraction is impractical.
In today’s construction environment, accuracy and structural reliability are essential. The significance of the Penetration Resistance Test in concrete continues to increase. Engineers often use it alongside the Windsor Probe Test concrete strength assessment system, which provides standardized and repeatable results. As part of evolving field assessments, the method aids in faster decision-making. It complements laboratory testing. The method remains practical, economical, and relevant in modern engineering practice.
This blog covers what the Penetration Resistance Test is, its significance, procedure, equipment, influencing factors, advantages, limitations, and practical applications for assessing concrete strength on site.
- What is Penetration Resistance Test?
- Significance of Penetration Resistance Test
- Types of Non Destructive tests
- Penetration Resistance Test Procedure
- Windsor Probe Penetration Resistance Test
- Apparatus – Windsor Probe Penetration resistance test
- Test Procedure for Penetration Resistance Test
- Conclusion
What is Penetration Resistance Test?
Engineers use the Penetration Resistance Test as a non-destructive method to estimate in-place compressive strength by measuring the penetration depth of a driven probe. The working concept is simple, the harder and stronger the concrete, the lower the penetration depth. A specially designed driver propels a hardened probe into the concrete surface. The depth of penetration is then measured. This reading is compared with calibrated charts. The comparison gives the estimated concrete strength. The test reacts directly to how resistant the surface is to penetration. This means it has a clear link to concrete surface hardness.
The method is useful for testing concrete already in a structure. It works well on slabs, pavements, overlays, bridges, and repair areas and does not require removing samples. This method does not cause structural damage. It allows strength assessment safely and quickly on site.
Significance of Penetration Resistance Test
Engineers evaluate concrete strength using two main categories of tests:
- Destructive Testing (DT)
- Non-Destructive Testing (NDT).
Understanding the difference aids us in comprehending the widespread use of the Penetration Resistance Test. This test is commonly employed in modern concrete evaluation and field testing.
Destructive testing vs Non destructive testing
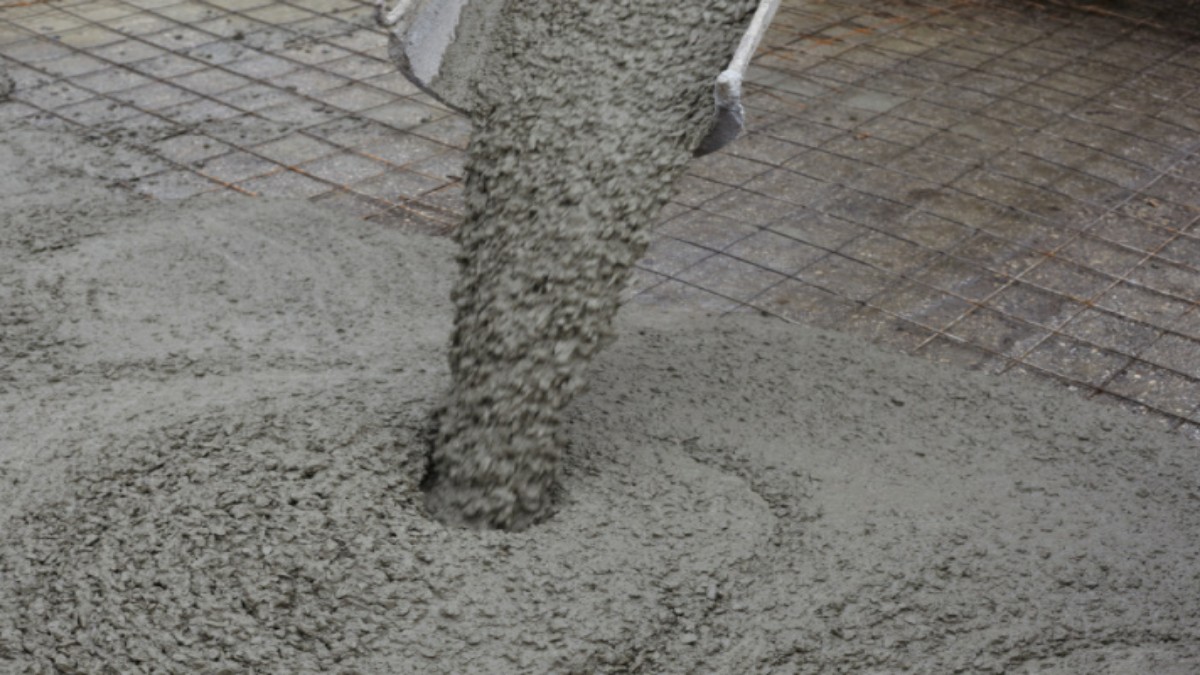
Destructive Testing involves casting concrete specimens at the same time as the structural concrete. Later, these specimens are tested for compressive, tensile, or flexural strength. These tests take time, and the results are not immediate. Also, the concrete specimen may not represent the real concrete in the structure because pouring conditions, curing method, compaction, and density can vary. DT also damages or destroys the sample, so it cannot be reused and does not allow repeated testing.
Non-Destructive Testing, however, measures concrete strength directly from existing structures without causing damage. NDT keeps the structure in service, allows results to be obtained immediately, and makes it possible to check strength development and deterioration over time. This makes NDT useful for bridges, slabs, pavements, repairs, and old structures.
Why Penetration test is Considered NDT ?
The Penetration Resistance Test qualifies as a non-destructive testing method. It measures surface hardness and in-situ strength. It does this by checking probe penetration depth without reducing the structural capacity. Engineers often use it with the Windsor Probe system. They rely on it to perform safe, simple, and reliable concrete assessment on site.
Types of Non Destructive tests
Penetration resistance test is a concrete non-destructive test. Nowadays Non-destructive test is conducted to determine the relative strength of the concrete. The non-destructive test is the method of evaluating the strength and durability of concrete without loading the specimen.
The main Non Destructive test are
- Penetration Resistance Test
- Rebound Hammer Test
- Ultrasonic Pulse Velocity Test
- Pullout Test and Pull-off Test
- Concrete Core Testing or Compressive strength test
Penetration Resistance Test Procedure
The Penetration Resistance Test Procedure outlines how to assess in-situ concrete strength using a driven probe. It follows standard codes and defines equipment requirements. It provides systematic steps for accurate surface hardness evaluation.
Relevant Codes
- ASTM C803 / C803M – Standard Test Method for Penetration Resistance of Hardened Concrete
- ACI 228.1R – In-Place Methods to Estimate Concrete Strength
- BS 1881 – Methods of Testing Concrete (NDT Guidance Reference)
Windsor Probe Penetration Resistance Test
The Windsor probe test is used to determine the following
- To determine the concrete strength.
- For evaluating the uniformity of concrete.
- To identify deterioration in concrete.
- To evaluate the in-place strength.
- For investigating the presence of cracks and flaws.
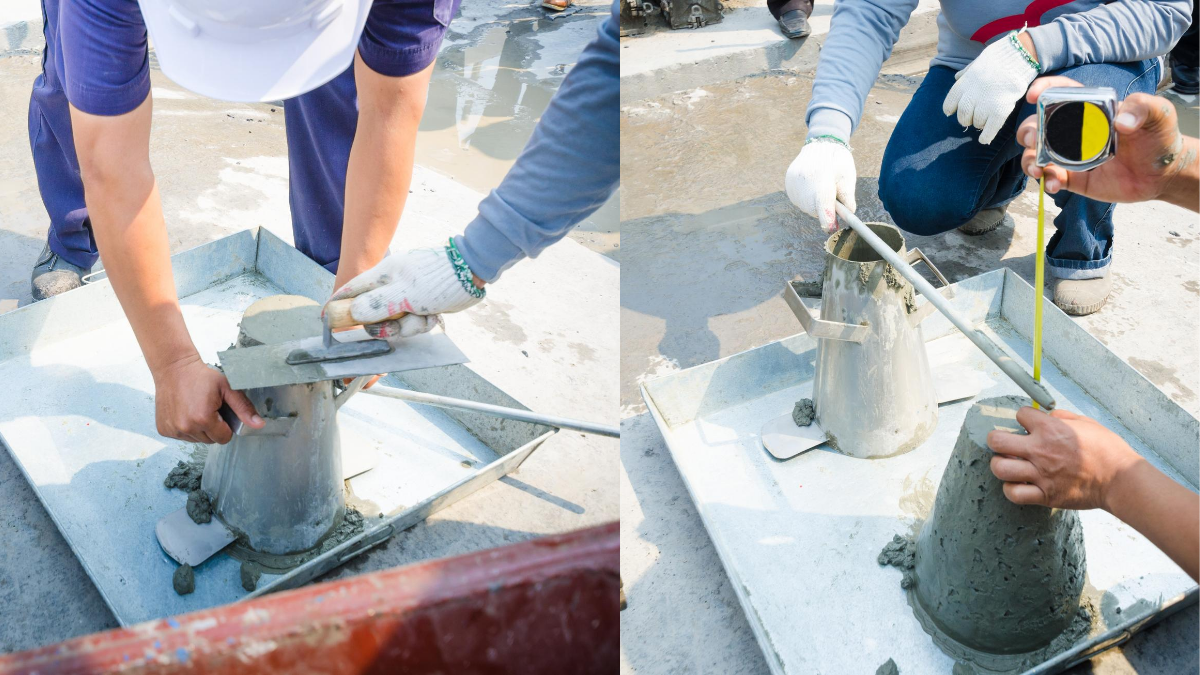
Apparatus – Windsor Probe Penetration resistance test
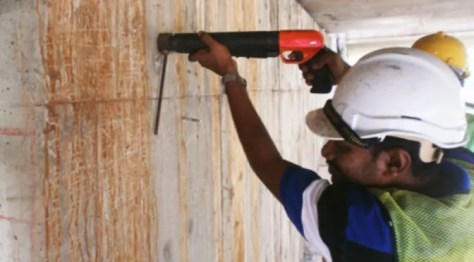
The equipment used for this test is called the Windsor Probe System. To begin with, it is designed to estimate in-situ concrete strength. In this method, it works by measuring the penetration depth of a hardened probe. Furthermore, the setup includes a gunpowder-actuated driver. This driver then propels the probe into the concrete surface with controlled energy.
The probe is a hardened alloy rod with a blunt conical nose. Different probes are chosen based on aggregate hardness. This ensures accurate readings and prevents corrosion. A depth gauge is used to measure the penetration length. The reading is then converted into estimated compressive strength using calibration charts.
Spacing rules must be followed during testing. There should be at least 100 mm between probes. The test point must also be 200 mm away from edges. These requirements prevent interference and ensure reliable results.
Equipment List
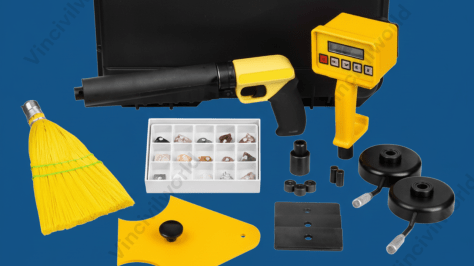
- Calibration chart
- Gunpowder-actuated driver
- Loaded cartridge
- Hardened alloy probe
- Depth gauge
- Alignment and positioning guide

Test Procedure for Penetration Resistance Test
- Select the Test Area – Choose a clean, smooth concrete surface free from cracks, honeycombing, coatings, or loose material.
- Check Edge Distance – Ensure the test point is at least 200 mm away from edges and corners to avoid weakened zones.
- Confirm Probe Spacing – Maintain a minimum spacing of 100 mm and a maximum of 175 mm between test points to prevent overlapping influence.
- Position the Guide Device – Place the alignment guide firmly against the surface to ensure the probe is driven perpendicular for accurate penetration.
- Load the Cartridge – Insert the correct cartridge into the gunpowder-actuated driver according to manufacturer specifications and safety guidelines.
- Insert the Probe – Place the hardened alloy probe into the driver barrel, ensuring proper seating.
- Discharge the Driver – Trigger the device to drive the probe into the concrete with controlled force.
- Measure Penetration Depth – Use the depth gauge to record penetration length precisely.
- Repeat Readings – Take at least three penetrations in the same area and average the results.
- Interpret Results – Compare the averaged penetration depth with the calibration chart to estimate in-situ concrete strength.
Correlate the depth of penetration with the compressive strength. If the depth of penetration is low, then the strength of concrete is high and vice versa.
Factors Affecting Penetration Resistance Test Results
The Penetration Resistance Test results can vary due to several factors. Concrete hardness, moisture, and carbonation effects can all play a role. Incorrect probe angle or positioning also influences penetration depth and strength interpretation.
- Material hardness
- Moisture and carbonation
- Test angle and positioning
Advantages and Limitations of Penetration Resistance Test
The Penetration Resistance Test offers advantages over the rebound hammer and UPV. It provides a more direct indication of concrete strength. This is related to surface hardness and penetration depth. It delivers quick on-site results and is useful for comparative evaluation. Engineers avoid using the test on weak or highly porous concrete. They also refrain from using it on lightweight or freshly cast concrete. Surfaces where aggregate hardness, carbonation, or nearby reinforcement can distort readings and reduce accuracy are also avoided.
Applications of Penetration Resistance Test in Concrete Structures
The Penetration Resistance Test is widely used for assessing concrete strength in bridges, pavements, slabs, and structural repair zones where sampling is difficult. It supports quality control checks, renovation planning, surface wear evaluation, and strength verification in existing structures. The test helps engineers identify weak spots, confirm uniformity, and monitor ageing concrete without damaging the member, making it practical for field investigation and ongoing structural performance assessment test has some limitations, this method is apt for the on-site estimation of concrete strength
Key Takeaways
- The Penetration Resistance Test is a non-destructive method that evaluates in-situ concrete strength by measuring probe penetration depth.
- This test is crucial in modern construction, as it provides immediate results without damaging structures, unlike destructive testing.
- Engineers can use the Penetration Resistance Test alongside methods like the Windsor Probe Test to determine concrete strength accurately.
- Factors such as material hardness and moisture can affect the test results, emphasising the need for careful procedure adherence.
- Overall, the Penetration Resistance Test is practical for assessing concrete in various structures like bridges and slabs without extraction.
Conclusion
The Penetration Resistance Test is a valuable concrete strength test. It helps engineers assess in-situ strength without damaging structures. This makes it an essential part of non-destructive testing practices. Understanding what the Penetration Resistance Test is and how it relates to concrete surface hardness enables more accurate evaluation. This method is better compared to traditional destructive testing. Destructive testing requires specimens and delays results.
The Significance of Penetration Resistance Test in concrete is evident in bridges, pavements, and slabs. It is also crucial for overlays and repair assessment. Quick decisions are necessary in these areas. When performed according to the Penetration Resistance Test Procedure, the method supports reliability. It ensures quality control and aids in condition monitoring using the Windsor Probe. Despite influences like moisture, carbonation, and positioning, it remains a practical tool for field evaluation, structural performance checks, and long-term concrete assessment.