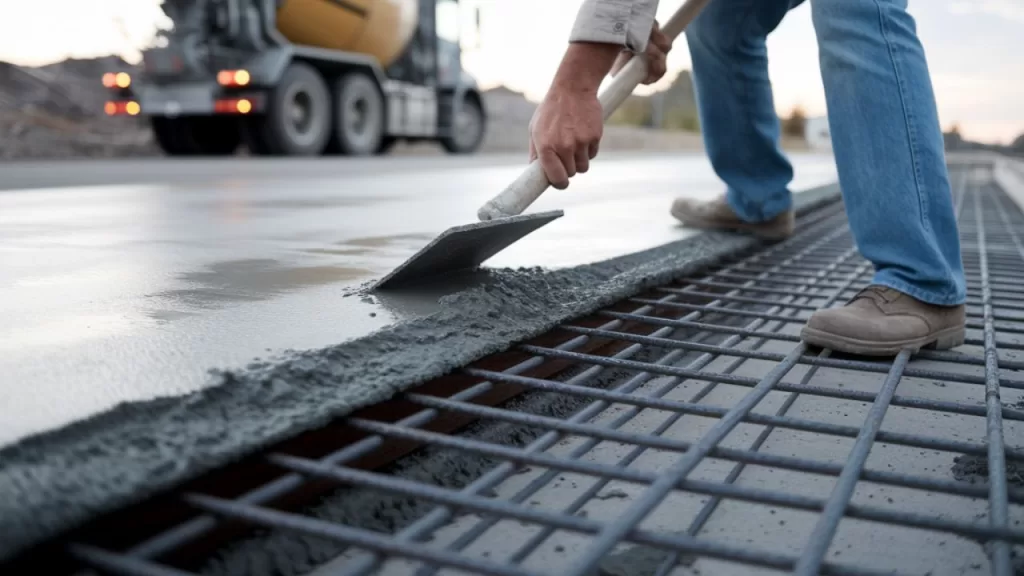
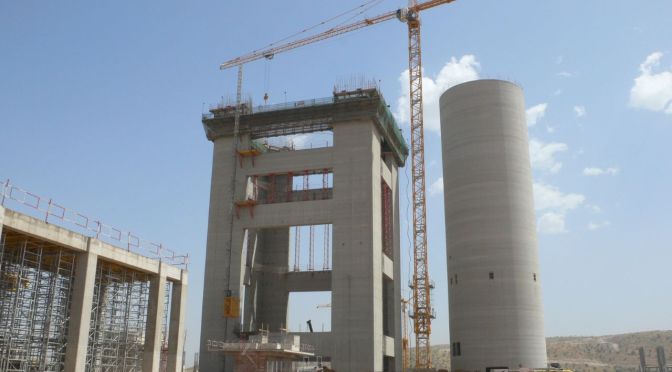
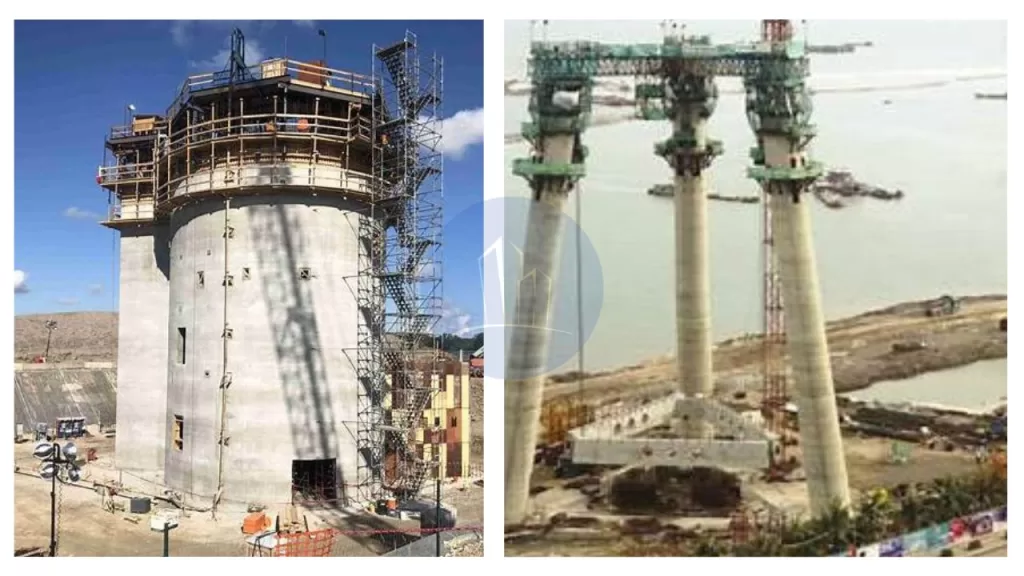
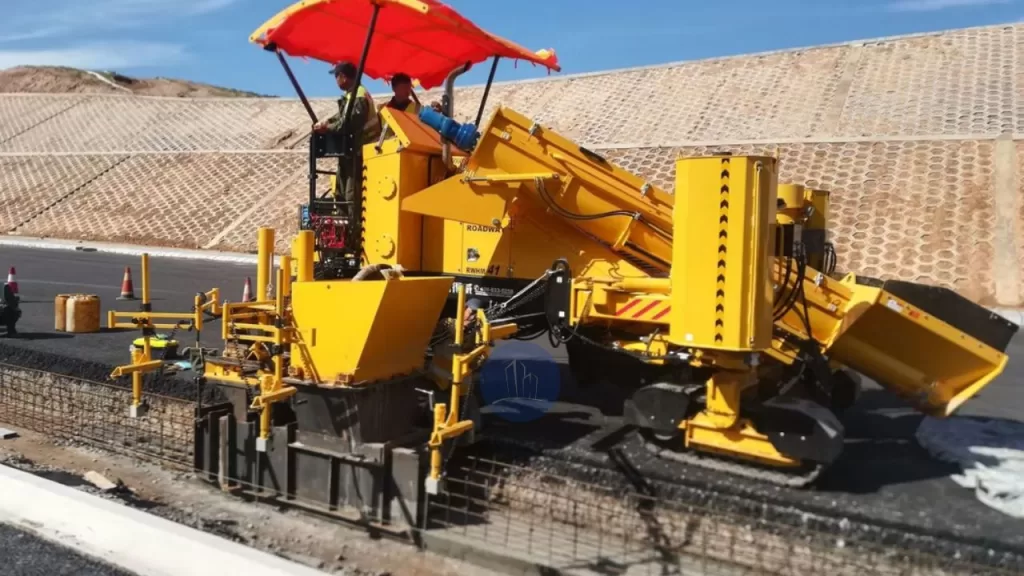
You often wonder how a sketch on a screen becomes a building that stands and stays on budget. Ask any contractor, and you will get the same answer: a set of construction drawings. Behind every finished building sits a stack of these drawings that most people never see. Those drawings tell crews what to build, tell inspectors what to check, and tell owners what they are paying for.
When all professionals are clear about these sheets, a project moves along. When they are not, delays and surprises show up fast. In this post, you will see what construction drawings really do, how they carry a design from approval to handover, and what can go wrong along the way. By the end, you will know exactly how they turn designs into real buildings.
The Five-Step Path of Construction Drawings From Idea to Finished Building
Construction drawings are the technical sheets paired with written specifications. These details usually include material grades and installation rules. These technical sheets and specifications together are called construction documents, and they become part of the contract.
The table shows what the drawings do at each step and what the design becomes as a result. Read it as a chain: the output of one step is the input of the next.
The scale of this chain is large. The U.S. Census Bureau estimated construction spending in July 2026 at a seasonally adjusted annual rate of $2,157.6 billion. Every project inside that number needs a design turned into instructions that owners and all other construction professionals can read the same way. Pricing is one clear example. Professional construction estimating services can only count materials and price labor accurately when the sheets are clear and complete.
Step 1: Drawings Translate the Design Into Buildable Instructions
The journey starts with the translation of design into clear instructions. A design says how a building should look and feel. A crew needs to know the stud spacing, the beam depth, the waterproofing lap, and the duct route. Drawings turn the first into the second by fixing the size and material of every element.
Each drawing sheet type addresses a different design aspect of the construction project, as the table below shows.
Even a well-drawn set can’t stand alone. The sheets from each discipline have to agree, which is where coordination comes in.
Step 2: Drawings Coordinate Every Discipline Into One Design
A modern building has different systems that all need the same space. Beams, ducts, pipes, cable trays, and light fixtures often come together above one ceiling. If each designer works on their own, these parts bump into each other. The workers find out when they are on the job site. Construction drawings provide coordination that stops this from happening in the following steps.
Share one set of rules
All technical sheets of the construction project follow a standard like the U.S. National CAD Standard. Every team uses the same grid lines and level names provided by construction drawings.
Let each discipline draw its part
Architects and all structural engineers create their sheets using one construction drawing set.
Overlay and check for clashes
The team stacks the sheets and looks for conflicts. On BIM projects, software runs clash detection on the 3D model.
Resolve and reissue
Problems get fixed at the desk, and updated sheets go out together. No one builds from a set that does not match.
Software plays a role here. CAD made changes faster. A dimension change that once meant redrawing a sheet now takes a few clicks. BIM takes it further. A BIM model includes objects like walls, doors, and beams with data attached. And plans, sections, elevations, and schedules all come from that one model, so they match automatically. Many companies use both methods: a model for coordination and 2D sheets for the site. Once the design is a coordinated whole, it can be priced with confidence.
Step 3: Drawings Set the Scope, the Quantities, and the Price
With a coordinated set in hand, the project can be priced. Estimators work through the sheets in a steady order:
Read the scope: They start with the general notes, schedules, and specs to see what is included and what is not.
Take off quantities: They count and measure every item shown, such as square feet of drywall, cubic yards of concrete, linear feet of pipe, and the number of doors.
Apply costs: Unit costs and labor rates get applied to those quantities.
Compare bids: When every bidder prices the same complete set, the bids line up fairly.
Vague sheets break this chain. Bidders pad their numbers with allowances and contingencies. Sometimes they leave out items they assume belong to someone else. Both paths lead to change orders later. Owners who want a second opinion often bring in outside construction estimating companies, which review the drawings and flag gaps before bids go out. Once the price is settled, the project needs permission to start.
Step 4: Drawings Win Approval and Define the Contract
Permission comes from the building department, and the drawings are what it reviews. Two things happen at this step:
Plan review
Reviewers check the sheets against the adopted building code, zoning rules, fire and life safety requirements, and energy rules. Many U.S. jurisdictions use the International Building Code with changes added on top. If egress widths, fire ratings, or structural notes are not there, the reviewer sends comments back. The permit is put on hold.
Contract definition
Once the contract is signed, the drawings and specs become contract documents. They show what the contractor agreed to build and what the owner agreed to pay for.
If a scope dispute happens, both sides look at the drawings and specs. Many contracts also say which document controls when the two disagree, so read that part before work begins. With a permit and a signed contract, the drawings finally go from the office to the field.
Step 5: Drawings Guide the Build and Record What Was Built
The drawings turn into a tool on the construction site. This is how they are used, in the order that most jobs follow:
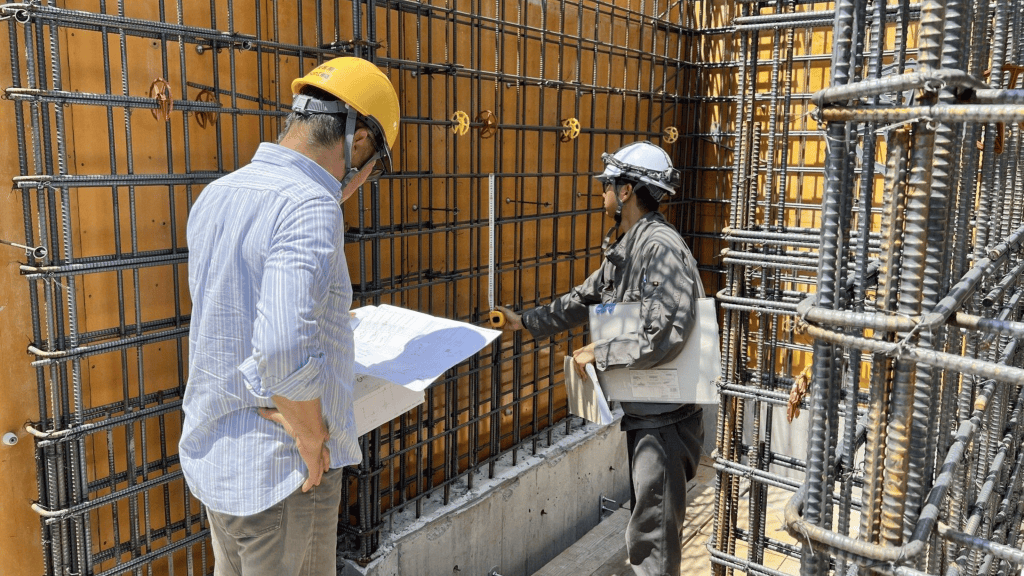
Layout and construction: The crews lay out foundations and openings from the specific details. They also verify dimensions using the sheets.
Shop drawings: Subcontractors create drawings for items such as steel, cabinets, and windows. The design team then reviews these drawings against the set.
RFIs: If a crew discovers a conflict or a missing detail, it sends a request for information (RFI). The response usually arrives as a drawing.
Revisions and field changes: Every change is recorded on a revision log. This ensures that each trade builds from the current sheets.
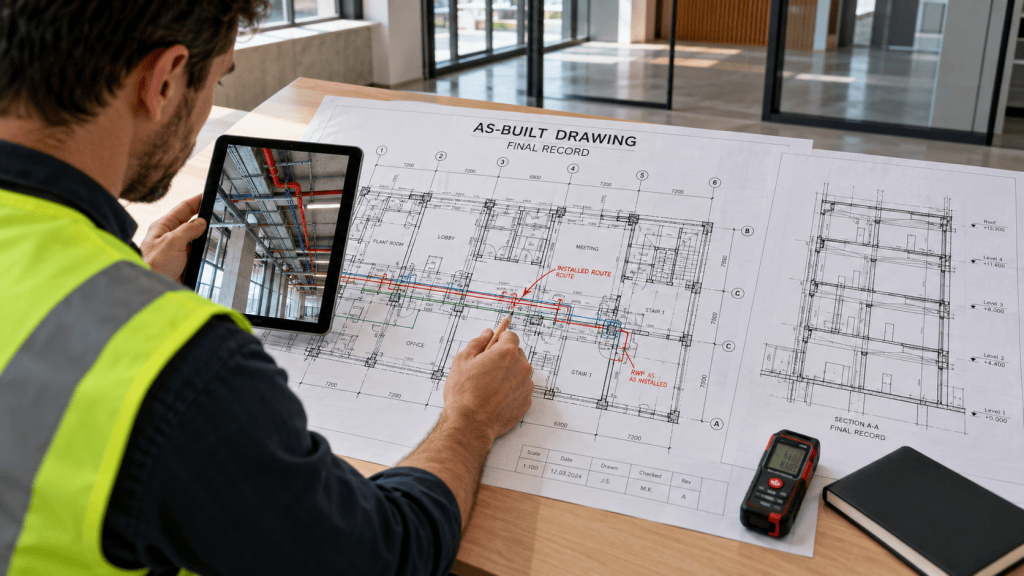
As-built drawings: At closeout, the team marks up the set to show what was actually built, including any changes made along the way.
That completes the path from design to building. The chain works only if each step holds. Knowing where the chain usually breaks can help keep the process smooth.
When a Step Breaks: What Weak Drawings Cost on Site
Weak drawings cost money in ways that are easy to miss. A crew waits for an answer, a fabricator remakes a part, or a finished wall gets opened up again. Builders call that rework, and it eats into schedules and profit.
How big is the problem? In a study covered by ASCE in January 2026, researcher Peter Love looked at actual rework costs from a contractor’s projects instead of estimates. Field rework from all causes before completion averaged 0.38% of contract value, and 0.76% once post-completion fixes were counted. Earlier studies had reported figures as high as 12.4% when change orders and quality issues were combined. The gap between those numbers shows why measuring rework with real data matters.
The table traces each common drawing problem back to the step where it starts.
Drawing problem
Step that failed
What it causes on site
Simple fix
Dimensions that don’t add up
Step 1
Wrong cuts, misaligned openings
Check dimensions on every sheet before issue
Architectural and structural sheets disagree
Step 2
Beams land in the wrong place, walls get moved
Overlay sheets at each design stage
Missing or vague details
Step 1
Crews improvise, leak, and callbacks
Add enlarged details at joints and edges
Incomplete scope on the sheets
Step 3
Padded bids and change orders
Review the set for gaps before bid
Old sheets still in circulation
Step 5
Trades build from outdated information
Keep one sheet log and a revision log
Most of these fixes are just effective strategies that cost little compared with tearing out finished work. Not every construction firm has the staff to fix all of these in-house. Many turn to outside partners for CADservices, which can convert sketches into clean sheets. These professionals keep layers and sheet sets consistent from start to finish.
Conclusion
Construction drawings work as a chain of five steps. They translate the design into instructions and coordinate every discipline to set the scope and price. These drawings also secure approval and guide the build until the as-built record is complete. Each step depends on the one before it, so a weak link shows up later as delays and extra cost.
That is why the quality of the drawing set matters so much. It is important to put effort into the sheets early and keep every revision under control. Those steps cost far less than the rework that follows a weak set. Whether you are an owner or a designer, treat the drawings as the plan that everything else depends on.
FAQs
What is the main purpose of construction drawings?
Construction drawings give builders instructions for putting a design in place. They show sizes and connections so all construction professionals work from the same information instead of guessing.
What is the difference between design drawings and construction drawings?
Design drawings show the concept of the actual building structure. Construction drawings add dimensions and notes that a crew needs to build it.
Who prepares construction drawings?
All AEC professionals play a key role in preparing construction drawings. For instance:
Architects lead the construction drawings and produce the sheets.
Structural and plumbing engineers add their sheets
Civil engineers handle site work
CAD drafters and BIM modelers often coordinate much of the construction drawing work under their direction.
What are as-built drawings, and why do they matter?
As-built drawings record what was actually built during the construction process. Owners use them for maintenance and future additions because the original design sheets may no longer match what is inside the walls.
The joinery arrives on a Tuesday. Four reception units, built to the dimensions on the approved drawing. The site team offers them up to the wall and the last one is 15 mm too wide.
Somebody will suggest the shop measured wrong. Usually nobody measured wrong. The drawing said 2 400 and the wall says 2 385, and both of those numbers are honest.
Getting comfortable with that gap is one of the things that separates a second-year engineer from a first-year one. Buildings do not come out the size they were drawn. The job is keeping the difference small enough that nothing has to be rebuilt.
Where the difference comes from?
No single villain here. It accumulates.
Setting out carries a small error from the start, because instruments have tolerances too. Concrete shrinks as it cures, and it does not shrink evenly. Blockwork picks up a millimetre or two per course, and by the time you have twenty courses those millimetres have found each other. Steel moves with temperature, which matters more than people expect on long spans in hot weather. Then finishes go on, and plaster has a thickness that varies with the plasterer’s day.
Add a wall built slightly out of plumb, which is entirely normal within tolerance, and the opening at the top is not the opening at the bottom.
The drawing does not model any of this. It shows the geometry as designed, and that is exactly what it should show. cad drawings are prepared to define intent and dimensions clearly, not to predict how a particular crew will pour a particular slab in a particular week.
So the question on site is never whether there is a difference. It is how big the difference is and whether anyone has measured it yet.
What a tolerance actually is ?
A tolerance is permission to be slightly wrong, agreed in advance.
Two kinds matter and people mix them up. Construction tolerance covers what the structure and finishes are allowed to deviate by. Fabrication tolerance covers what a manufactured element is allowed to deviate by. They are different numbers, set by different parties, and the joint between them has to absorb both.
That is why joints exist where they do. A 10 mm shadow gap around a panel is not only a design decision. It is the space where the difference between the wall and the panel goes to live. Remove the gap for aesthetic reasons and you have removed the tolerance, and now somebody is scribing panels on site with a jigsaw.
Practical version: if a detail has no gap, no shim space and no scribe, ask who is absorbing the deviation. If nobody can answer, the answer is the installer, at their own cost, badly.
Why fabricators insist on measuring the opening ?
Anything made off site to fit a specific space gets measured on site first. Joinery, cabinetry, doors, glazed screens, cladding panels, stone. The fabricator sends someone out with a laser and a clipboard, and the numbers they bring back override the drawing.
This is what shop drawings are for. They take the designed element and document it at the size it is actually going to be built, with the site conditions folded in.
The economics explain the insistence. A reception desk built to a drawing dimension and delivered 15 mm oversize is not adjustable on site. It goes back to the shop, gets remade, and arrives three weeks later. A survey visit costs a morning.
Worth knowing as a site engineer: when the fabricator asks whether the walls are finished before they measure, they are asking a real question. Measuring to bare blockwork and then applying 15 mm of plaster produces exactly the problem this whole visit was meant to prevent.
How dimensional control is done on site ?
The principle is that every measurement traces back to something fixed.
A project has control points established by survey, usually referenced to a site datum. From those come the grid lines, and from the grid come the offsets used to set out individual elements. Level control works the same way, running from a benchmark rather than from the floor you are standing on, because that floor has its own deviation.
Instruments in normal use: total station for setting out, laser level for transferring levels, plumb laser for verticality on multi-storey work, plus a tape and a spirit level for the hundred small checks a day nobody records.
The habit that matters is checking against the control, not against the previous element. Measuring each partition from the one before it is how a 3 mm error becomes a 40 mm error by the end of the corridor.
Where error accumulates fastest ?
Multi-storey vertical alignment, where each floor inherits the last one
Long runs of repeated elements: partitions, columns, façade bays
Interfaces between two contractors, where each set out from a different reference
Sequences with several finish layers, since each has its own thickness variation
Anything set out from a wall rather than from a grid line
Retrofit work, where the existing building was never square to begin with
Retrofit deserves a note. In an old building, nothing is plumb, nothing is level and no room is rectangular. Everything gets measured. Design dimensions there are a starting hypothesis rather than an instruction.
A checklist before you order material
Before anything is fabricated or delivered:
Confirm the opening or space has been measured on site, not scaled off a drawing
Confirm whether the measurement was taken to finished surfaces or to structure
Record who measured, when, and with what
Check the finishes schedule for layers not yet applied
Identify which joint absorbs the deviation, and how much it can absorb
Confirm the fabrication tolerance the supplier works to
Note any element that cannot be adjusted on site at all
Get any dimensional change back into the drawings before the next trade uses them
That last one gets skipped constantly. A dimension that changed on site and never reached the drawing will surface again three months later, when the next subcontractor works from the old number.
The gap is the job
A drawing is a statement of intent, produced before the building exists. The building is a physical object made by people working in weather. Those two things will never match exactly, and a project that expects them to is a project full of surprises.
Measure early, write it down, tell the people whose work depends on the number. Most dimensional disasters on site are not measurement failures. They are communication failures wearing a measurement costume.
A retaining wall is a structure designed to hold or support soil behind it. These walls are commonly used in landscaping, construction, road development, and residential properties where uneven ground levels need additional support. A retaining wall helps reduce soil movement, erosion, and pressure caused by sloped terrain while also improving the usability of outdoor spaces.
Retaining walls can be built using materials such as concrete, stone, brick, timber, or reinforced blocks. The type of wall used often depends on soil conditions, drainage requirements, wall height, and the overall purpose of the project. In both residential and commercial construction, retaining walls play an important role in long-term ground stability and site management.
In construction, a retaining wall is designed to resist the lateral pressure created by soil, water, or sloped ground surfaces. These structures are commonly installed where natural slopes may create instability or where flat usable land is needed for building or landscaping purposes.
Retaining walls are often found near gardens, driveways, roads, basements, and hillside properties. In residential landscaping projects, they are also frequently combined with features such as patios, pathways, andoutdoor fireplace areas to create more functional outdoor living spaces across various types of terrain.
What Is The Purpose Of A Retaining Wall?
The primary purpose of a retaining wall is to hold back soil and prevent erosion. Without proper support, sloped land can gradually shift over time, especially during periods of heavy rain or changing weather conditions.
Retaining walls also help improve land organization and outdoor functionality. Many residential properties use retaining walls to create level garden spaces, pathways, seating areas, or separated landscape sections across uneven terrain.
Functions And Advantages
Retaining walls provide both structural and visual benefits within construction projects. Structurally, they help stabilize slopes and reduce the risk of soil movement around buildings or outdoor spaces. This added support can help protect foundations, roads, and landscaping from erosion damage over time.
Beyond structural performance, retaining walls are also used to improve outdoor design layouts. Landscaped properties often combine retaining walls with patios, seating areas, or outdoor fireplace installations to create more functional outdoor living environments while managing elevation changes effectively.
Types Of Retaining Walls
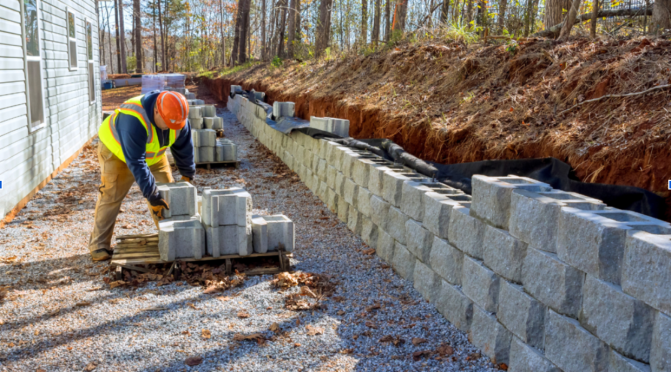
Several types of retaining walls are used depending on the project size, soil conditions, and engineering requirements. Gravity retaining walls rely on their own weight to resist soil pressure, while reinforced retaining walls use steel reinforcement or concrete systems for additional strength.
Cantilever retaining walls are commonly used in larger construction projects because they distribute pressure more efficiently. Segmental retaining walls, often built using interlocking blocks, are frequently used in residential landscaping because of their flexibility and simplified installation process.
Size Of Retaining Wall
The size and thickness of a retaining wall depend on factors such as wall height, soil type, drainage conditions, and the amount of pressure behind the structure. Smaller garden retaining walls may only require limited reinforcement, while taller walls often need engineering calculations and stronger foundation systems.
Local building regulations may also affect wall dimensions and permit requirements. In many areas, retaining walls above a certain height require professional design approval before construction begins.
Retaining Wall Installation Costs
The cost of building a retaining wall depends on factors such as wall height, materials, drainage systems, and site conditions. Because every project has different structural and landscaping requirements,retaining wall costestimates can vary significantly between residential and commercial properties.
In the United States, an installation project commonly ranges between around $20 to $75 per square foot depending on the material and wall design. In Canada, pricing is often slightly higher because of labor costs and seasonal construction conditions, with many residential retaining wall projects averaging around CAD $25 to CAD $65 per square foot depending on complexity and materials used.
Factors That Affect Retaining Wall Cost
Retaining wall pricing can vary significantly between projects because costs usually depend on multiple site evaluations and planning considerations before construction begins.
Wall height and overall size
Type of material used
Soil conditions and drainage requirements
Excavation and foundation preparation
Accessibility of the construction site
Reinforcement or engineering requirements
Local labor and permit costs
Decorative finishes or landscaping integration
Maintenance And Long-Term Durability
Although retaining walls are built for long-term use, periodic maintenance remains important. Drainage outlets should remain clear, and visible cracks or movement should be inspected before structural issues become more serious.
Environmental exposure, soil pressure, and water buildup can gradually affect wall performance if maintenance is neglected. Proper installation combined with regular inspections generally improves the lifespan of retaining wall systems.
Common Problems
Several issues can affect retaining wall performance over time. Poor drainage is one of the most common causes of wall failure because trapped water increases pressure behind the structure.
Other problems may include weak foundations, insufficient reinforcement, soil erosion, or improper installation techniques. Identifying these issues early can help reduce repair costs and prevent larger structural damage later.
Finding Professionals For Retaining Wall Projects
Building a retaining wall often involves more than simply stacking materials together. Soil conditions, drainage systems, wall height, reinforcement, and local regulations can all influence the overall structural performance of the project. Because of this, many property owners choose to work with experienced contractors or landscape professionals when planning larger retaining wall installations.
Professional’s advice from these contractors can also help homeowners better understand a number of considerations before construction begins. Material selection, excavation requirements, drainage systems, and site accessibility are some of the factors that may affect the overall budget depending on the size and complexity of the project.
Wrapping Up
A retaining wall serves an important role in supporting soil, managing elevation changes, and improving outdoor functionality across residential and commercial properties. Different retaining wall systems are designed to handle varying structural conditions depending on wall height, soil pressure, and environmental exposure.
From erosion control to landscape organization, retaining walls provide both practical and visual benefits when installed correctly. Proper planning, drainage, reinforcement, and material selection all contribute to the long-term durability and effectiveness of retaining wall construction projects.
Shrinkage of concrete refers to the reduction in its volume over time, primarily due to moisture loss and chemical reactions during hydration. This phenomenon can lead to shrinkage cracking of concrete, compromising structural integrity and durability. Understanding what shrinkage of concrete is involves recognizing its various forms, such as drying shrinkage, autogenous shrinkage, and thermal shrinkage. Drying shrinkage occurs as moisture evaporates from the hardened concrete. Autogenous shrinkage results from internal chemical reactions during the hydration process. Thermal shrinkage happens due to temperature variations affecting the concrete mass. Factors influencing shrinkage include water-cement ratio, environmental conditions, and the concrete mix design. Mitigating shrinkage involves proper curing practices. It includes using shrinkage-reducing admixtures. Another method is optimizing mix proportions to minimize water content, thereby reducing the potential for shrinkage cracking.
Concrete shrinkage is a critical phenomenon in the construction industry. It refers to the reduction in volume of concrete as it undergoes hydration and drying. This dimensional change can lead to cracking, compromising the structural integrity and durability of concrete structures. Engineers, contractors, and stakeholders must understand the causes, types, and preventive measures of concrete shrinkage. This knowledge ensures the longevity and performance of concrete infrastructures. This article is about the types, causes and effects of Concrete shrinkage
Concrete, a composite material composed of cement,aggregates, water, and admixtures, is the backbone of modern construction. Its versatility, strength, and durability make it the material of choice for various structural applications. However, one inherent characteristic of concrete is its tendency to shrink during the curing process. This shrinkage, if not properly managed, can lead to cracks, reducing the lifespan and safety of structures. Therefore, a comprehensive understanding of concrete shrinkage is paramount for effective construction practices.
Shrinkage in concrete is the decrease in its volume over time. This occurs due to the loss of moisture and the chemical reactions during cement hydration. This volumetric reduction can induce tensile stresses within the concrete matrix. It leads to the formation of cracks, especially when the material is restrained. Cracks are also likely when shrinkage occurs unevenly. The primary factors influencing concrete shrinkage include the water-cement ratio, environmental conditions, and the properties of the constituent materials.
Types of Concrete Shrinkage
Concrete shrinkage is a natural phenomenon that affects the durability and structural integrity of concrete over time. It occurs due to moisture loss, chemical reactions, or temperature changes, leading to volume reduction and potential cracking. Understanding the different types of shrinkage is crucial. These types include plastic, drying, autogenous, thermal, and carbonation shrinkage. This knowledge helps in selecting appropriate construction techniques. These techniques minimize shrinkage-related issues and improve concrete performance.
Plastic Shrinkage
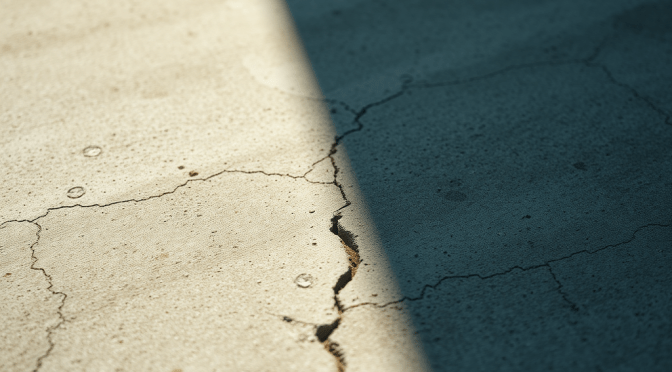
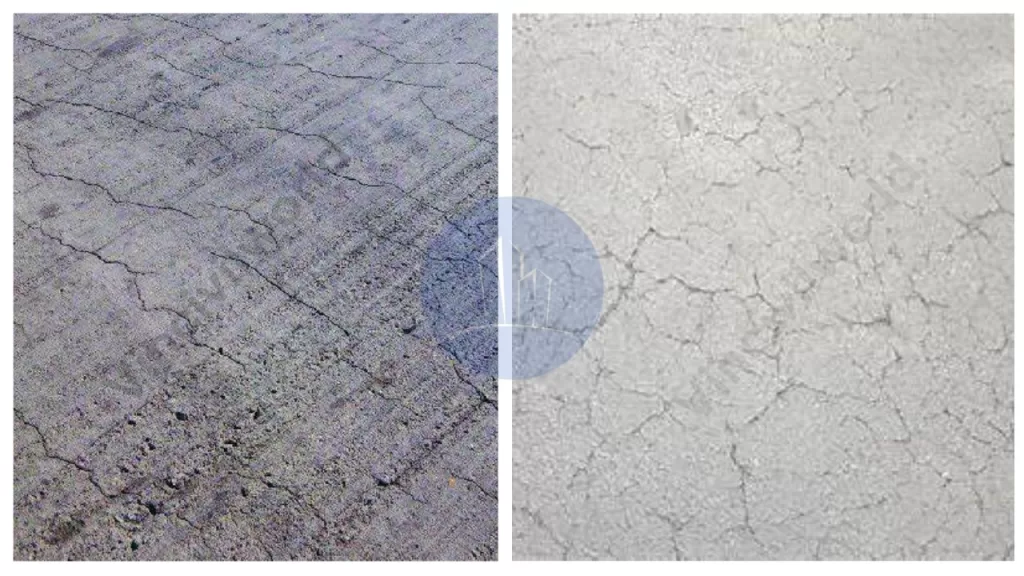
Plastic shrinkage occurs within the first few hours after concrete placement while it is still in a plastic state. It happens due to rapid evaporation of surface moisture, especially in hot, dry, or windy conditions. This leads to surface tension, causing shrinkage cracks to form. These cracks are often random, shallow, and irregular, primarily appearing on slabs and pavements. Preventing plastic shrinkage involves proper curing, windbreaks, shading, and using evaporation retarders to maintain surface moisture and reduce crack formation.
Plastic shrinkage
Drying Shrinkage
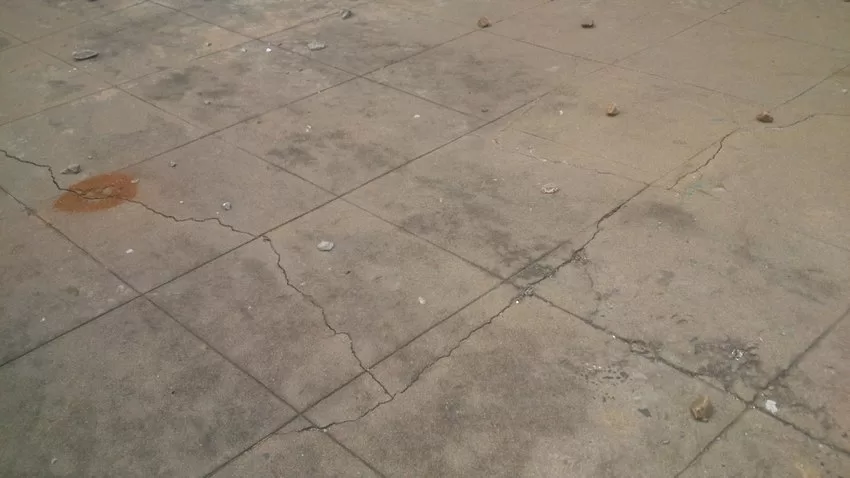
Drying shrinkage occurs as hardened concrete loses moisture to the surrounding environment. This process can last months or even years, depending on humidity levels and concrete properties. As water evaporates, capillary tension develops, causing the concrete to contract, leading to shrinkage cracks. These cracks can compromise durability and structural integrity. To reduce drying shrinkage, engineers use shrinkage-reducing admixtures, proper curing methods, and well-graded aggregates. These methods enhance moisture retention and minimize excessive volume reduction.
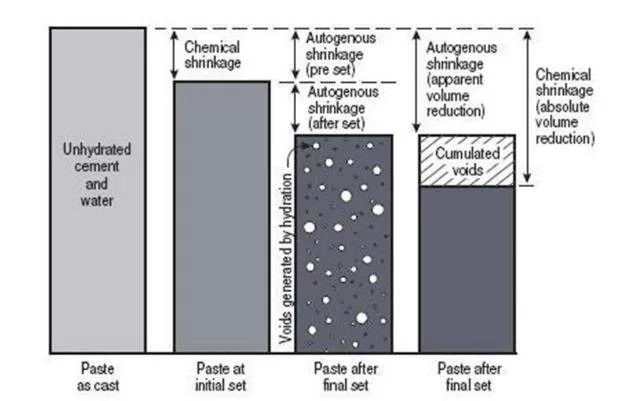
Autogenous shrinkage is common in high-strength, low water-cement ratio concretes where internal chemical reactions drive volume reduction. Unlike drying shrinkage, it occurs without external moisture loss and results from cement hydration reactions consuming water within the concrete. This type of shrinkage is more pronounced in self-consolidating and high-performance concretes, where fine particles create dense microstructures. To mitigate autogenous shrinkage, internal curing techniques are applied. Techniques such as using lightweight aggregates or superabsorbent polymers help retain water for extended hydration.
Thermal shrinkage is caused by temperature variations during the early curing stages of concrete. Cement hydration generates excess heat, causing the concrete to expand. As it cools, the contraction leads to thermal stress and shrinkage cracks. Large structures, such as bridges and massive foundations, are particularly vulnerable to this effect. To control thermal shrinkage, low-heat cement manages heat dissipation. Temperature-controlled pouring also assists. Insulation methods minimize volume changes, preventing long-term structural issues.
Carbonation Shrinkage
Carbonation shrinkage occurs when carbon dioxide (CO₂) from the atmosphere reacts with calcium hydroxide in concrete to form calcium carbonate. This process slightly reduces concrete volume over time and primarily affects thin concrete sections exposed to high CO₂ levels. Although carbonation can increase surface strength, excessive shrinkage can cause microcracking. To limit carbonation shrinkage, proper curing, protective coatings, and low-permeability mixes help slow down CO₂ penetration and maintain durability.
Several factors contribute to concrete shrinkage, and understanding these is crucial for implementing effective preventive measures:
Water Content: Excessive water in the concrete mix increases the potential for shrinkage. Maintaining appropriate water-cement ratios is critical to reducing this risk.
Cement Composition: The type and amount of cement influence shrinkage. High cement content can lead to increased shrinkage due to greater heat of hydration.
Environmental Conditions: High temperatures, low humidity, and wind can accelerate moisture evaporation, leading to increased shrinkage.
Improper Curing: Inadequate curing can result in rapid moisture loss, causing shrinkage and cracking.
Aggregate Properties: The size, type, and grading of aggregates affect the overall shrinkage
Effects of Concrete Shrinkage
Shrinkage can have several detrimental effects on structures:
Cracking: As concrete shrinks, tensile stresses develop, leading to cracks, especially if the concrete is restrained.
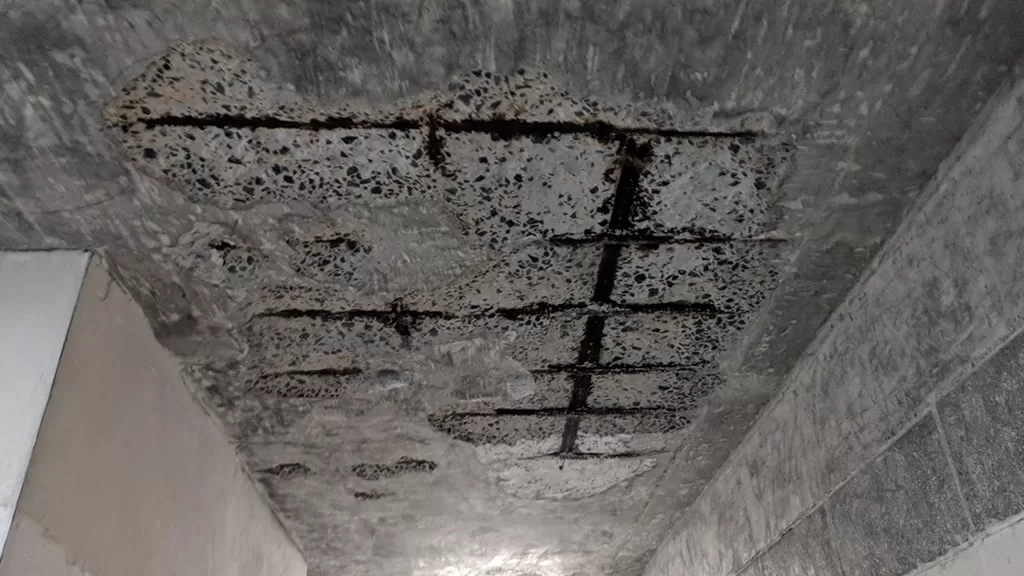
Reduced Durability: Cracks allow ingress of harmful substances like water and chlorides, which can lead to reinforcement corrosion and reduced lifespan of the structure.
Structural Weakness: Significant shrinkage and cracking can compromise the load-bearing capacity of concrete elements.
How to Reduce Shrinkage in Concrete
To reduce shrinkage and its adverse effects, consider the following measures:
Use Low Water-Cement Ratio: Reducing the amount of water in the mix decreases the potential for shrinkage. However, this must be balanced with workability requirements.
Use of Shrinkage-Reducing Admixtures: Incorporating admixtures can help reduce drying shrinkage and control crack widths.
Optimized Mix Design: Selecting appropriate types and proportions of cement and aggregates can influence shrinkage characteristics.
Environmental Control: Protecting concrete from extreme weather conditions, such as high temperatures and winds, can prevent rapid moisture loss.
Key Takeaways
Definition: The volume reduction due to moisture loss and hydration reactions.
Types: Includes plastic, drying, autogenous, thermal, and carbonation shrinkage.
Influencing Factors: Water-cement ratio, environmental conditions, and material properties.
Mitigation: Proper curing, shrinkage-reducing admixtures, and optimized mix designs are essential.
Importance: Effective shrinkage management preserves structural integrity, enhances durability, and ensures sustainable construction practices.
FAQs
What is concrete shrinkage?
It is the reduction in volume of concrete over time due to moisture loss and chemical reactions during cement hydration.
What causes this?
What are the types of concrete shrinkage?
The primary types include plastic, drying, autogenous, thermal, and carbonation shrinkage.
How can Concrete shrinkage be minimized?
What effects does concrete structures?
Shrinkage can cause cracking, reduce durability, and compromise the structural integrity and load-bearing capacity of concrete elements.
Conclusion
Concrete shrinkage involves a reduction in volume over time due to moisture loss. It also results from chemical reactions during hydration. This phenomenon poses a significant challenge for construction professionals. This blog has explored its various forms, including plastic, drying, autogenous, thermal, and carbonation shrinkage. The blog also examined the factors influencing shrinkage, such as water-cement ratio, environmental conditions, and material properties. Effective mitigation through proper curing, shrinkage-reducing admixtures, and optimized mix designs is crucial to prevent cracking and preserve structural integrity. By understanding these dynamics, engineers, contractors, and stakeholders can implement strategies that enhance durability and safety. Proactive management extends the lifespan of concrete structures. It also contributes to more resilient and sustainable construction practices. Ultimately, diligent control of shrinkage secures long-term performance and trust.
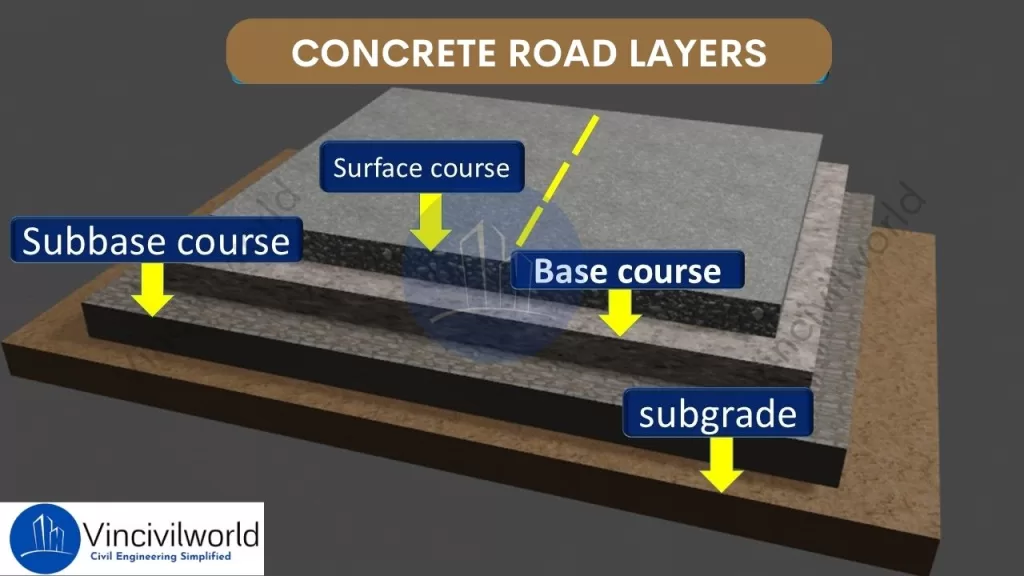
Concrete road construction involves building durable pavements using cement concrete road techniques, which prioritize strength and longevity. This method uses layered systems called concrete road layers, including subgrade, sub-base, base, and surface layers, to ensure stability and load distribution. Unlike asphalt, road construction concrete offers higher resistance to weather, heavy traffic, and wear, reducing long-term maintenance costs. Concrete for road construction is preferred for its sustainability, as it reflects sunlight, lowering urban heat, and uses recyclable materials. A cement concrete road lasts 30–40 years, outperforming flexible pavements in lifespan and cost-effectiveness. Engineers choose concrete road construction for highways and urban roads due to its minimal upkeep and eco-friendly benefits. By optimizing concrete road layers and material quality, this method delivers safer, smoother, and more reliable infrastructure.
This article explores concrete road construction, highlighting its layered design, durability, and sustainability. It explains why cement concrete roads outperform asphalt, offering long-lasting, eco-friendly, and cost-effective solutions for modern infrastructure needs.
Structural components of Concrete Road Construction
Concrete road construction relies on a well-structured system of layers to ensure durability and strength. These concrete road layers include the subgrade, sub-base, base course, and concrete slab. Each layer plays a critical role in distributing loads and preventing cracks. Proper road construction concrete techniques ensure the longevity of cement concrete roads, making them ideal for heavy traffic and harsh weather conditions. Let us explain each component in detail.
Concrete road construction – Layers
Subgrade
Engineers prepare the native soil to support the road structure, forming the subgrade. In concrete road construction, a stable subgrade is essential as it forms the foundation for all subsequent concrete road layers. Proper compaction of the subgrade prevents settlement and provides uniform support for the road construction concrete. A well-prepared subgrade enhances the durability of the cement concrete road by reducing the risk of cracks and deformations.
Sub-base
Positioned above the subgrade, the sub-base layer consists of granular materials like crushed stone or gravel. In concrete road construction, the sub-base serves to distribute loads and provides additional support to the upper concrete road layers. It also acts as a barrier against moisture, protecting the road construction concrete from potential damage. A properly installed sub-base enhances the overall performance of the cement concrete road.
Base Course
The base course lies directly beneath the concrete slab in concrete road construction. The base course consists of high-quality aggregates that create a stable platform for the pavement. It effectively transmits the loads from traffic to the underlying concrete road. Additionally, the base course plays a crucial role in enhancing the durability and performance of the pavement structure layers. A well-constructed base course is vital for the structural integrity of the cement concrete road, ensuring longevity and durability.
Concrete Slab (Pavement)
The concrete slab, or pavement, is the topmost layer in concrete road construction. This surface layer is made of road construction concrete and is designed to withstand direct traffic loads. The quality of the concrete for road construction used in this layer determines the road’s durability and service life. Proper curing and jointing of the concrete slab are crucial. These practices prevent cracks. They ensure a smooth, long-lasting cement concrete road surface.
Each of these layers is crucial in concrete road construction. They collectively enhance the pavement’s strength. They also improve its durability and longevity. Moreover, proper design and construction of these concrete road layers are essential to ensuring a high-quality cement concrete road. As a result, the pavement can effectively withstand the demands of heavy traffic. It can also endure varying environmental conditions. This ultimately provides a long-lasting and reliable transportation solution.
Types of Concrete Road Pavements
In concrete road construction, selecting the appropriate pavement type is crucial for durability and performance. There are three main types of concrete roads. These are Jointed Plain Concrete Pavement (JPCP), Jointed Reinforced Concrete Pavement (JRCP), and Continuously Reinforced Concrete Pavement (CRCP). Each type utilizes different concrete road layers and reinforcement methods to meet specific engineering requirements.
Jointed Plain Concrete Pavement (JPCP)
JPCP is the most commonly used type in concrete road construction. It consists of slabs with transverse joints spaced typically between 15 to 20 feet apart. These joints control cracking without the need for steel reinforcement. Dowel bars are often used to transfer loads across joints, enhancing the performance of the cement concrete road. The simplicity of design and construction makes JPCP a cost-effective choice for many road construction concrete projects.
Jointed Plain Concrete Pavement (JPCP)
Jointed Reinforced Concrete Pavement (JRCP)
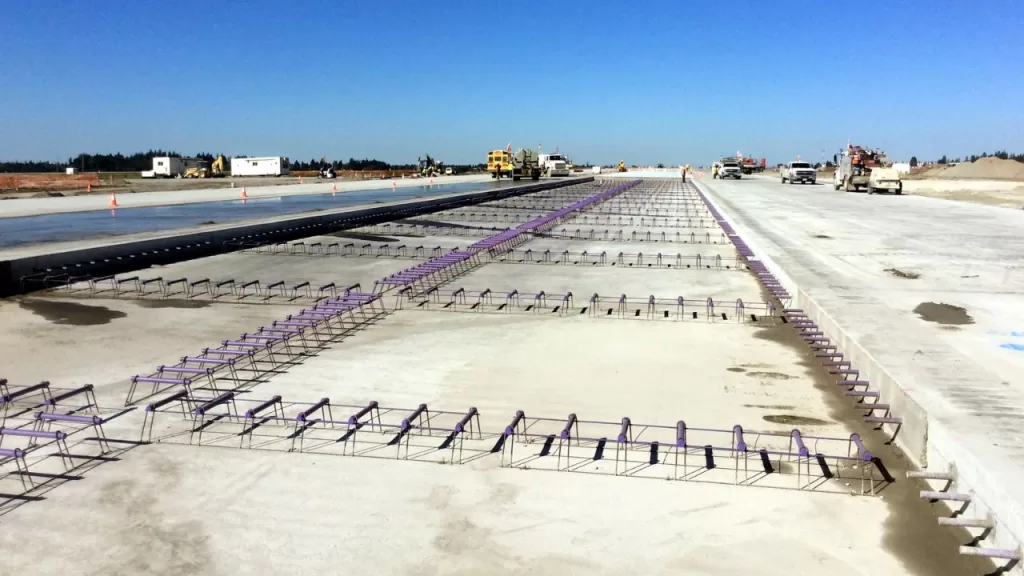
JRCP incorporates steel reinforcement within the concrete slabs and features longer joint spacing, typically ranging from 30 to 40 feet. As a result, the reinforcement effectively helps control cracking between the joints, thereby maintaining the structural integrity of the pavement. Additionally, dowel bars and tie bars are strategically placed at transverse and longitudinal joints, respectively, to ensure efficient load transfer and proper alignment.
Moreover, this design is particularly suitable for areas experiencing heavier traffic loads, as it provides enhanced durability and long-term performance. Consequently, JRCP serves as a reliable cement concrete road solution, offering both strength and stability. Ultimately, its combination of reinforcement and optimized joint spacing makes it an excellent choice for modern road infrastructure.
Jointed Reinforced Concrete Pavement (JRCP)
Contraction Joints
These are intentionally placed joints in the concrete pavement to control where cracks occur. In JRCP, the spacing of transverse joints typically ranges from 25 to 50 feet (7.6 to 15.2 meters). These joints allow the concrete to shrink as it cures, reducing the likelihood of random cracking.
Reinforcing Steel
JRCP incorporates reinforcing steel or steel mesh to hold cracks tightly together. While the longer slab lengths in JRCP make cracking inevitable due to concrete’s natural shrinkage and thermal contraction, the reinforcing steel ensures that cracks remain tight and do not widen significantly. This helps maintain the pavement’s structural integrity and load-bearing capacity.
Dowel Bars
Dowel bars are used at transverse joints to facilitate load transfer between adjacent slabs. These bars allow for vertical movement while ensuring that loads are effectively transferred across the joint, reducing stress concentrations and preventing faulting (unevenness at the joint).
Load Transfer Across Cracks
The reinforcing steel or wire mesh in JRCP not only holds cracks together but also assists in transferring loads across the cracks. This helps distribute traffic loads more evenly, reducing the risk of localized damage and extending the pavement’s service life.
Advantages of JRCP
Crack Control: The combination of joints and reinforcement ensures that cracks are controlled and do not compromise the pavement’s performance.
Durability: The use of reinforcing steel and dowel bars enhances the pavement’s ability to withstand heavy traffic and environmental stresses.
Load Distribution: Effective load transfer mechanisms reduce the risk of joint faulting and slab cracking.
Disadvantages of JRCP
Cost: The inclusion of reinforcing steel and dowel bars increases material costs. Construction costs also rise compared to simpler pavement types like Jointed Plain Concrete Pavement (JPCP).
Maintenance: JRCP is designed to control cracking. However, the presence of reinforcing steel can complicate repairs if the pavement eventually fails.
In summary, JRCP is a robust pavement design. It uses a combination of contraction joints, reinforcing steel, and dowel bars. These elements manage cracking and ensure effective load transfer. This makes it suitable for roads and highways subject to heavy traffic and environmental stresses.
Continuously Reinforced Concrete Pavement (CRCP)
CRCP is the most advanced type in concrete road construction, as it features continuous steel reinforcements throughout the slab. Consequently, this design eliminates transverse joints, making it particularly ideal for high-traffic areas such as highways and airports. Additionally, CRCP uses reinforcement to hold tightly spaced cracks together, thereby creating a smooth and highly durable surface.
Continuously Reinforced Concrete Pavement (CRCP)
Moreover, CRCP concrete road construction is especially suitable for high-traffic areas because it offers superior performance while requiring minimal maintenance. As a result, this construction method ensures long-lasting pavement that can withstand heavy loads and harsh environmental conditions. Ultimately, its combination of strength, durability, and reduced upkeep makes CRCP a preferred choice for modern infrastructure projects.
CRCP offers exceptional durability and requires minimal maintenance for cement concrete roads. The steel mesh prevents cracks and distributes traffic loads evenly across concrete road layers, ensuring a smooth and long-lasting surface. CRCP uses high-strength road construction concrete to withstand heavy loads and extreme weather conditions. Its seamless design reduces maintenance costs and enhances the performance of concrete road construction, making it a top choice for critical infrastructure projects.
Choosing the appropriate type of concrete pavement depends on factors such as traffic load, environmental conditions, and budget considerations. Each type offers distinct advantages in concrete road construction, contributing to the development of durable and efficient transportation infrastructure.
Advantages of Concrete Roads
Concrete roads offer several advantages over other paving materials:
Durability and Longevity: Concrete roads are known for their exceptional durability, as they can withstand heavy traffic loads and adverse weather conditions. As a result, they offer a longer service life compared to other road construction materials. Furthermore, this durability ensures lower maintenance costs over time, making concrete roads a cost-effective option for long-term use.
Low Maintenance Requirements: Once constructed, concrete roads demand relatively low maintenance. Their resistance to wear and tear reduces the frequency of repairs, making them a cost-effective choice in the long run.
Resistance to Weathering and Heavy Loads: Concrete’s high stiffness and negligible wear and tear make it resistant to environmental factors such as water, extreme temperatures, and UV radiation. This resistance helps maintain the structural integrity of the road over time.
Improved Fuel Efficiency for Vehicles: Concrete roads are more economical to drive on in terms of fuel consumption, as they reflect light better and provide a smoother surface, contributing to better fuel efficiency for vehicles.
Methods of construction of cement concrete roads
Cement concrete roads are constructed through three primary methods, each designed to meet specific project requirements and conditions.
Alternate Bay Method
In this approach, the contractor divides the road into alternate bays, typically ranging from 6 to 8 meters in length. They construct the road in these alternate sections, ensuring each bay cures properly before constructing the adjacent bays. This method allows for effective curing and prevents premature construction, ultimately enhancing the quality of the road. This method helps in managing shrinkage and thermal stresses effectively, reducing the likelihood of cracks. However, it requires more time to complete since only alternate sections are worked on at a time. Additionally, during adverse weather conditions, water may collect in the unconstructed bays, potentially causing delays.
Continuous Bay Method
Also known as the strip method, this technique involves constructing the entire width of the road continuously without any breaks from one end to the other. Transverse joints, known as dummy joints, are provided at regular intervals (typically around 5 meters) to control cracking by creating planes of weakness. This method ensures a uniform surface and is suitable for projects requiring rapid completion. However, it necessitates careful planning to manage the setting time of concrete and to ensure proper curing across the entire stretch.
Expansion Joint and Strip Method
In this method, the engineers incorporate expansion joints at regular intervals to accommodate temperature-induced expansions and contractions. This prevents uncontrolled cracking and ensures the road remains structurally stable over time. By strategically placing these joints, they allow for controlled movement while maintaining the integrity of the pavement.These joints allow the concrete slabs to expand and contract with temperature variations without causing damage to the pavement. This technique is essential for long stretches of pavement, especially in regions experiencing significant temperature fluctuations. Proper placement and construction of these joints are crucial to maintain the structural integrity and longevity of the road.
Each method offers distinct advantages, and the choice depends on factors such as project scale, environmental conditions, and desired durability.
Steps involved in road construction
Constructing a cement concrete road involves several critical steps to ensure durability and longevity. Each phase plays a vital role in achieving a high-quality pavement.
Preparation of Subgrade
The subgrade is the native soil layer that serves as the foundation for the road. Preparation involves clearing the site of vegetation, debris, and any unsuitable materials. The soil is then leveled and compacted to achieve the desired density and strength. Proper subgrade preparation ensures uniform support for the pavement, preventing future settlement and distress. In cases where the subgrade soil is weak, stabilization techniques or additional layers may be applied to enhance its load-bearing capacity.
Placement of Formwork
Formwork refers to temporary molds used to shape and support the concrete until it hardens. In road construction, workers set sturdy forms along the edges of the proposed pavement to define its boundaries and maintain the desired thickness. They must accurately align and securely anchor these forms to withstand the pressure of the poured concrete. Consequently, proper formwork ensures consistent pavement dimensions and well-formed edges, contributing to the overall structural integrity.
Mixing and Pouring of Concrete
Workers prepare concrete by mixing cement, aggregates (such as sand and gravel), water, and any necessary admixtures in specified proportions. They perform this mixing either on-site or at a batching plant. Afterward, they transport the mixed concrete to the site and pour it into the prepared formwork. It’s essential to pour the concrete promptly to prevent premature setting. Consistent mixing and timely pouring ensure a uniform composition, which is crucial for the pavement’s strength and durability
Compaction and Finishing
After pouring the concrete, workers must compact it to eliminate air voids and achieve the desired density. They typically use vibrators to ensure the concrete settles properly around any reinforcement and into all corners of the formwork. Following compaction, they level and smooth the surface using tools like screeds and trowels. Proper compaction is crucial, as it enhances the strength and durability of the concrete by removing entrapped air and consolidating the mixture. Finishing may also involve creating surface textures to enhance skid resistance. Proper compaction and finishing are vital for the pavement’s structural performance and surface quality.
Curing Process
Curing involves maintaining adequate moisture and temperature conditions to allow the concrete to achieve its intended strength. This process typically lasts for several days and can be accomplished by methods such as covering the surface with wet burlap, applying curing compounds, or using plastic sheeting. Proper curing prevents the concrete from drying too quickly, which can lead to surface cracking and reduced durability. It’s a critical step to ensure the longevity of the pavement.
Joint Cutting and Sealing
Once the concrete has gained sufficient strength, joints are cut into the pavement to control cracking caused by temperature changes and shrinkage. These joints are typically spaced at regular intervals and can be of various types, including contraction, expansion, and construction joints. After cutting, workers thoroughly clean the joints and carefully apply appropriate sealants. This process effectively prevents the infiltration of water and debris, which could otherwise compromise the pavement’s integrity. Moreover, proper joint cutting and sealing play a crucial role in maintaining the road’s overall performance while significantly extending its service life.
Furthermore, each of these steps is essential for constructing a durable and long-lasting cement concrete road. By paying close attention to every phase, from preparation to finishing, workers ensure that the pavement can withstand heavy traffic loads and varying environmental conditions throughout its intended lifespan. Consequently, a well-executed construction process leads to stronger, more resilient roads that require minimal maintenance over time.
Disadvantages of concrete road construction
Concrete road construction offers durability and strength, but it also presents several challenges:
High Initial Construction Cost: Building concrete roads requires a significant upfront investment. This is due to the cost of materials and skilled labor.
Extended Construction Time: The curing process of concrete is time-consuming, leading to longer project durations compared to asphalt roads.
Difficulty in Maintenance: Repairing damaged concrete roads can be challenging. Often, it requires replacing entire slabs rather than simple patching.
Lower Comfort and Noise Issues: Concrete’s rigidity can result in a noisier and less comfortable driving experience due to its poor shock absorption and higher noise levels.
Susceptibility to Cracking: Concrete roads are prone to cracking under heavy loads and temperature variations, which can compromise their structural integrity over time.
These factors should be carefully considered when planning and implementing concrete road projects.
Maintenance Practices for Concrete Roads
Concrete road resurfacing and rehabilitation involve various methods to restore pavement functionality and extend service life:
Joint and Crack Sealing: Involves cleaning and filling existing joints and cracks with sealant to prevent water infiltration and debris accumulation, thereby reducing further deterioration.
Slab Stabilization: Addresses voids beneath concrete slabs by injecting grout to restore support and prevent faulting or cracking.
Diamond Grinding: Removes surface irregularities and restores smoothness by grinding the concrete surface, improving ride quality and skid resistance.
Partial-Depth Repair: Targets surface-level distress by removing and replacing the top portion of the slab, addressing issues like spalling.
Full-Depth Repair: Involves removing and replacing entire concrete slabs or sections to address severe damage extending through the slab.
Load Transfer Restoration: Enhances load distribution across joints by installing dowel bars, improving structural capacity and extending pavement life.
Concrete Overlays: Applies a new concrete layer over existing pavement to increase structural capacity and address surface deficiencies.
Selecting the appropriate method depends on the pavement’s condition, distress types, and project objectives.
Innovations and Future Trends in Concrete Road Construction
Smart concrete and self-healing materials represent significant advancements in construction technology. Key points include:
Self-Sensing Capabilities: Smart concrete can monitor its own structural health. It does so by embedding sensors or conductive materials. This allows it to detect stress or damage in real-time.
Self-Healing Mechanisms: Incorporating materials like superabsorbent polymers or specific bacteria enables the concrete to autonomously repair cracks, enhancing durability and reducing maintenance needs.
Environmental Benefits: Extending the lifespan of structures and reducing the need for repairs contribute to sustainability in construction.
Enhanced Durability: Self-healing properties allow the concrete to recover from internal damage without external intervention, limiting reinforcement corrosion and concrete deterioration.
Innovative Additives: The use of carbon nanotubes, mineral admixtures, and shape memory alloys improves the unique properties of smart concrete.
These innovations aim to create more resilient, sustainable, and low-maintenance infrastructure.
Key Takeaways
Concrete road construction offers unparalleled durability and longevity, often lasting 20-40 years, which is two to four times longer than asphalt roads.
This longevity translates to lower maintenance costs over time, making it a cost-effective choice for modern infrastructure. The typical layered design—comprising subgrade, sub-base, base, and concrete slab—ensures exceptional strength and stability. Although the initial investment is higher compared to asphalt, the long-term savings and environmental benefits make concrete road construction a wise investment. Innovations such as self-healing concrete, which can repair its own cracks, further enhance performance and extend service life.
Proper curing, jointing, and high-quality materials are critical to success. Despite challenges like cracking and temperature sensitivity, concrete road construction remains a reliable solution for highways, urban roads, and industrial zones, ensuring safe and sustainable travel for decades.
Conclusion
Concrete road construction is a cornerstone of durable and sustainable infrastructure. Its ability to withstand heavy traffic, harsh weather, and long-term wear makes it ideal for modern roadways. By optimizing concrete road layers and using high-quality materials, engineers can create pavements that last 30–40 years with minimal maintenance. While challenges like cost and cracking exist, advancements in technology and construction techniques continue to improve its efficiency and performance. Embracing concrete road construction ensures safer, smoother, and more eco-friendly roads, paving the way for resilient and future-ready transportation networks.
Slipform shuttering is a continuous construction method. In this method, concrete is poured into a continuously moving formwork. This allows for the seamless creation of vertical structures. This technique, known as slipforming, enables the efficient construction of tall edifices such as silos, chimneys, and core walls in high-rise buildings. By employing slipform formwork, builders can achieve monolithic structures without horizontal joints. This method enhances the overall strength and durability of the construction.
The slipform formwork construction process involves the gradual and steady upward movement of the formwork system. This movement is synchronized with the setting rate of the concrete. This ensures that as the formwork ascends, the concrete below has gained sufficient strength to support itself. The continuous nature of slipform shuttering not only accelerates the construction timeline but also reduces labor costs and minimizes the need for scaffolding, making it a preferred choice for large-scale vertical constructions.
The blog will explore the definition and principles of Slipform shuttering, its key components, and the process of slipforming. We will highlight its advantages, common applications, and critical considerations for effective use. Additionally, we will discuss how Slipform formwork construction enhances efficiency and provide insights into best practices for successful implementation.
Slipform shuttering is an advanced construction technique. It enables the continuous pouring of concrete for vertical structures like silos, chimneys, and high-rise cores. The method employs slipform formwork construction, where the formwork system moves steadily upward, synchronized with the concrete’s setting time. This ensures seamless, monolithic structures without horizontal joints.
Significance and Development
The development of slipforming revolutionized construction by enhancing efficiency and reducing project timelines. This method eliminates the need for scaffolding, minimizes labor costs, and ensures structural integrity. Slipform shuttering has become integral in modern construction. It is especially useful for projects requiring tall, uniform structures. This is due to its ability to streamline processes while maintaining high-quality results.
Slipform formwork construction
The slipform formwork construction method basically rely on the following factors
Slipform formwork construction
Continuous Pouring and Synchronized Upward Movement
In slipform shuttering, concrete is poured continuously into a moving formwork system, which climbs steadily as the concrete sets. This synchronized upward movement ensures a seamless structure, eliminating horizontal joints and enhancing strength.
Importance of Concrete Setting Time
The climbing speed of the formwork is carefully calibrated to match the concrete’s setting time. If the formwork ascends too quickly, the concrete may deform due to insufficient strength. Conversely, if it moves too slowly, delays and uneven surfaces can occur. Maintaining this balance is crucial for structural integrity and efficiency. Proper synchronization is essential. It ensures that the concrete beneath the formwork gains enough strength to support its weight. It also needs to withstand construction loads during the process.
Historical Development of Slipform formwork construction
Slipforming has a rich history dating back to the early 20th century. The first slipform systems were primarily used for concrete roads and canals. Over the years, significant technological advancements have led to the development of sophisticated slipform systems that can handle complex structures and challenging environments. Some key milestones in the development of slipforming include:
Early 20th Century: The first rudimentary slipform systems were used for road and canal construction.
Mid-20th Century: The introduction of hydraulic systems and improved concrete technology paved the way for more efficient and versatile slipform systems.
Late 20th Century: The development of computer-controlled slipform systems further enhanced precision and accuracy.
21st Century: Continued advancements in automation, robotics, and material science are leading to even more sophisticated and sustainable slipform systems.
Key components of slipform system
In slipform shuttering, several key components work together to facilitate continuous concrete construction:
Formwork Panels: These vertical molds shape the concrete as it’s poured, ensuring the desired dimensions and surface finish. As the formwork ascends, the panels move upward at a controlled rate, allowing the structure to rise seamlessly.
Jacking Systems: Hydraulic or pneumatic jacks lift the formwork incrementally. They support the formwork, platforms, crew, and withstand the hydrostatic pressure of the fresh concrete. The placement of jacks depends on vertical forces and lateral pressures, ensuring stability during the slipforming process.
Working Platforms: These platforms provide safe and accessible areas for workers to perform tasks such as pouring concrete, monitoring alignment, and managing reinforcement. They move in tandem with the formwork, maintaining consistent working conditions.
Support Structures: Elements like yokes and whalers distribute loads from the formwork and jacking systems, maintaining structural integrity. Yokes connect the formwork to the jacks, while whalers reinforce the formwork panels, ensuring even pressure distribution.
Concrete Placement Equipment: Conveying systems like concrete pumps or chutes ensure continuous concrete delivery to the formwork.
Vibration System: Compacts the concrete within the formwork, eliminating air pockets and ensuring a uniform density.
The cohesive interaction of these components enables the efficient construction of vertical structures. These structures are continuous and without joints. This process enhances both speed and structural integrity.
Types of slipform shuttering
Slipform shuttering encompasses several types, each tailored to specific construction needs. The most common types of slipform shuttering types are as follows
Vertical slipform shuttering
Horizontal Slipform shuttering
Tapered slipform
Conical slipform
Egg shaped slipform
Cantilever type
Vertical Slipform
Builders use vertical slipform to construct tall structures, such as silos, chimneys, or towers. They employ a moving formwork system that continuously ascends as they pour concrete. Workers gradually raise the formwork using hydraulic jacks, ensuring a smooth and consistent construction process.This method allows for the creation of vertical concrete structures without the need for scaffolding or traditional formwork systems. As the concrete sets, the formwork slips upwards, maintaining a uniform shape. Vertical slipform is efficient for projects requiring rapid construction, offering enhanced safety and reduced labor costs. It also ensures high-quality finishes and precise dimensions, making it suitable for large-scale industrial and infrastructure projects.
Slipform shuttering /slipforming
Horizontal Slipform shuttering
This technique is utilized in constructing horizontal structures such as road pavements and bridge decks. It allows the formwork to move horizontally. This movement enables continuous concrete placement along the structure’s length. Workers use horizontal slipform to create continuous concrete elements such as pavements, curbs, drainage channels, and safety barriers. This method involves the extrusion of concrete in situ, allowing for uninterrupted casting of long sections.
A specially designed machine has a mold with the required dimensions. It is equipped with vibrators for concrete compaction and moves forward at a controlled rate. The machine powers itself and mounts on wheels or tracks, ensuring stability during operation. As workers pour concrete from the rear of the machine, it becomes self-supporting. The machine follows a prefixed guide wire to achieve the correct line and level. This approach offers advantages such as speed, the ability to produce monolithic structures, and operational economy.
Horizontal slipform formwork construction
Tapered Slipform shuttering
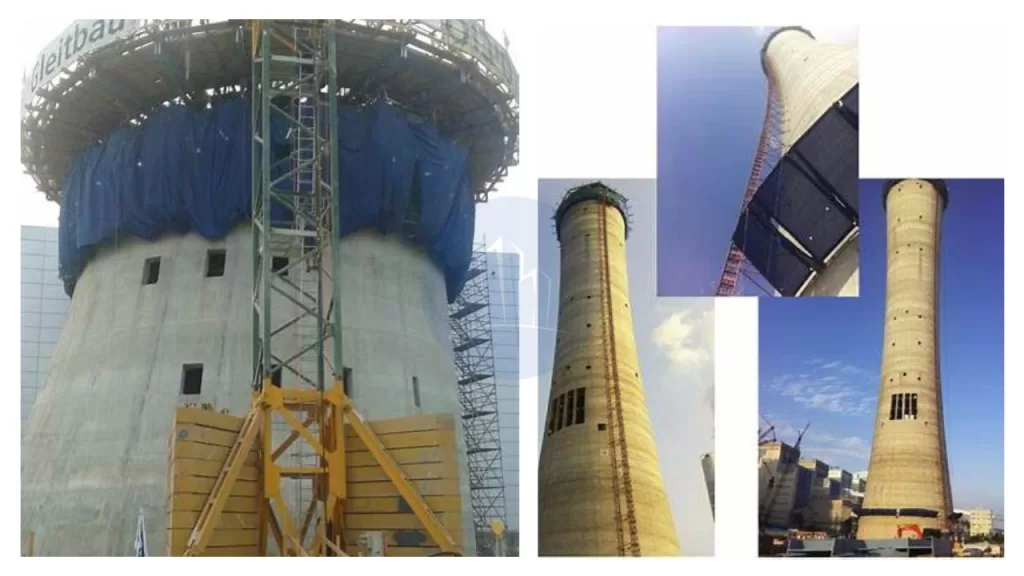
This method is designed for structures with varying cross-sections, such as conical chimneys and cooling towers. It adjusts the formwork dimensions during the slipforming process. This adjustment achieves the desired tapering effect.
Builders use tapered slipform to create structures with a gradually narrowing shape. Examples include chimneys, cooling towers, and tall industrial structures. They employ movable formwork that adjusts in size as it rises, allowing for a tapered design. Similar to vertical slipform, workers pour concrete continuously as the formwork rises, typically using hydraulic jacks or other lifting mechanisms. Engineers design the formwork carefully to accommodate the structure’s changing cross-section, ensuring a precise and smooth taper.This method offers efficiency in construction, as it reduces the need for complex scaffolding and allows for a seamless, uniform finish. Tapered slipform is ideal for projects requiring strong, stable, and visually appealing tapered structures.
Tapered construction
Conical Slipform shuttering
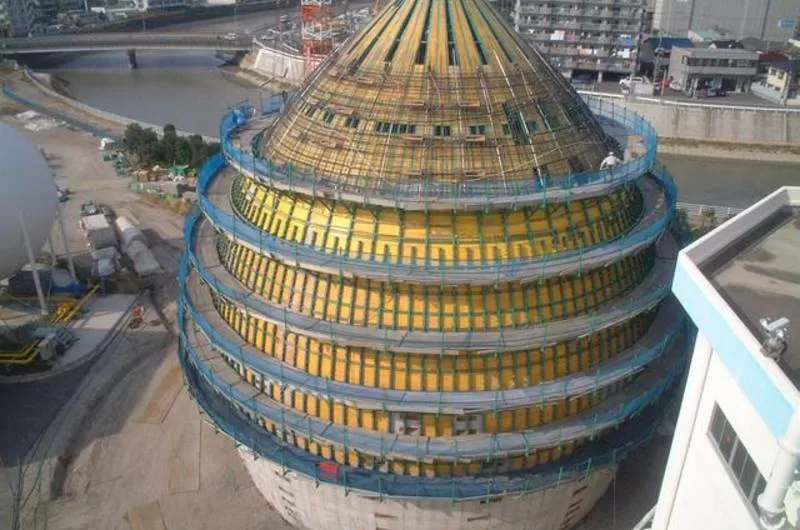
Builders use conical slipform to construct structures with a conical shape, such as cooling towers or silos. They use a moving formwork that continuously ascends as workers pour concrete. Workers shape the formwork to create a gradual narrowing toward the top. This process forms the cone. Workers raise the formwork using hydraulic jacks or other lifting mechanisms as the concrete cures, ensuring a smooth and consistent structure. This approach is highly efficient, as it eliminates the need for scaffolding and enables continuous, uninterrupted pouring. Conical slipform offers precise control over the shape and finish. It is ideal for large-scale, high-strength structures with conical geometry. It also reduces labor costs and construction time.
Egg-shaped Slipform
Engineers use egg-shaped slipform to create structures with an elliptical or egg-like shape. These structures include certain types of silos, industrial towers, and water or wastewater treatment facilities. They utilize specially designed formwork that moves vertically as workers pour concrete continuously. The formwork is shaped to create the unique, rounded profile of the egg shape, gradually narrowing at the top. Workers raise the formwork using hydraulic jacks or other lifting mechanisms, ensuring smooth and consistent construction. Egg-shaped slipform provides benefits like efficient construction with minimal labor, reduced material waste, and precise control over the shape. This technique is particularly suitable for structures requiring unique, aerodynamic designs, offering both functional and aesthetic advantages.
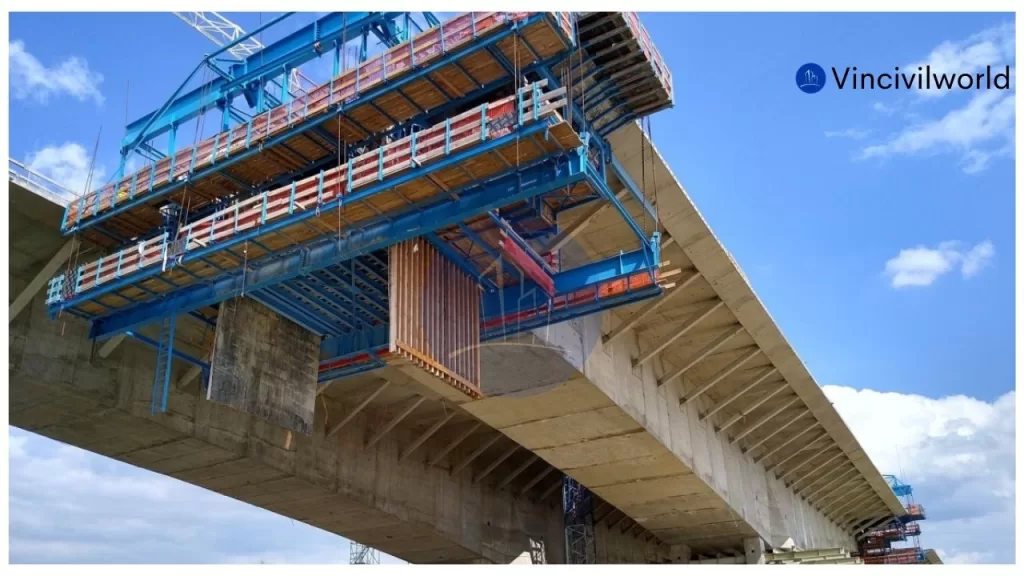
This method enables builders to construct structures that extend horizontally beyond their supports. These structures include certain bridge segments. It also allows them to build overhanging elements without the need for additional support scaffolding.
In cantilever slipform, construction teams use a method to build structures with an overhanging or projecting shape, such as bridges, dams, and tall towers. They gradually move the formwork system upwards while pouring concrete continuously. The structure itself supports the formwork, which extends outward as it rises, creating a cantilever effect. This technique is ideal for projects where workers have limited access to both sides of the structure or when constructing from the top down. Cantilever slipform ensures a precise and smooth finish, with high structural integrity. It reduces the need for scaffolding or external supports, making it an efficient and cost-effective method for large-scale projects that require overhanging sections or complex geometries.
Cantilever slipforming
Engineers design each type of slipform shuttering to meet specific architectural and structural demands, enhancing construction efficiency and quality.
Advantages of Slipform Formwork Construction
Slipform shuttering offers several advantages in construction, making it a preferred method for certain types of structures. Some key benefits include:
Speed and Efficiency: Continuous pouring and raising of formwork allow for faster construction, reducing overall project timelines.
Cost-Effective: It minimizes labor costs by eliminating the need for scaffolding and extensive formwork, resulting in a more economical process.
High Quality: The method provides a smooth, consistent finish with high precision and uniformity in dimensions.
Safety: With less reliance on manual labor and scaffolding, slipform offers enhanced safety for workers during construction.
Minimal Material Wastage: The continuous nature of the process reduces material waste, making it more environmentally friendly.
Reduced Need for Supervision: Automated or semi-automated systems reduce the need for constant supervision, leading to better management of resources.
Versatility: Suitable for a variety of structures, including vertical, tapered, conical, and curved shapes, making it adaptable to different project requirements.
Monolithic Structures: Slipform allows for the construction of monolithic concrete elements, improving the structural integrity of the finished project.
Durability: The seamless construction process ensures strong, durable structures with fewer weak points.
Reduced Labor Dependency: The method relies on machinery, reducing the need for large labor forces and improving construction consistency.
Challenges and disadvantages of Slipform Shuttering
While slipforming offers numerous advantages, it also presents several challenges that need to be carefully managed to ensure successful implementation.
High Initial Setup Costs: The machinery, formwork, and equipment required for slipforming can be costly. This leads to high upfront investments. Such investments may not be feasible for smaller projects.
Complexity in Design: Formwork design must be highly precise and adaptable to varying shapes and sizes. Skilled engineering and planning are necessary to meet specific project requirements.
Skilled Labor: Skilled operators are crucial for proper alignment. They ensure smooth operation. The availability of experienced personnel is essential for effective slipforming.
Concrete Quality Control: Maintaining consistency in concrete mix and quality is vital. Any variation in material quality, mix ratios, or curing methods can negatively impact the structure’s integrity.
Weather Conditions: Unfavorable weather, such as heavy rain or freezing temperatures, can disrupt the slipforming process. It can also affect concrete curing. This necessitates careful planning and adjustments.
Continuous Supervision: Despite automation, slipforming systems still require constant monitoring to address potential malfunctions or adjustments during the process.
Site Access: Limited access to construction sites can make it challenging to transport the necessary machinery and materials.
By addressing these challenges with proper planning, slipforming can be an efficient construction method. Skilled labor and risk management also contribute to its effectiveness.
Applications of Slipform shuttering
Slipform shuttering is a versatile construction technique. It is employed across various industries for its efficiency. It also has the ability to create continuous, seamless structures. Key applications include:
High-Rise Building Cores: Slipform is ideal for constructing the core walls of high-rise buildings. It enables rapid and uniform construction of elevator shafts and stairwells.
Chimneys and Cooling Towers: The method is extensively used for building tall, tapered structures like chimneys and cooling towers. It ensures consistent quality and structural integrity.
Silos and Tanks: Slipform facilitates the construction of large storage silos and tanks. It provides a cost-effective and efficient solution for industries requiring bulk storage.
Bridges: Bridge piers and abutments benefit from slipform construction, allowing for continuous pouring and reducing the need for formwork stripping.
Roadways and Pavements: In highway construction, slipform is used to build continuous pavements, curbs, and barriers. This technique enhances construction speed. It also improves surface uniformity.
Dams: Slipform technology is applied in constructing concrete-faced dams, enabling efficient and continuous pouring of concrete.
Water Towers: The technique is employed to construct the walls of water towers, ensuring uniformity and structural strength.
Offshore Structures: Slipform is utilized in the construction of offshore platforms and structures, providing a robust and continuous concrete shell.
These applications highlight the versatility and efficiency of slipform shuttering in modern construction projects.
Advancements in slipform construction
Advancements in automation and real-time monitoring have significantly enhanced slipform shuttering processes. Integrating automated systems with real-time concrete monitoring allows for precise adjustments during construction, ensuring optimal curing conditions and structural integrity. By embedding sensors within the concrete, teams can monitor parameters like temperature and strength, enabling timely interventions and reducing delays.
Additionally, innovations in materials and formwork technology have improved efficiency and safety. Modern formwork systems are designed to be cost-effective, lightweight, reusable, and easy to assemble and dismantle. These advancements contribute to faster construction times and enhanced structural performance.
Collectively, these developments modernize construction practices by increasing efficiency, reducing costs, and ensuring higher-quality outcomes.
Conclusion
Slipform shuttering has revolutionized modern construction by enabling continuous, efficient, and precise building of complex structures. Its key benefits include faster construction timelines and reduced labor costs. It also minimizes material wastage and improves safety by eliminating the need for scaffolding. The method ensures a smooth, uniform finish. It is highly adaptable to various structural shapes. These include high-rise cores, chimneys, silos, cooling towers, bridges, and dams. It is particularly effective for projects requiring repetitive, large-scale concrete pouring. Slipform shuttering reduces manual labor. It optimizes resource use and modernizes construction practices. These improvements make construction practices more cost-effective, environmentally friendly, and precise. Its efficiency and scalability are crucial for meeting the demands of large infrastructure projects in today’s fast-paced construction industry.